DISCLAIMER: This might not be the most well-written article since I haven't written in a while and I just wanted to get back to writing with a short article about my experience of the day, so sorry about that
I previously used this repository for my shortlinks, but it looks like airtable recently moved away from API Keys to Permanent Access Tokens. So, I thought why not just take out the functionality from this and use it in my personal website itself so that whenever I go to https://kavin.me/[something], I could redirect to the target link if it exists on the airtable base.
For people who don't know the backstory of my website, it's a terminal themed website and was originally made with vanilla JS but it soon got very hard to maintain. So, I moved it to NextJS in the pre-app router days by just copy pasting things and somehow made it work (it's not the best codebase because of this)
To implement the desired shortlink functionality, I wanted to add a catch-all API route on /. This was a bit tricky in Next.js 12, as API routes only existed within the api directory. While it was possible to use getServerSideProps in other locations, it felt like a hack. So, I decided to upgrade to the new app router, hoping it would simplify the process.
I wasn't wrong because it was amazingly easy to upgrade. I followed this guide to just install the latest dependencies. Then, I:
Created the app directory
Created a
app/layout.jsfileCopy pasted the previous
index.jsintoapp/page.jsMarked a few of the files inside the
componentsdirectory to"use client"
And just like that, the upgrade was complete!
Of course, I understand that this process won't be as simple for most projects, especially those with more complexities and pages. The previous data fetching method was also quite different from the new approach using React Server Components. However, the ability to work concurrently with the pages and app directories allows for incremental changes. This means you can gradually adopt the newest features without causing significant disruption to your application.
I loved the experience moving to the App Router and it's something which I prefer using over the pages format.
]]>The release of NextJS 13 brought about a plethora of new and impressive features, with one standout being the updated data fetching and management process. The fetch API replaced the more complicated functions, including getServerSideProps, getStaticProps, and getInitialProps.
Video
If you prefer watching a video, you can check out the Youtube video posted on the same
fetch() API
React recently introduces support for async/await in Server Components. You can now write Server Components using standard JavaScript await syntax by defining your component as an async function and that is what turned out to be a big plus point for NextJS 13.
Server Components
This is all you need to do to fetch data in NextJS now:
import { Post } from "@/lib/types";
import { Inter } from "next/font/google";

const inter = Inter({ subsets: ["latin"] });

const getPosts = async (): Promise<Post[]> => {
  const data = await fetch("https://jsonplaceholder.typicode.com/posts");
  const posts = await data.json();

  return posts;
};

export default async function Posts() {
  const posts = await getPosts();
  console.log(posts);

  return (
    <div className={inter.className}>
      <h1>Posts</h1>
      <ul>
        {posts.map((post) => (
          <li key={post.id}>{post.title}</li>
        ))}
      </ul>
    </div>
  );
}
The data is no more serialised so you can pass any type of data, including Dates, Maps, Sets, etc.
Also, note the fact that you no longer need to do this on the page level, like if you did before using getStaticProps or getServerSideProps. You can do this inside any component
Client Components
For now, if you need to fetch data in a Client Component, NextJS 13 recommends using a third-party library such as SWR or React Query.
React also introduced the use hook that accepts a promise conceptually similar to await. use handles the promise returned by a function in a way that is compatible with components, hooks, and Suspense.
"use client";

import { Post } from "@/lib/types";
import { Inter } from "next/font/google";
import { use } from "react";

const inter = Inter({ subsets: ["latin"] });

const getPosts = async (): Promise<Post[]> => {
  const data = await fetch("https://jsonplaceholder.typicode.com/posts");
  const posts = await data.json();

  return posts;
};

export default function ClientPosts() {
  const posts = use(getPosts());

  return (
    <div className={inter.className}>
      <h1>Posts</h1>
      <ul>
        {posts.map((post) => (
          <li key={post.id}>{post.title}</li>
        ))}
      </ul>
    </div>
  );
}
Static Data Fetching
fetch by default caches the data. So, even if the data from the API changes, when you refresh the page, the site doesn't update the data. This works great for sites which have static data which seldom changes. The example above demonstrates how to do this because it is the same as doing
fetch("https://jsonplaceholder.typicode.com/posts", {
  cache: "force-cache",
});
Dynamic Data Fetching
You can tell the fetch API to never cache the data by changing force-cache to no-cache or no-store(both signify the same in NextJS).
fetch("https://jsonplaceholder.typicode.com/posts", {
  cache: "no-cache"
});
Dynamic Params Data Fetching
Say, you link all the posts to another page /posts/[postId] and fetch the data here once you're in there. You'd do something like this:
// app/posts/[postId]/page.tsx

import { Post } from "@/lib/types";
import { Inter } from "next/font/google";

const inter = Inter({ subsets: ["latin"] });

// params: {
//   postId: aksdjlkjasd
// }

const getPost = async (id: string): Promise<Post> => {
  const data = await fetch(`https://jsonplaceholder.typicode.com/posts/${id}`);
  const post = await data.json();

  return post;
};

export default async function PostPage({
  params: { postId },
}: {
  params: {
    postId: string;
  };
}) {
  const post = await getPost(postId);
  return (
    <div className={inter.className}>
      <h1>{post.title}</h1>
      <p>Post ID: {postId}</p>
      <p>{post.body}</p>
    </div>
  );
}
Now, this works great, but when you try to build it, look at the response:

It says that /posts/[postId] is server-side rendered at runtime even though /posts is static. This is because NextJS doesn't know what all routes(postIds) exist. So, to enhance this further, you can add this function to the /posts/[postId]/page.tsx page
export const generateStaticParams = async () => {
  const data = await fetch("https://jsonplaceholder.typicode.com/posts");
  const posts = await data.json();

  return posts.map((post: Post) => ({
    params: {
      postId: post.id.toString(),
    },
  }));
};
This now tells NextJS, that all these postIds exist and we want it to statically generate them at build time if possible. Now, if we try rebuilding the app, this happens

Now, see that /posts/[postId] is static HTML + JSON! And, that would further optimise your app really well.
Revalidating Data
Say, your app is not fully dynamic but still sometimes the data does change, you can add this to your /posts/[postId]/page.tsx page
export const revalidate = 3600; // in seconds
This will tell NextJS to revalidate the data every hour. And the interesting this is, you can do this on the page level as well as the layout level.
You can also do this per fetch by tweaking the fetch call as follows
fetch("https://jsonplaceholder.typicode.com/posts", {
  next: {
    revalidate: 3600,
  },
});
And that is it!
Conclusion
It takes a while to wrap your head around all this, but this is what NextJS does so well and one of the biggest plus points about it, and once you get a hold of it, it's really powerful.
You can find all the code over here
Do give the video a look if you like that more, and stay tuned for more such posts!
Reference Links
]]>Looking for a safe and reliable way to authenticate users? Consider implementing magic links. They offer a secure alternative to traditional passwords and can help mitigate the risk of password leaks and forgotten passwords.
Magic Link authentication, also known as Email-only authentication, is a trending method of authentication that has recently gained significant popularity.
How does it work?
The following steps are involved:
The user enters their email.
If the user doesn't already exist in the database, an account is created.
A unique verification token is generated.
The user is sent an email with a link which contains the verification token encoded.
When the user visits the link, the verification token is cross-checked with the one stored on the database, and the user is authenticated if the token is valid.
Why use Email-only authentication?
Doesn't it seem less secure without passwords? However, if you have access to someone's email, you can access their account. Most websites offer a "forgot password" function that allows you to reset a password with access to an email. So, if a hacker gains access to the email, they can still get into the account.
So, it does appear that email-only authentication (or passwordless authentication) could be more secure as it eliminates the risk of password hacking.
How to add Email-only authentication to a NextJS project?
You can easily accomplish this by utilizing Next-Auth, which is now referred to as Auth.js. Check out my video tutorial on how to implement it for further information!
]]>Neovim is a powerful text editor that can be customized with plugins to enhance its functionality. In this article, we will explore the top 10 essential Neovim plugins. These plugins can help improve your Neovim experience by adding features such as file searching, syntax highlighting, language server setup, and more. So if you want to take your Neovim game to the next level, keep reading!
packer.nvim
packer.nvim is not really a plugin, but it's a plugin manager. I used to use vim-plug before moving to lua, and now, I am very satisfied with packer. Unlike vim-plug which is written in vim-script, packer.nvim is written in lua. It is one of the most powerful and feature-rich plugin managers written in Lua.
telescope.nvim

telescope.nvim is a highly extendable fuzzy finder over lists. Built on the latest awesome features from neovim core. Telescope is centred around modularity, allowing for easy customization. It has a lot of really good features, like:
Finding Files
Fuzzy Search through buffers
Searching through files and so much more.
nvim-treesitter
nvim-treesitter provides a simple and easy way to use the interface for tree-sitter in Neovim and to provide some basic functionality such as highlighting based on it. It builds an Abstract Syntax Tree and helps integrate lots of features.
Nvim-treesitter is based on three interlocking features: language parsers, queries, and modules, where modules provide features – e.g., highlighting – based on queries for syntax objects extracted from a given buffer by language parsers
nvim-lspconfig
Now, this is one of the most important plugins on the list. Neovim v5 brought in one of the biggest updates to neovim till now and one of the most important features was native LSP. Now, you can setup language servers in neovim without having to use plugins like coc.nvim. Now, one of the downsides of using native LSP is that there's quite a lot of setup you have to do. If you don't want to do that I'd highly recommend coc.nvim since it gives you a boilerplate and brings many vscode like features to neovim.
If that's not a problem for you, then nvim-lspconfig is a very good plugin. You can combine it with the following plugins to make it even better
nvim-cmp
nvim-cmp is a completion engine for neovim written in lua.

null-ls
Unlike the VS Code and coc.nvim ecosystems, Neovim doesn't provide a way for non-LSP sources to hook into its LSP client. null-ls is an attempt to bridge that gap and simplify the process of creating, sharing, and setting up LSP sources using pure Lua.
With Neovim LSP, it gets a little harder to setup things like Prettier and ESLint and that's where null-ls comes in. It provides a very simple way to plug in non-LSP sources.

LuaSnip
luasnip is a vscode like snippet feature. It works hand in hand with nvim-cmp and you can customize your snippets.
nvim-tree
nvim-tree is a file explorer for neovim written in lua.

Bufferline
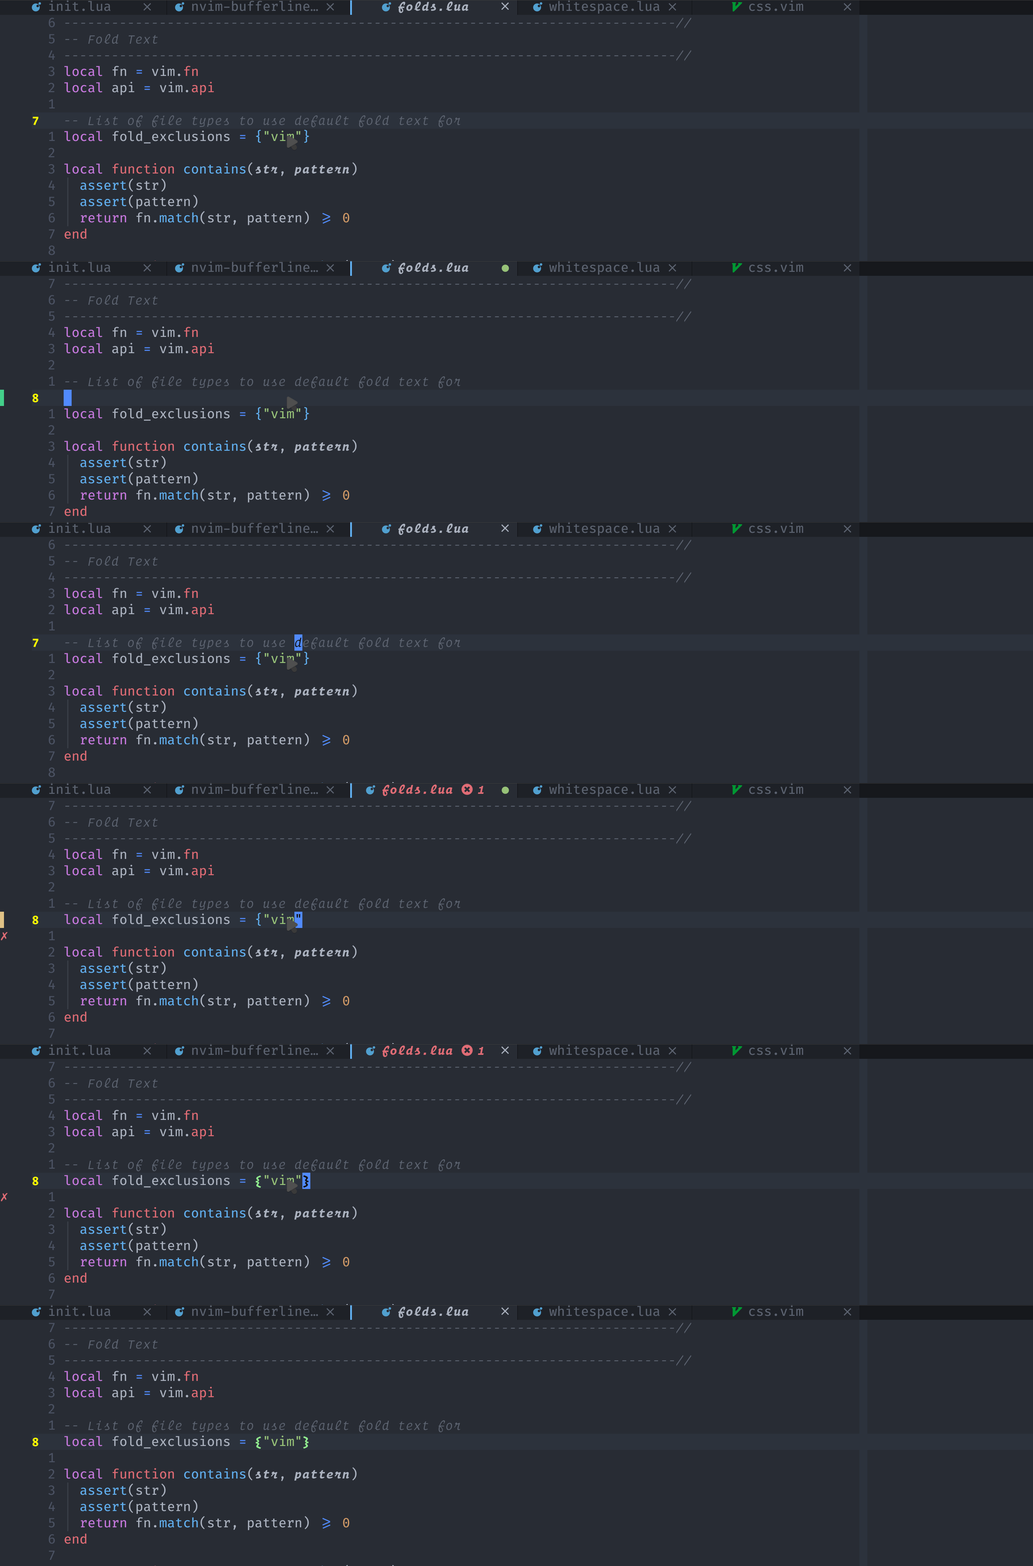
One of the many bufferline solutions for neovim out there. It's completely written in Rust and if you want to emulate a Doom emacs style bufferline, this is your way to go. It has multiple features like Tab Pages, LSP Indicators, Pinning, GUI for closing and reordering, and so much more!
Lualine
A blazing fast and easy to configure neovim statusline plugin written in pure lua.

There are a lot of themes you can choose from and customise the look of your statusline and you can reorder items, add plugins and a lot more.
In conclusion, Neovim is a highly customizable text editor that can be enhanced with plugins to improve your coding experience. The plugins listed in this article are just a few examples of the many options available. By adding these essential plugins to your Neovim setup, you can streamline your workflow, increase productivity, and take your coding game to the next level. So why not give them a try and see how they can transform your Neovim experience?
Additional Resources
]]>
Well, the people who've read my previous articles know how much I love type-safety, hence someone who loves the t3 stack. Here's Typewind, a typesafe and zero-runtime version of Tailwind CSS, a utility-first CSS framework that can be composed to build any design, directly in your markup.
What does Typewind do?
Typewind is a powerful utility-first CSS framework that combines the magic of Tailwind with the safety of Typescript. It provides a typesafe environment over Tailwind CSS, enabling developers to work with autocomplete, prevent typos, and catch errors at compile time. With zero runtime overhead, Typewind generates custom type definitions based on your app's tailwind.config.js file, making it a top choice for developers who value type-safety. Here's an example of how Typewind works:
https://twitter.com/Mokshit06/status/1617880004846825474
import { tw } from "typewind";

export default function Button() {
    return (
        <button className={tw.}></button>
    )
}
The moment you type tw., you will get autocomplete like so, based on your own custom tailwind.config.js
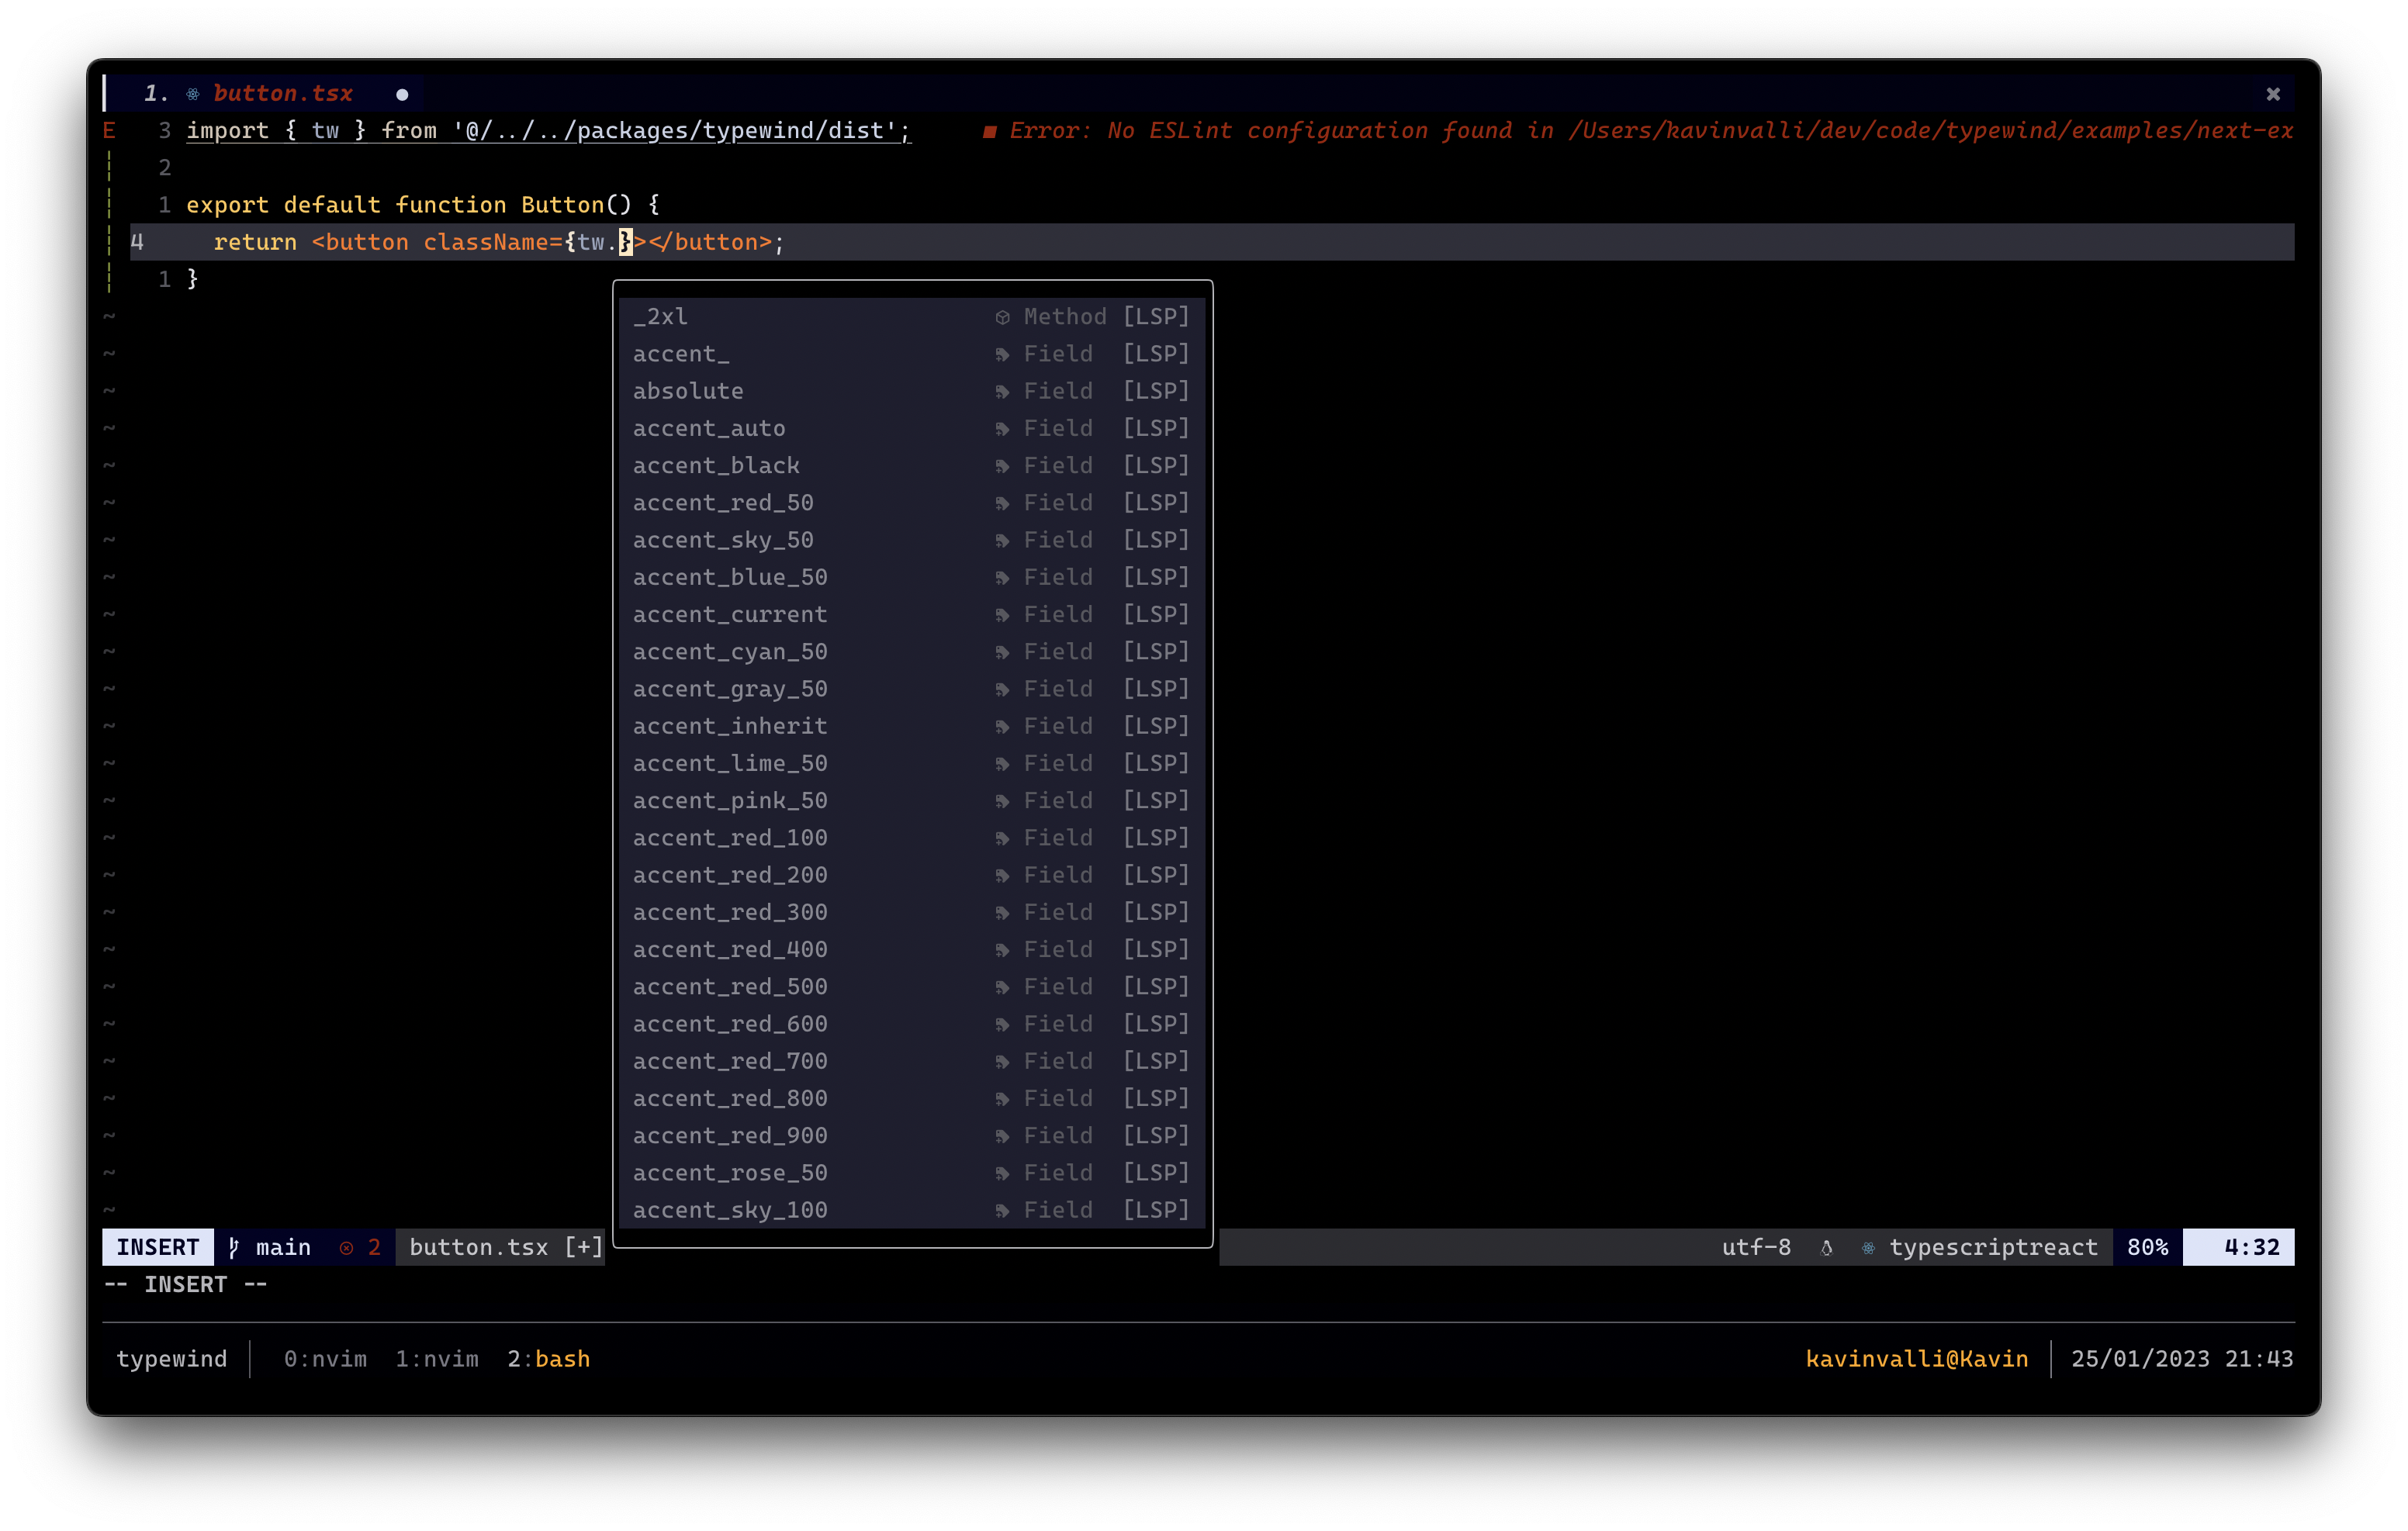
And, the moment you make a typo:

And it has absolutely zero overhead runtime! Will talk a little more about the features below, but before that, let me talk about how this started!
Origin
The whole thing started with one tweet.
https://twitter.com/stolinski/status/1613699772111638530

Then Colin McDonnell tweeted on what tailwind with type safety and proper autocompletion would look like.
https://twitter.com/colinhacks/status/1615154756204523521

Mokshit, the creator of Typewind, sent me this tweet and both of us, at first look were having confused thoughts but the more and more we saw it, the more and more we started getting convinced of it. Looks like Theo had similar thoughts.
We discussed it for some time and he decided to start working on it. Overnight, he was done with the transpilation part and I was just hovering along with him, looking at the things which were being done understanding only 70% of the things happening.
I started working on the docs and working a little on the tailwind transformers started getting me interested in build tools (probably something I want to give a try in the future).
Fast forward to just a few days later, he was done building the package and I was done setting up the docs and the examples and decided to release. However, we had one issue. We couldn't think of a logo. After playing around for hours with different combinations, I thought of a wavy line under wind but said it looked bad and discarded it. Turns out only the font and the structure of the wavy line was bad cause the final version turned out way better.

He released it overnight and it got a lot more response than we had expected! So here's about Typewind, and how you can get started with it:
Features
Zero runtime
Type-safety and auto-completion
CSS docs based on your config
Apply variants to multiple styles at once
No need for additional editor extensions
Catches errors at compile time
Typewind, generated type definitions on Tailwind classes custom to your app's tailwind.config.js after running the npx typewind generate command.
Typewind has currently been tested to work with Vite (React) and Next.JS and you can find them in the examples.
Getting Started
The installation page in the docs is a very good place to start with Typewind.
Installation
Install via your favourite package manager (npm/yarn/pnpm).
npm install typewind
Generate Type Definitions
npx typewind generate
This will go through your tailwind.config.js and generate types and css docs custom to your app.
Setup with Next.JS
After setting up Tailwind, make the following changes:
- Add a
.babelrcwith the following contents:
{
  "presets": ["next/babel"],
  "plugins": ["typewind/babel"]
}
- Add transformer to your Tailwind Config
const { typewindTransforms } = require('typewind/transform');

/** @type {import('tailwindcss').Config} \*/
module.exports = {
  content: {
    files: ['./src/**/*.{js,jsx,ts,tsx}'],
    transform: typewindTransforms,
  },
};
And you're good to go! Just run npm run dev next time and you should be able to use Typewind inside your app.
Setup with Vite
Make the same change in the tailwind.config.js file as mentioned in the NextJS example, but the babel change has to be done in the vite.config.js like so:
import { defineConfig } from 'vite';
import react from '@vitejs/plugin-react';

// https://vitejs.dev/config/
export default defineConfig({
  plugins: [react({ babel: { plugins: ['typewind/babel'] } })],
});
And, you'll be done setting up Typewind in your Vite application.
Usage
Here's just a trailer to show you what it's capable of:
import { tw } from 'typewind';

export default function App() {
  return (
    <div
      className={tw.flex.items_center.justify_center.h_screen.bg_white.text_["#333"].dark(tw.bg_black.text_white)}>
      <h1 className={tw.text_xl.sm(tw.text_3xl).md(tw.text_4xl).font_bold}>
        Hello World
      </h1>
    </div>
  );
}
Applying Normal Tailwind Classes
All the utility tailwind classes are available in the tw proxy, and can be chained one after another. They can be found in the Tailwind Docs. The - in the tailwind classes are replaced with _ (for eg. bg-red-500 can be accessed as tw.bg_red_500)
import { tw } from 'typewind';

export default function Button() {
  return (
    <button className={tw.bg_blue_500.text_white.rounded.py_3.px_4}>
      Click Me
    </button>
  );
}
Applying Tailwind Modifiers
Pseudo-classes like :hover and :focus, Pseudo-elements like ::before, ::after, ::placeholder and ::selection, Media and feature queries and Attribute Selectors are available as a function (for eg. :hover can be accessed as tw.hover(tw.some_class) )
Typewind also have a dark function which is used to apply styles when the user is in dark mode.
import { tw } from 'typewind';

export default function Button() {
  return (
    <button
      className={tw.bg_blue_500
        .hover(tw.bg_blue_600)
        .text_white.rounded.py_3.px_4.md(tw.py_4.px_5)
        .dark(tw.bg_sky_900.hover(tw.bg_sky_800))}
    >
      Click Me
    </button>
  );
}
Note that Typewind does not have
tw.2xl()but hastw._2xl()because object keys cannot start with a number 🫠
Applying Tailwind Arbitrary Values
Tailwind JIT Mode introduced the feature of arbitrary values. You could now apply classes like bg-[#2977f5] and specify arbitrary values for classes by yourself. This can be done with Typewind as well!
import { tw } from 'typewind';

export default function App() {
  return (
    <button className={tw.text_['20px'].py_3.px_4.bg_blue_500}>Click Me</button>
  );
}
Why Typewind over Tailwind Intellisense?
This has been answered by Mokshit in this tweet:
https://twitter.com/Mokshit06/status/1617506874773082112?s=20&t=erkUIb_bUjty0KfXzGlrDw

Outro
Hope this gets you interested in getting started with Typewind, and gets you to use it in your next project!
]]>For those who don't know me, I am Kavin, and I am a high schooler from Delhi, India. I have been programming for the past 2-3 years and have been in love with Web Development ever since. The past year has been a great one for me as a developer, and here's that in a nutshell. View more about me, here.
January 2022
In January 2022, my school's technology club, Exun Clan had our annual symposium Exun 2021-22 from January 14-21. During that, we decided to use Laravel for our cryptic hunt, Sudocrypt v11.0. I had no experience with Laravel or even PHP, for that matter, but one of my seniors had already used Laravel on a cryptic hunt, Cryptocracy before, and since the codebase was very similar to AdonisJS, which I had some experience with, in around a couple weeks, I went through the codebase, and plucked out the parts which we to be reused and came up with a completely unstyled app which worked.
With the help of a few designers, we styled the website, created an admin portal, etc and came up with a platform which handled 1500+ participants from 10+ countries, 50k+ attempts, and 4.5k+ levels solved.
I also had hands-on experience in holding an event/hackathon for the first time.
After the event, I had to write a script which went through the participant's data and generated certificates for all the participants and emailed them. In the process, I got some experience with Pillow.
February 2022
There wasn't much programming-wise, I did in February, but I tinkered around a lot with Neovim and my developer setup. I also wrote a blog post on it here.
March 2022
March was a time when I got into technical writing a lot and consistently posted articles for a while. I posted articles on ExpressJS, played around with Hashnode's Custom CSS, Github Pages, React's useState and useEffect hooks, and also on Tailwind's Dark Mode.
I also gave RemixJS and watched a lot of Kent C. Dodds' streams and read his blog posts and got interested in Remix and its fundamentals. I also wrote a blog post on that here.
April 2022
I had my exams March end till April and given that I didn't study the whole past year, this was a time I had to get off my computer ;)
May 2022
I had to learn Java, during this time to write my AP CS A, well which turned out not very tough, but still not something I'd write willingly.
June 2022
In June 2022, we at Exun Clan, conducted our annual inductions for the club in our school and conducted various workshops throughout the month and then tasks for the participant to prove themselves for getting inducted. I conducted a session on ReactJS, going through the basics of React and creating a couple of basic apps on the way.
I also wrote a platform, practice.sudocrypt.com to help the students of my school get started with Cryptic Hunts, and along with the Cryptic hunt department of Exun Clan, we compiled an archive of previous year levels and uploaded them onto the site.
July 2022
In July, I participated in a high school creative event (combined Designathon, Hackathon and Pitching), where we created an app which offered a way to transfer your progress across multiple metaverses by retaining common assets, thereby paving a way to connect the different metaverses.
August 2022
In early August, I was appointed the President of my school's technology club. During this time, my school also had 50-year celebrations. For this, I worked on a QR Code based entry system where-in each alumnus and student who registered for the event received a QR Code from our side which when scanned upon entry by a custom app would mark them as attended in our database. We were also able to track the number of people who attended with them. The app was used to scan over 2000+ QR codes over two days.
This project allowed me to finally use Flutter in an actual app, and the fact that I had to use PHP, Typescript, Python and Dart all in one project makes it a very memorable one.
September 2022
In September, I had my half-yearlies right after which a company, Speechify approached me. Unfortunately, I couldn't clear the interview, but it gave me a lot of experience and ideas on what skills to work on more.
October 2022
On October 1-2, I participated in the NASA Space Apps Challenge, where my team and I built Liberty, a browser-based 3D visualisation of the International Space Station in Realtime. This project won us second place in the Regional Round among 90+ teams and qualified us for the Global Round. We were awarded the Global Finalists Honourable Mention which was awarded to the top 80 teams from around 55000+ teams from all around the world.
You can find our project here and our submission here.
This project allowed me to get into 3D in the browser and read a lot about ThreeJS(which we ended up not using), and CesiumJS and even had some experience with Rust and WASM(which my teammate used in the app).
November 2022
In November, we at Exun Clan conducted our annual symposium, Exun 2022, and after two years, we planned to now conduct it in a hybrid mode. The event was a success and had over 22000+ participants from around the world. Conducting an offline event and meeting so many people was a refreshing change after seeing faces across zoom meets for the past two years.
We completely revamped our website at exunclan.com using NextJS and TailwindCSS.
I also participated in Tiger Hacks 2022, where we created a product which aimed to solve the issue of over/under-inflation of tyres and hence reduce the road risks associated with them, elongating the lifetime of tyres, making car rides more enjoyable and saving fuel at the same time. We aimed to take into all the environmental factors that cause the internal pressure of the tyre to change and exceed the safety limits, quickly alert the user of the safety concerns using Twilio SMS and notification and then adapt the pressure of the tyres automatically to the conditions.
We built a software prototype for all this using Next.JS, OpenWeather API, Mapbox API, etc. and this also gave me a refreshment on my Grade 11 chemistry, having to read about Gay Lussac's Law and how pressure is affected by factors like temperature, speed of a car, etc.
November was also a time, I got really into the T3 stack by Theo, and learnt a lot more about tRPC. The announcement of Next13 made things very interesting for the Javascript ecosystem. I wrote an article on the T3 stack here which gained a lot of attention and also was my first article which got featured on Hashnode.
December 2022
Well, December just started, but I decided to give Rust a try while attempting to do Advent of Code, which is a pain because I'm having to learn a lot more about memory management, the Borrow Checker and so many more concepts which were not familiar to me as a Javascript Developer.
I also made a self-hosting discord bot which shows your Private Advent of Code Leaderboards on your discord servers. Discord.js as handy as it is doesn't have very good documentation on its types, so writing this bot in Typescript was a little bit of a rollercoaster ride but was a very good experience. You can find more about it here.
A friend of mine, Mokshit Jain recently released Macaron, a Typesafe CSS-in-JS with zero runtime, colocation, maximum safety and productivity. Macaron is a new compile-time CSS-in-JS library with type safety. Because of this, I got an opportunity to read more about build tools like babel, vite, esbuild, etc. So, learning more about them is on my todo-list for the coming year. Helping with the docs, I found out about Code Hike which seemed very impressive. It did have a few issues for me, because of which I had to go through the source code and find out type definitions and their working to get stuff working.
Outro
A lot more to come for the rest of the month and the next year, when I'll probably be in college, excited to go more in-depth into something I love. I will keep posting articles, and get more into technical writing. Hopefully, learning Rust will get easier as I go on, and might be something I end up using more.
I'm also participating in Epoch from Dec 30 to Jan 1, a hackathon by Hack Club for high schoolers from all around the world, and am excited to be part of such a big event.
]]>It is December! That means Advent of Code is here! If you don't know what that is:
Advent of Code is an Advent calendar of small programming puzzles for a variety of skill sets and skill levels that can be solved in any programming language you like. People use them as interview prep, company training, university coursework, practice problems, a speed contest, or to challenge each other.
Idea Inspiration
Now, Advent of Code has two kinds of leaderboards. One is the Global Leaderboard where you're competing against the whole world and the other is Private Leaderboards. You can create Private Leaderboards for your class, your club, or a group of friends!
I am a part of a couple of Private Leaderboards and since all of us were on a discord server, I thought why not create a Discord Bot which shows the leaderboard right on the app? And so, I created this discord bot.

Setup
The bot is very easy to set up and get up and running on your server. Follow the instructions on the GitHub README and you will be up and running in no time.
Deployment
To deploy the app on an EC2, GCP Instance, etc. use pm2 like mentioned here.
GitHub
Check out the GitHub Repository linked above and you will find all the instructions on how to get up and running with the bot.
Feel free to also point out any issues, any PRs are welcome and be sure to star the repo!
]]>There is this new stack in the open, the T3 stack, started by Theo, CEO of ping.gg and an ex-Twitch employee. I came across it when I was taking a look at tRPC and was amazed by how efficient, it made me while creating an app. First of all, what is tRPC.
What is the T3 Stack?
Quoting the website, "We made create-t3-app to do one thing: Streamline the setup of typesafe Next.js apps WITHOUT compromising modularity" which is so true. It is a stack which just works out of the box, but is yet so customisable. Just pick what you want to use and get up and running! It consists of:
Next.JS
Ever since I gave Next.JS a try, it has been one of my favourite frameworks to use. I have given so many more React frameworks a try, but Next.JS just works for me.
Next.js offers a lightly opinionated, heavily optimized approach to creating applications using React. From routing to API definitions to image rendering, we trust Next.js to lead developers toward good decisions.
tRPC
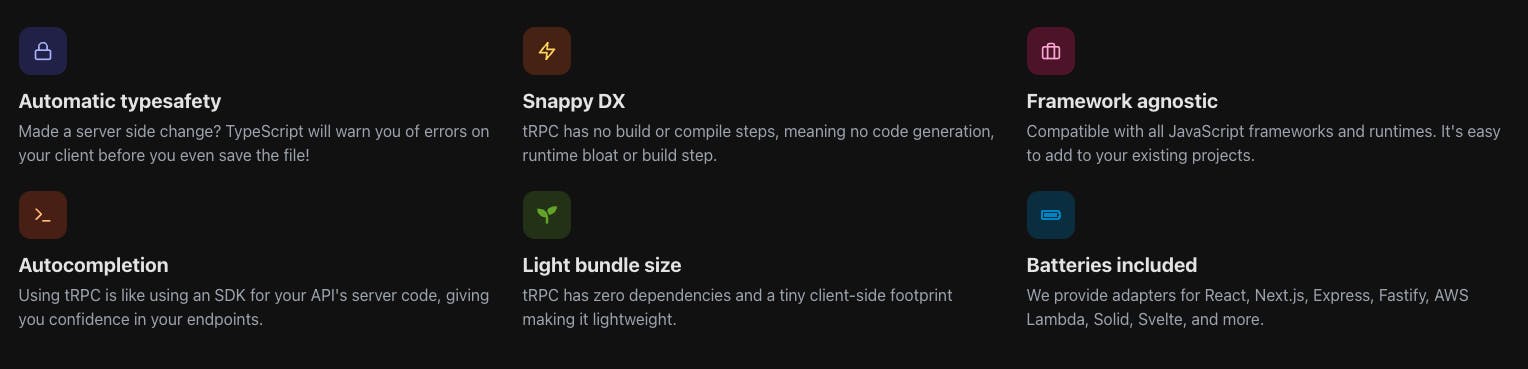
tRPC is one of the best ways, in my opinion to create a fully typesafe API. API Routes allow us to build fullstack routes easier and faster. There are alternatives like GraphQL CodeGen but they essentially are a build step which generate types based on your GraphQL, which is kind of eh. tRPC just allows you to build it without an intermediate step. The following screenshot from the tRPC website just explains why tRPC.
You can read more about tRPC at trpc.io.
Tailwind CSS
For those, who don't know what Tailwind is, I have a blog post on it and how to get started with tailwind here.
TypeScript
TypeScript isn't optional in the T3 stack and it is probably one of the best things. Once you give TypeScript a try, you will not be able to go back to Javascript. You will blow your head off trying to find the right data to pass into a function, or trying to find why and where you have an error in your app because it is the wrong type.
Typesafety makes you faster. If you’re not convinced, you might be using TypeScript wrong…
Prisma
Prisma is one of the best database adapters for TypeScript out there. It just makes it so easy to work with SQL. It generates all the types for you as well which is a big plus point, as it guarantees and continues the T3 Axiom of end-to-end typesafety from your database to your app. It also provides an awesome GUI called the Prisma Studio.
NextAuth
Next Auth makes it very easy to plugin authentication into your NextJS application. It comes with many adapters which just work for you out of the box and is very simple to work with Prisma.
Why I recommend the T3 stack?
First of all, type safety. TypeScript was a huge revolution when it came out in 2012 because of this reason. It just make you so much faster and efficient if you start using it right. The autocompletes, the hover documents, the red squiggly lines just make it much much easier to write code.
create-t3-app makes it easier to manage the modularity and simplivity in code while starting off. It just doesn't add everything.
Everything added to create-t3-app should solve a specific problem that exists within the core technologies included. This means we won’t add things like state libraries (zustand, redux) but we will add things like NextAuth.js and integrate Prisma and tRPC for you.
Resources to get started with the T3 stack
- Create T3 App Documentation
- The BEST Stack For Your Next Project Video
- Build a Blog With the T3 Stack - tRPC, TypeScript, Next.js, Prisma, Zod Video
References
]]>Dark mode is something which has gained a lot of popularity in the last few years. Many popular websites are also implementing a dark mode on their website. However, dark mode can be a pain to setup if your css isn't well structured. Tailwind makes it very easy and instinctive to implement it. In this article, I'm going to go over how you can implement dark mode using Tailwind CSS.
Prerequisites
- You should have a basic knowledge of Tailwind CSS.
- You should know a little Javascript to understand how the theme toggle works.
Setup
Let's start by setting up a tailwind project. You also use bundlers like parcel, and this can also be used with any framework. Just setting up tailwind will be different and you can check that out here. I will be using it using npm without any bundler and with just HTML.
Create folder
mkdir dark-mode-tailwindcss
cd dark-mode-tailwindcss
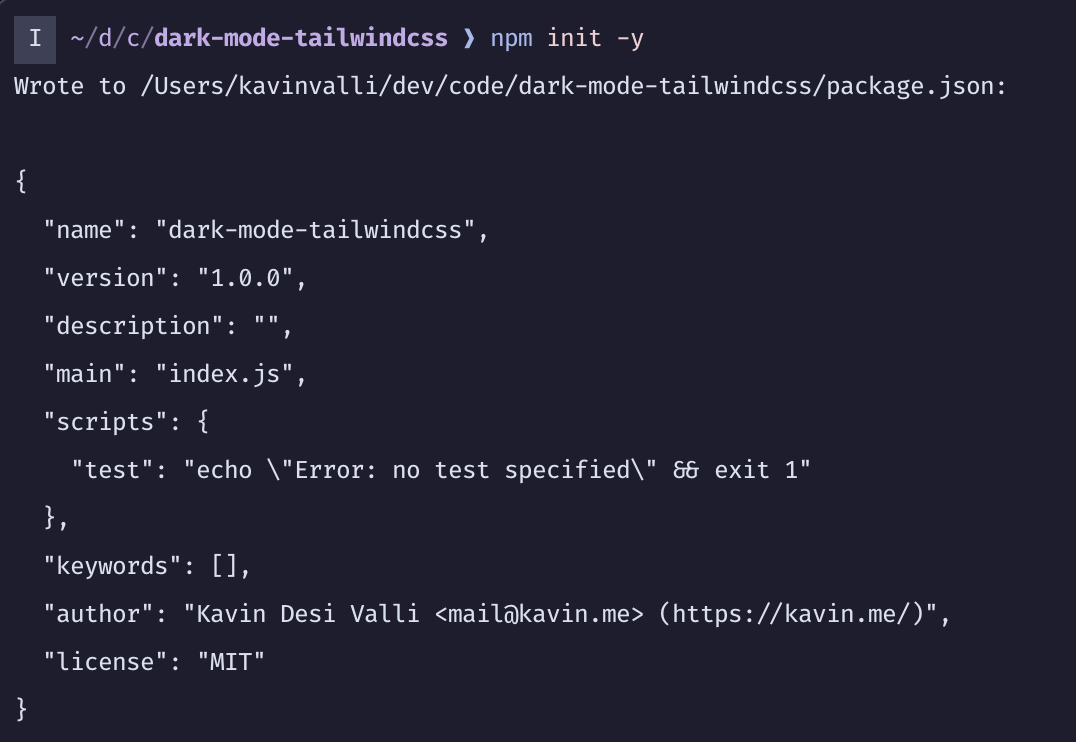
npm init -y
You will see something like this
Install Tailwind
npm i -D tailwindcss
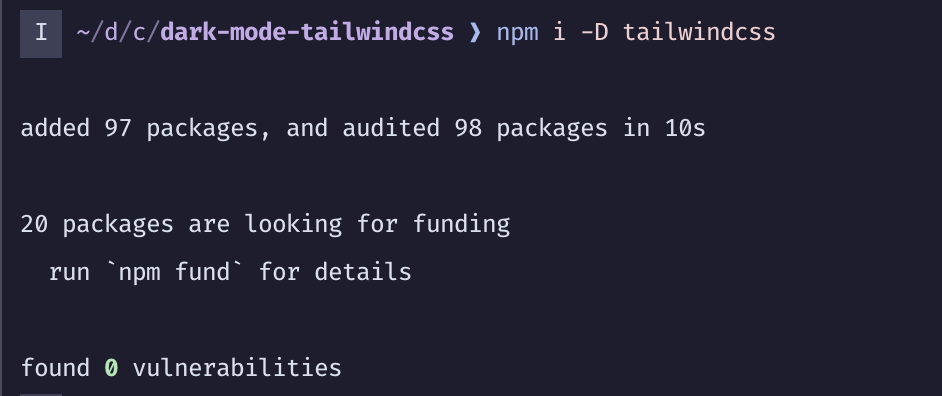
Setup Tailwind
npx tailwindcss init

Open tailwind.config.js and make the following change:
-  content: [],
+  content: ['./**/*.html'],
This will look for all html files and look for tailwind classes through them. Now, let's create an html file to start off with
touch index.html
When to use Dark Mode?
Now, tailwind supports two ways of using Dark Mode. One is prefers-color-scheme and one is using classes. So, the way the former works is, if the users system's preferred mode is dark mode then it'll use dark mode else will use light mode. In the class based mode, it will be applied when the dark class is applied to any element before the current element in the tree.
In this article, I'll be using classes just to demonstrate how to toggle between them, but feel free to use any. Not that prefers-color-scheme mode is used by default. To use class based mode you need to add the following line in tailwind.config.js
module.exports = {
+  darkMode: 'class',
   ...
}
Setup tailwind css file
Create a src directory with the tailwind css file
mkdir -p src/css
touch src/css/tailwind.css
and add the following contents to it
@tailwind base;
@tailwind utilities;
@tailwind components;
Setup css build commands
In your package.json make the following changes
...
  "scripts": {
-    "test": "echo \"Error: no test specified\" && exit 1"
+    "css:build": "tailwindcss -i src/css/tailwind.css -o dist/css/tailwind.css",
+    "css:watch": "tailwindcss -i src/css/tailwind.css -o dist/css/tailwind.css --watch"
  },
...
And then run
npm run css:watch
Setup html
<!DOCTYPE html>
<html lang="en">
  <head>
    <meta charset="UTF-8" />
    <meta http-equiv="X-UA-Compatible" content="IE=edge" />
    <meta name="viewport" content="width=device-width, initial-scale=1.0" />
    <link rel="stylesheet" href="./dist/css/tailwind.css" />
    <title>Tailwind Dark Mode</title>
  </head>
  <body>


  </body>
</html>
Now, this will be our starting point to the html. I've added the stylesheet which points to the compiled css generated by the Tailwind CLI.
I'm gonna setup a basic html site like so:
  <body>
    <div
      class="h-screen w-full bg-gray-100 dark:bg-gray-800 flex justify-center items-center"
    >
      <div class="bg-white text-gray-800 rounded-lg p-4 text-center">
        <h1 class="text-2xl font-bold">Tailwind Dark Mode</h1>
        <p>This is a demo of Tailwind CSS Dark Mode.</p>
      </div>
      <button
        class="absolute bottom-5 right-5 w-10 h-10 rounded-full bg-gray-800 flex justify-center items-center text-white"
        id="theme-toggle"
      >
        <svg
          width="24"
          height="24"
          viewBox="0 0 24 24"
          fill="none"
          xmlns="http://www.w3.org/2000/svg"
        >
          <path
            fill-rule="evenodd"
            clip-rule="evenodd"
            d="M12.2256 2.00253C9.59172 1.94346 6.93894 2.9189 4.92893 4.92891C1.02369 8.83415 1.02369 15.1658 4.92893 19.071C8.83418 22.9763 15.1658 22.9763 19.0711 19.071C21.0811 17.061 22.0565 14.4082 21.9975 11.7743C21.9796 10.9772 21.8669 10.1818 21.6595 9.40643C21.0933 9.9488 20.5078 10.4276 19.9163 10.8425C18.5649 11.7906 17.1826 12.4053 15.9301 12.6837C14.0241 13.1072 12.7156 12.7156 12 12C11.2844 11.2844 10.8928 9.97588 11.3163 8.0699C11.5947 6.81738 12.2094 5.43511 13.1575 4.08368C13.5724 3.49221 14.0512 2.90664 14.5935 2.34046C13.8182 2.13305 13.0228 2.02041 12.2256 2.00253ZM17.6569 17.6568C18.9081 16.4056 19.6582 14.8431 19.9072 13.2186C16.3611 15.2643 12.638 15.4664 10.5858 13.4142C8.53361 11.362 8.73568 7.63895 10.7814 4.09281C9.1569 4.34184 7.59434 5.09193 6.34315 6.34313C3.21895 9.46732 3.21895 14.5326 6.34315 17.6568C9.46734 20.781 14.5327 20.781 17.6569 17.6568Z"
            fill="currentColor"
          />
        </svg>
      </button>
    </div>

    <script src="./src/js/index.js"></script>
  </body>
Should show you something like this:
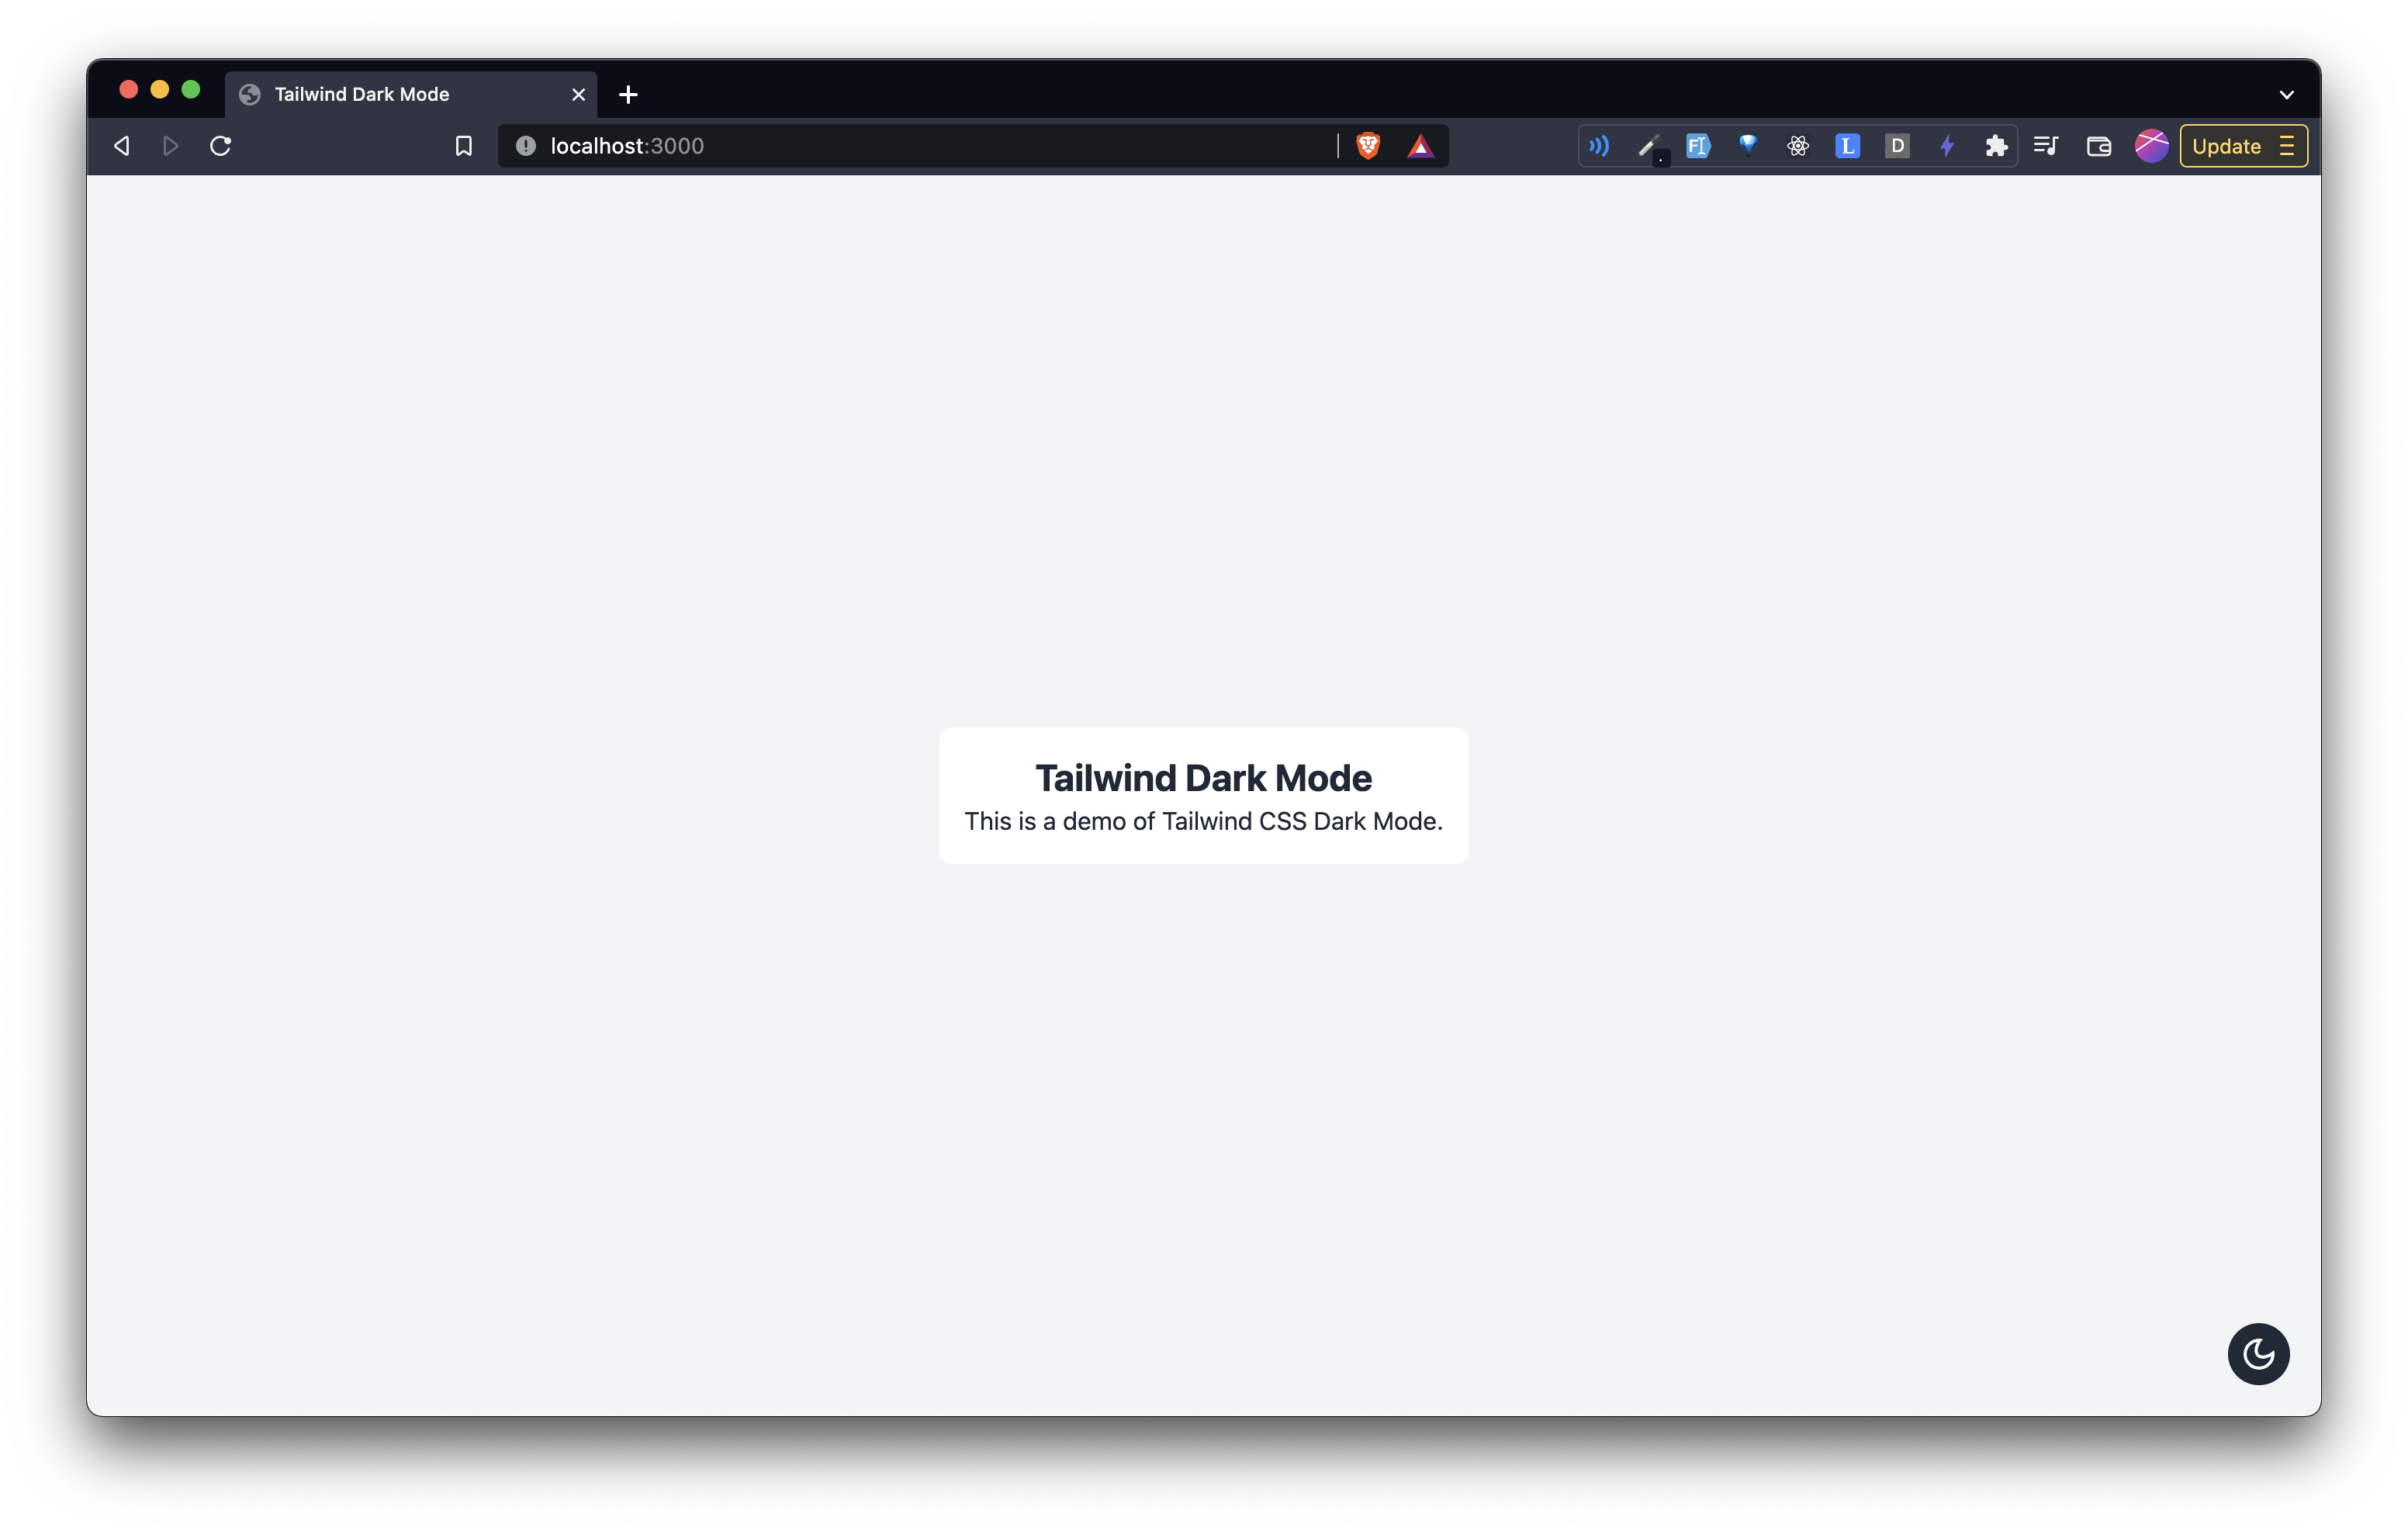
I'm using the serve package by Vercel to serve my html. Just run
npx servefrom your project directory.
Javascript
We'll be needing a little bit of javascript to manage the dark mode.
Add this in the index.html file:
...
+    <script src="./src/js/index.js"></script>
  </body>
...
Now, create an index.js file
mkdir src/js
touch src/js/index.js
Add the following to the index.js file.
const themeToggleButton = document.getElementById("theme-toggle");

const MOON_SVG = `<svg width="24" height="24" viewBox="0 0 24 24" fill="none" xmlns="http://www.w3.org/2000/svg"><path fill-rule="evenodd" clip-rule="evenodd" d="M12.2256 2.00253C9.59172 1.94346 6.93894 2.9189 4.92893 4.92891C1.02369 8.83415 1.02369 15.1658 4.92893 19.071C8.83418 22.9763 15.1658 22.9763 19.0711 19.071C21.0811 17.061 22.0565 14.4082 21.9975 11.7743C21.9796 10.9772 21.8669 10.1818 21.6595 9.40643C21.0933 9.9488 20.5078 10.4276 19.9163 10.8425C18.5649 11.7906 17.1826 12.4053 15.9301 12.6837C14.0241 13.1072 12.7156 12.7156 12 12C11.2844 11.2844 10.8928 9.97588 11.3163 8.0699C11.5947 6.81738 12.2094 5.43511 13.1575 4.08368C13.5724 3.49221 14.0512 2.90664 14.5935 2.34046C13.8182 2.13305 13.0228 2.02041 12.2256 2.00253ZM17.6569 17.6568C18.9081 16.4056 19.6582 14.8431 19.9072 13.2186C16.3611 15.2643 12.638 15.4664 10.5858 13.4142C8.53361 11.362 8.73568 7.63895 10.7814 4.09281C9.1569 4.34184 7.59434 5.09193 6.34315 6.34313C3.21895 9.46732 3.21895 14.5326 6.34315 17.6568C9.46734 20.781 14.5327 20.781 17.6569 17.6568Z" fill="currentColor" /></svg>`;
const SUN_SVG = `<svg width="24" height="24" viewBox="0 0 24 24" fill="none" xmlns="http://www.w3.org/2000/svg"><path fill-rule="evenodd" clip-rule="evenodd" d="M12 16C14.2091 16 16 14.2091 16 12C16 9.79086 14.2091 8 12 8C9.79086 8 8 9.79086 8 12C8 14.2091 9.79086 16 12 16ZM12 18C15.3137 18 18 15.3137 18 12C18 8.68629 15.3137 6 12 6C8.68629 6 6 8.68629 6 12C6 15.3137 8.68629 18 12 18Z" fill="currentColor" /><path fill-rule="evenodd" clip-rule="evenodd" d="M11 0H13V4.06189C12.6724 4.02104 12.3387 4 12 4C11.6613 4 11.3276 4.02104 11 4.06189V0ZM7.0943 5.68018L4.22173 2.80761L2.80752 4.22183L5.6801 7.09441C6.09071 6.56618 6.56608 6.0908 7.0943 5.68018ZM4.06189 11H0V13H4.06189C4.02104 12.6724 4 12.3387 4 12C4 11.6613 4.02104 11.3276 4.06189 11ZM5.6801 16.9056L2.80751 19.7782L4.22173 21.1924L7.0943 18.3198C6.56608 17.9092 6.09071 17.4338 5.6801 16.9056ZM11 19.9381V24H13V19.9381C12.6724 19.979 12.3387 20 12 20C11.6613 20 11.3276 19.979 11 19.9381ZM16.9056 18.3199L19.7781 21.1924L21.1923 19.7782L18.3198 16.9057C17.9092 17.4339 17.4338 17.9093 16.9056 18.3199ZM19.9381 13H24V11H19.9381C19.979 11.3276 20 11.6613 20 12C20 12.3387 19.979 12.6724 19.9381 13ZM18.3198 7.0943L21.1923 4.22183L19.7781 2.80762L16.9056 5.6801C17.4338 6.09071 17.9092 6.56608 18.3198 7.0943Z" fill="currentColor" /></svg>`;

let theme = localStorage.getItem("T_SITE_THEME") || "light";
theme === "light" ? setLightTheme() : setDarkTheme();

function setDarkTheme() {
  document.body.classList.add("dark");
  themeToggleButton.innerHTML = SUN_SVG;
  localStorage.setItem("T_SITE_THEME", "dark");
  theme = "dark";
}

function setLightTheme() {
  document.body.classList.remove("dark");
  themeToggleButton.innerHTML = MOON_SVG;
  localStorage.setItem("T_SITE_THEME", "light");
  theme = "light";
}

themeToggleButton.addEventListener("click", () => {
  if (theme === "light") {
    setDarkTheme();
  } else {
    setLightTheme();
  }
});
Ok, so let's go over this file and what it is doing.
- On line 1 - We're querying the toggle theme button from the dom
- On line 3 and 4 - We're setting two constants which correspond to a Moon SVG and a Sun SVG. This will be shown inside the toggle button.
- On line 5 - I'm setting a theme variable. Now, I'm querying from the localStorage the site's theme. If it exists, that means the user has already visited the website before and they have some preference. If not, set it to light by default. You can use dark if you want.
- On line 6 - Based on the theme, i'm either setting dark mode or light mode.
- In the
setDarkThemefunction - I'm first of all, adding thedarkclass to the body. This is essential for tailwind to understand that the user is using dark mode. Then, I'm changing the SVG inside the toggle button to that of a Sun. After that, we're resetting the value of our theme in the localStorage to dark and we're also resetting the value of thethemevariable to dark. - In the
setLightThemefunction - We're doing everything opposite to that in thesetDarkThemefunction. - From lines 17 to 23 - We're handling the
clickevent on the toggle theme button and setting dark mode or light mode accordingly.
Tailwind dark variant.
Now, how do we tell Tailwind to use which class in dark mode and which class in light mode? We do that using the dark variant which it provides us. For example, in the first div element on the page (just below the body tag), add this class:
-    <div class="h-screen w-full bg-gray-100 flex justify-center items-center">
+    <div class="h-screen w-full bg-gray-100 dark:bg-gray-800 flex justify-center items-center">
And checkout what happens when you refresh the site on the browser and click on the toggle theme button!
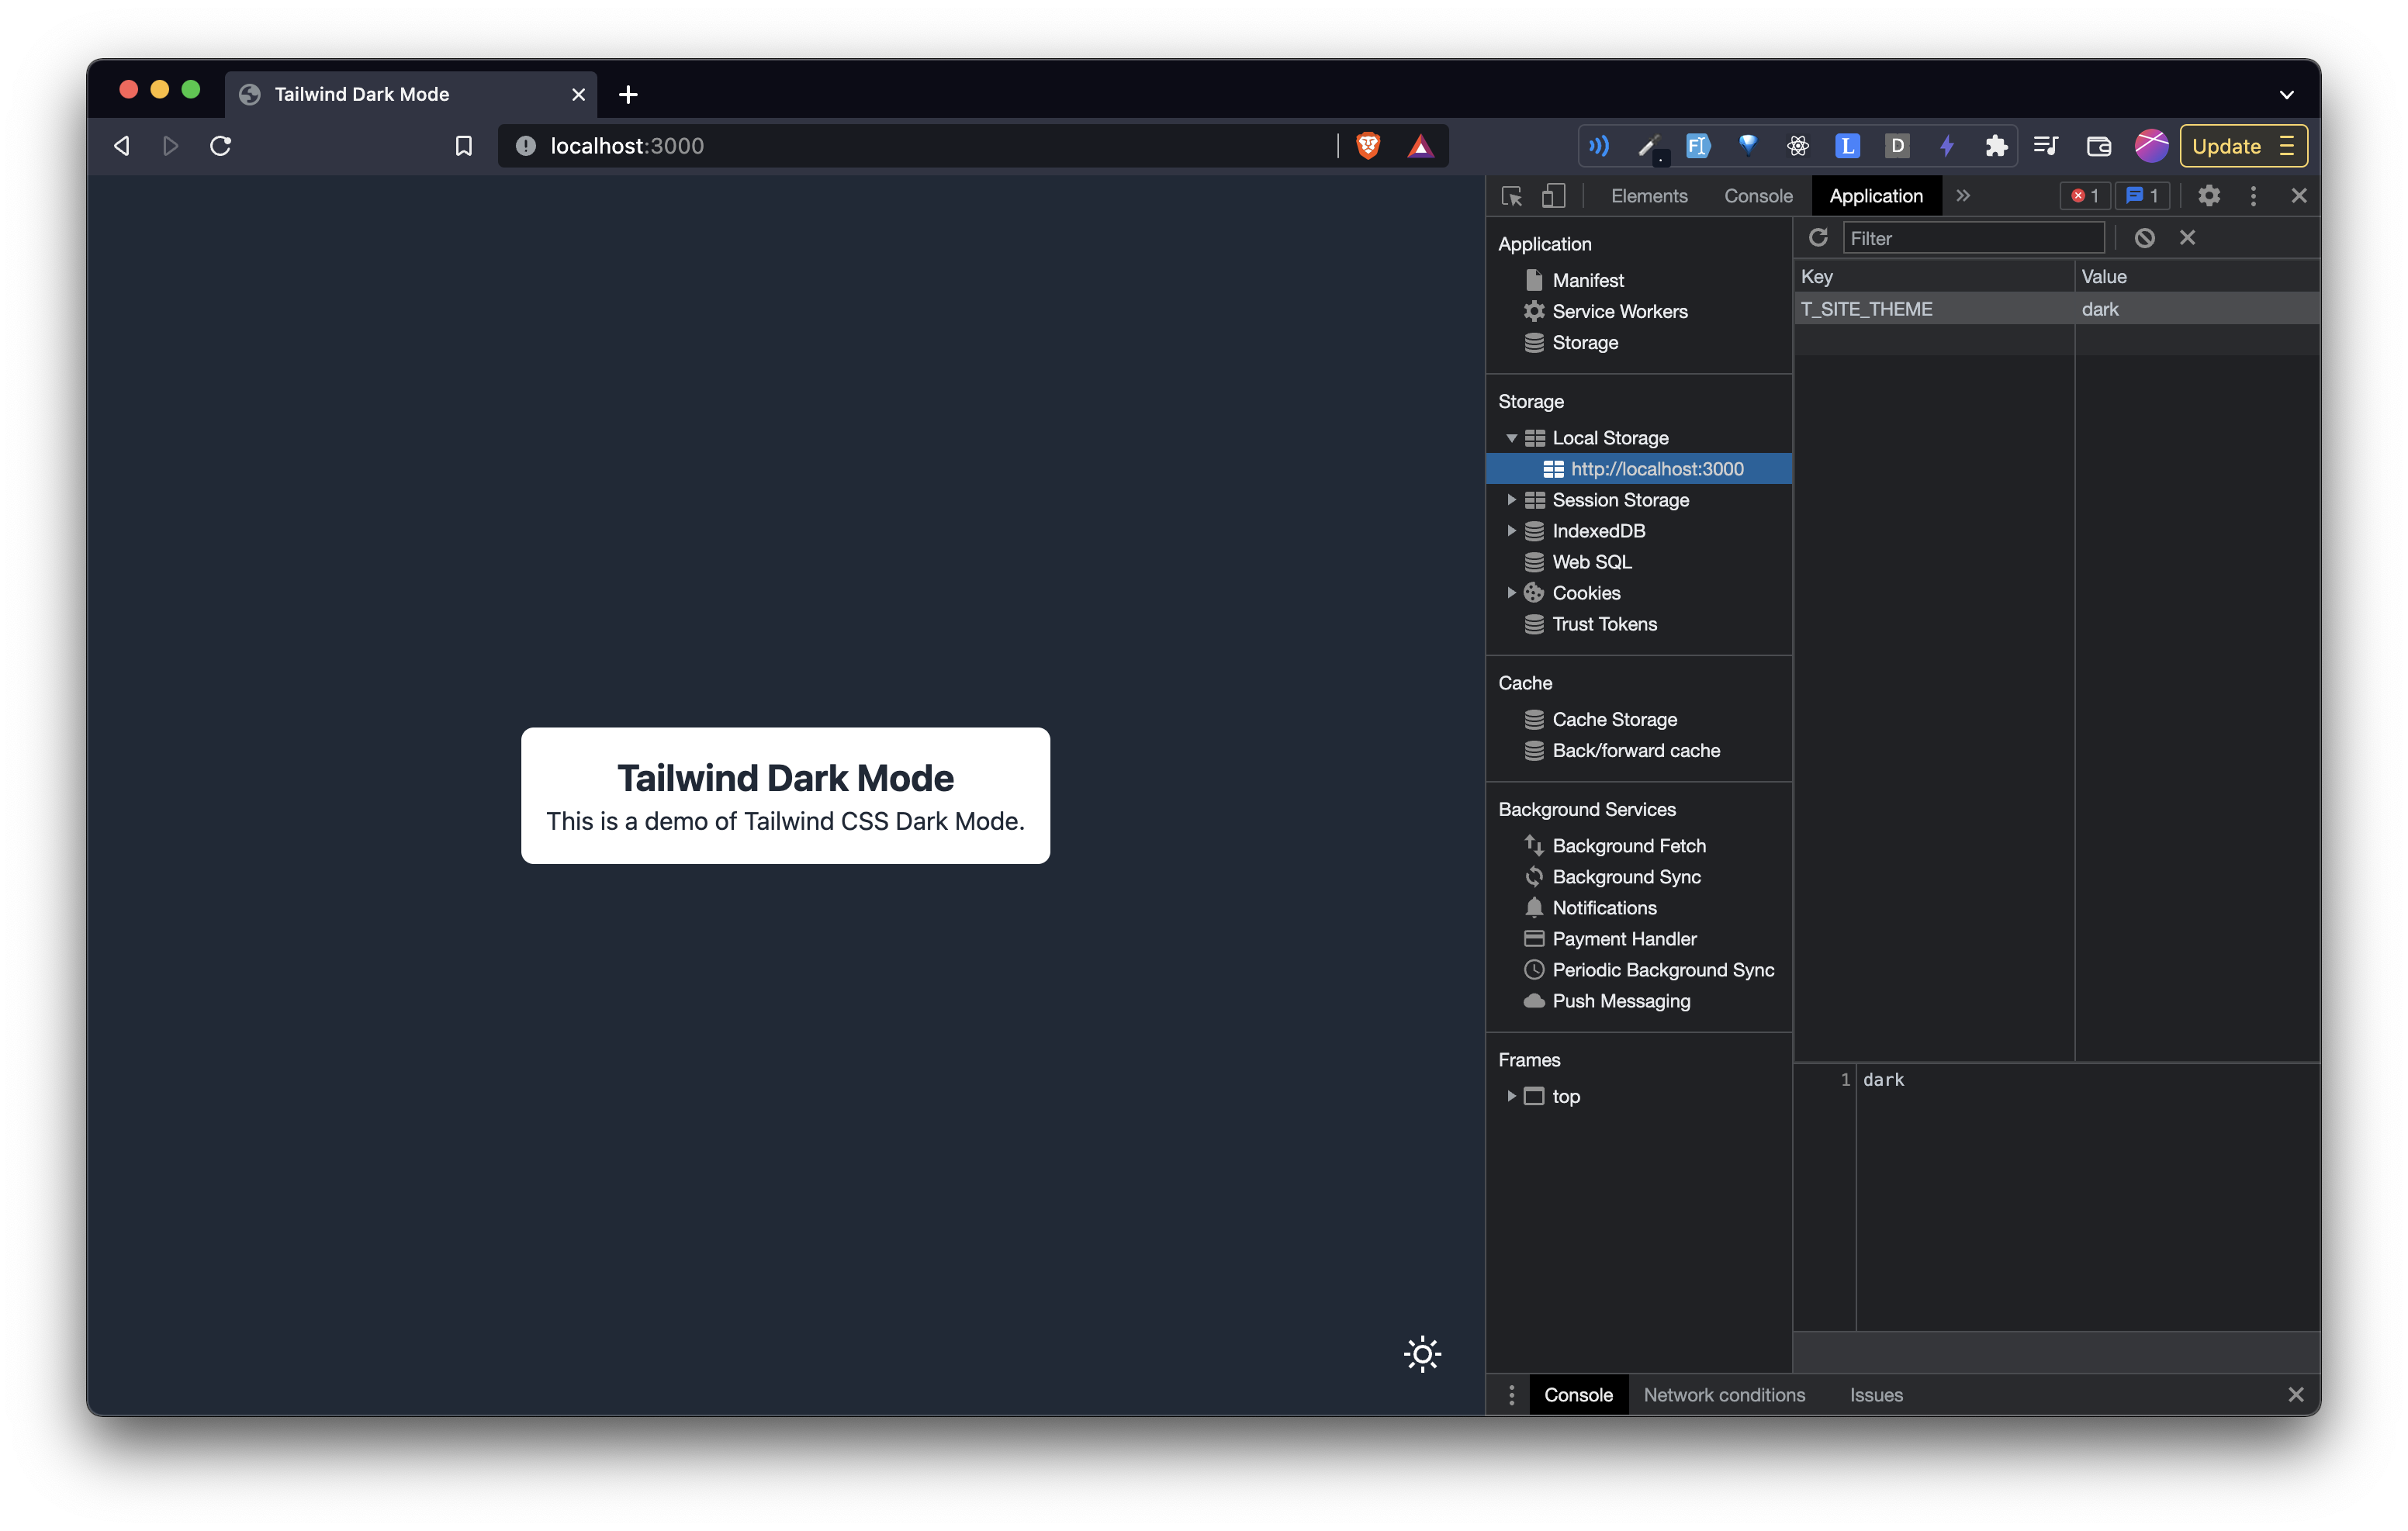
Notice the changes:
- The background color changes.
- If you inspect the body element, you will see a
darkclass on it. - The localStorage
T_SITE_THEMEvalue changes todark - The svg inside the toggle theme button changes
Now, click on the button again:
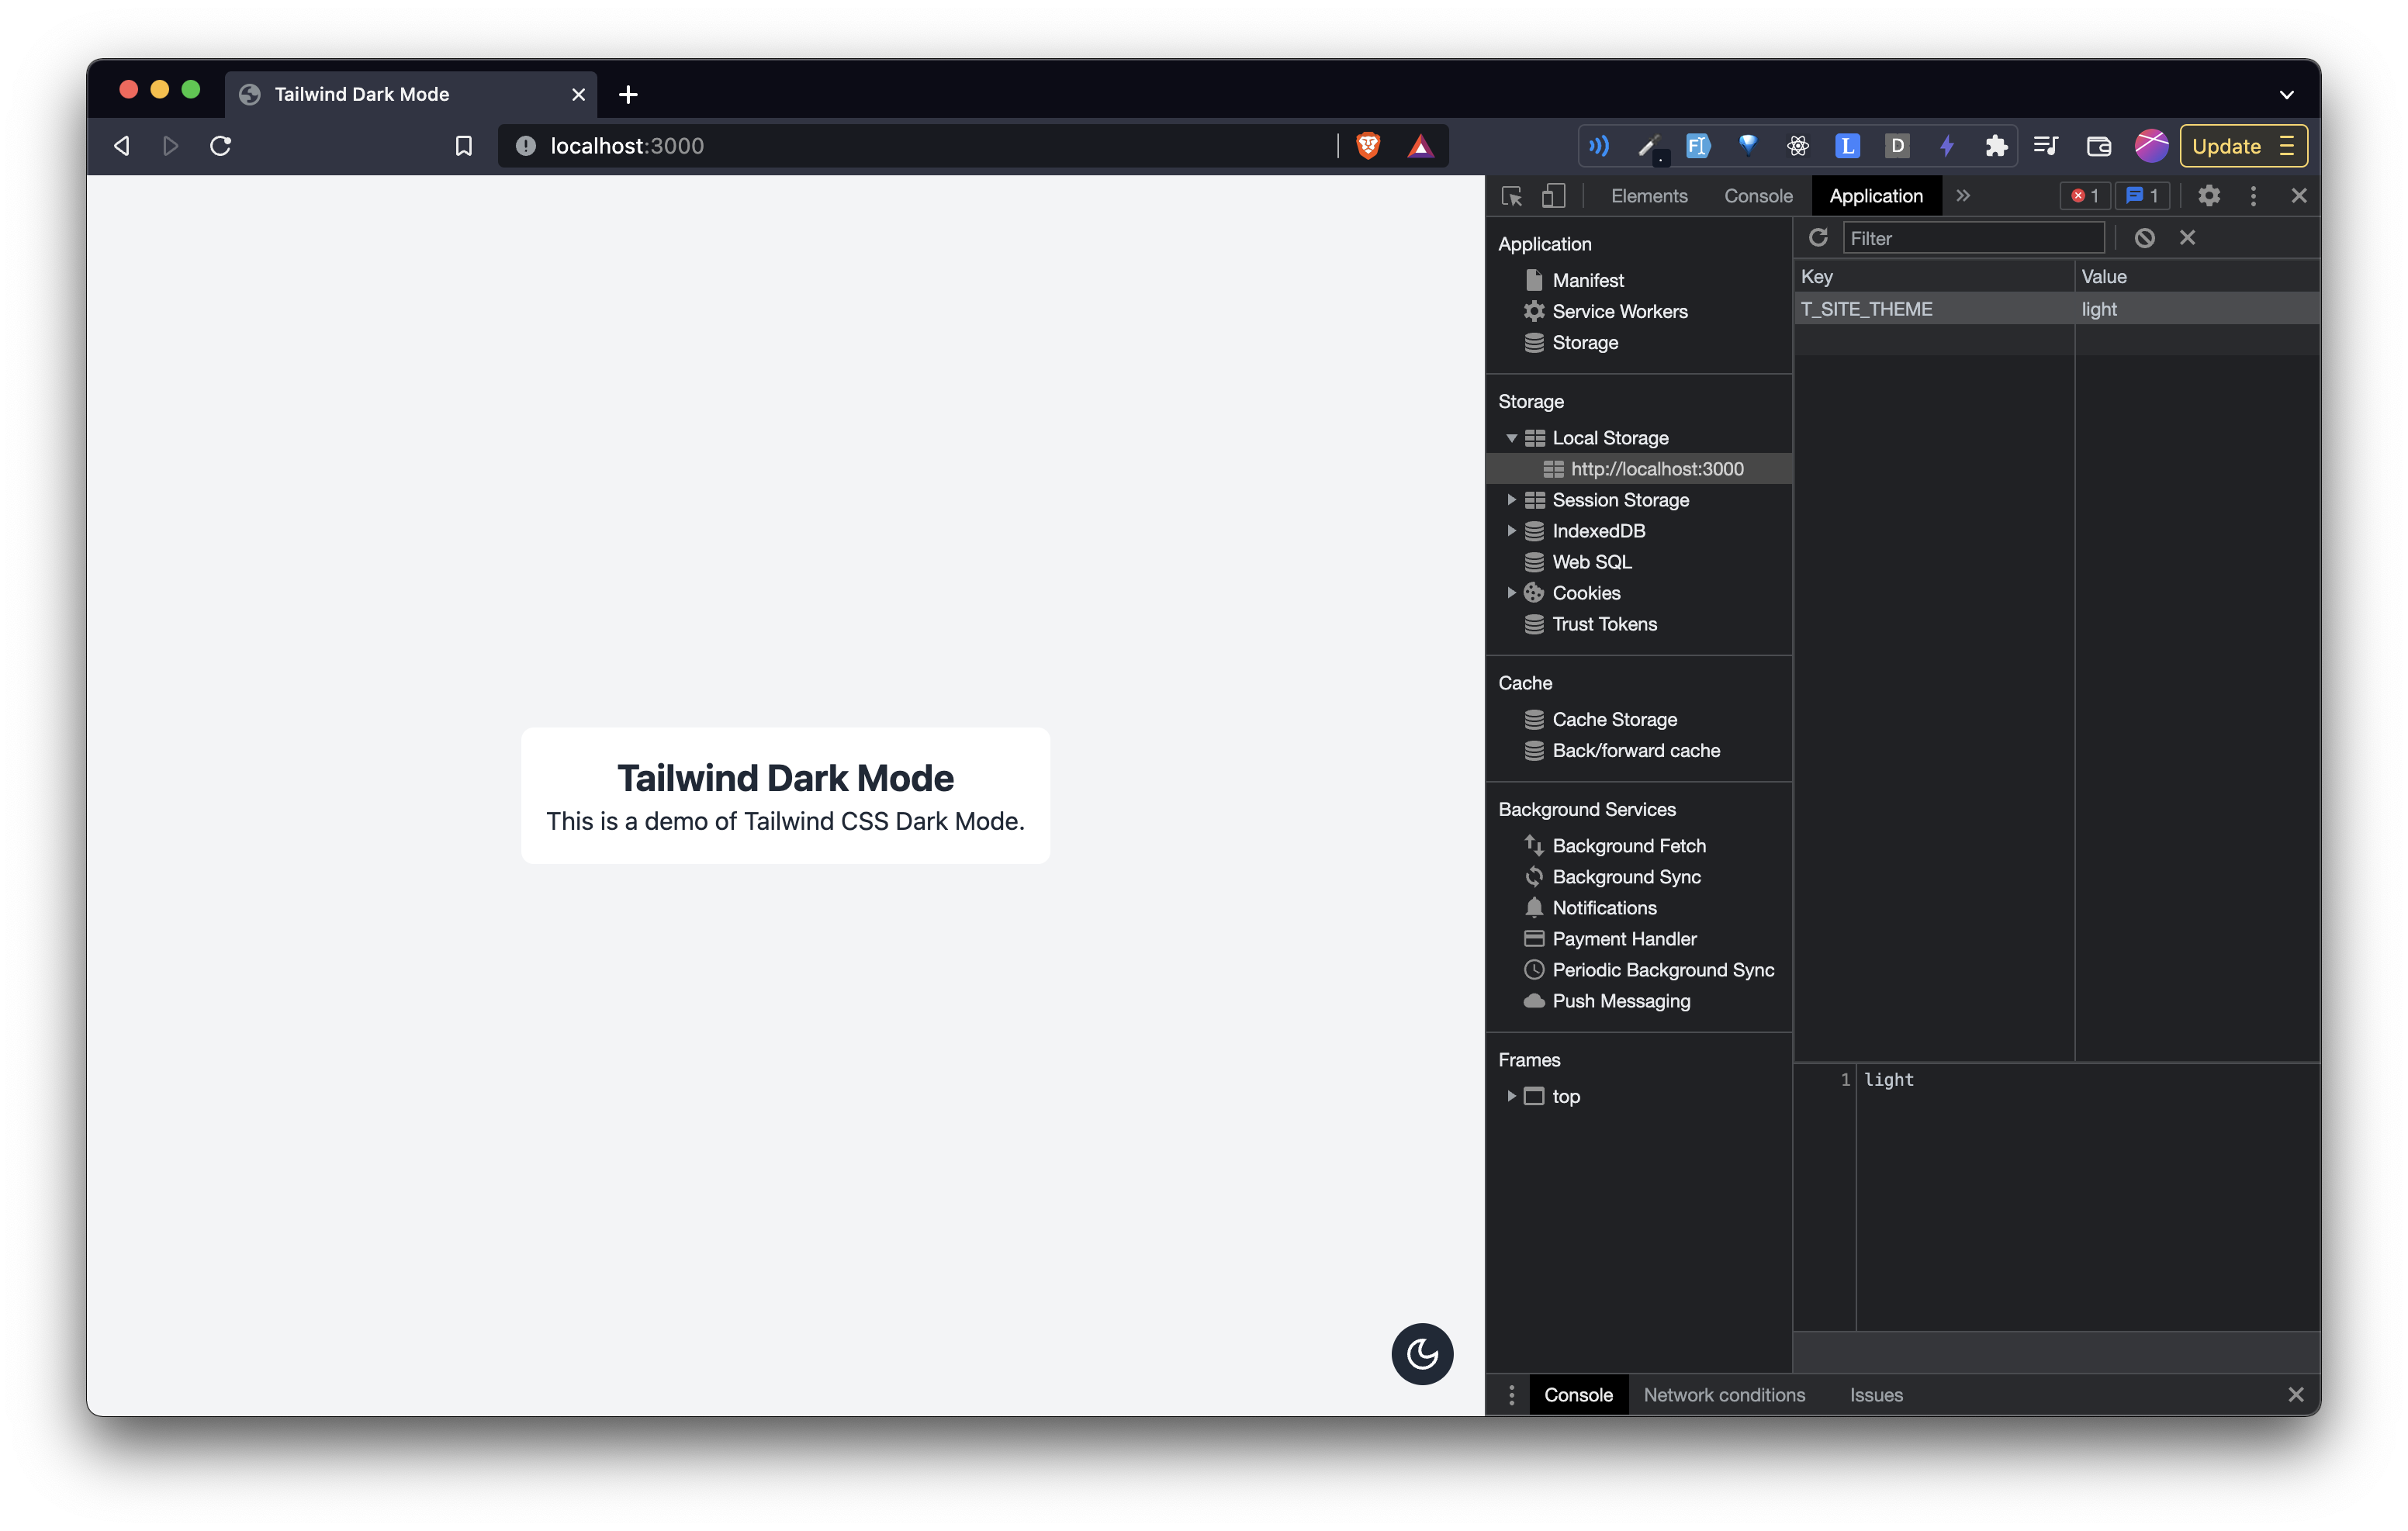
Let's make a few changes in out html now:
-      <div class="bg-white text-gray-800 rounded-lg p-4 text-center">
+      <div class="bg-white dark:bg-gray-900 text-gray-800 dark:text-gray-200 rounded-lg p-4 text-center">
...
-      <button class="absolute bottom-5 right-5 w-10 h-10 rounded-full bg-gray-800 flex justify-center items-center text-white" id="theme-toggle">
+      <button class="absolute bottom-5 right-5 w-10 h-10 rounded-full bg-gray-800 dark:bg-gray-900 flex justify-center items-center text-white" id="theme-toggle">
Now your html should look like this:
<!DOCTYPE html>
<html lang="en">
  <head>
    <meta charset="UTF-8" />
    <meta http-equiv="X-UA-Compatible" content="IE=edge" />
    <meta name="viewport" content="width=device-width, initial-scale=1.0" />
    <link rel="stylesheet" href="dist/css/tailwind.css" />
    <title>Tailwind Dark Mode</title>
  </head>
  <body>
    <div
      class="h-screen w-full bg-gray-100 dark:bg-gray-800 flex justify-center items-center"
    >
      <div
        class="bg-white dark:bg-gray-900 text-gray-800 dark:text-gray-200 rounded-lg p-4 text-center"
      >
        <h1 class="text-2xl font-bold">Tailwind Dark Mode</h1>
        <p>This is a demo of Tailwind CSS Dark Mode.</p>
      </div>
      <button
        class="absolute bottom-5 right-5 w-10 h-10 rounded-full bg-gray-800 dark:bg-gray-900 flex justify-center items-center text-white"
        id="theme-toggle"
      >
        <svg
          width="24"
          height="24"
          viewBox="0 0 24 24"
          fill="none"
          xmlns="http://www.w3.org/2000/svg"
        >
          <path
            fill-rule="evenodd"
            clip-rule="evenodd"
            d="M12.2256 2.00253C9.59172 1.94346 6.93894 2.9189 4.92893 4.92891C1.02369 8.83415 1.02369 15.1658 4.92893 19.071C8.83418 22.9763 15.1658 22.9763 19.0711 19.071C21.0811 17.061 22.0565 14.4082 21.9975 11.7743C21.9796 10.9772 21.8669 10.1818 21.6595 9.40643C21.0933 9.9488 20.5078 10.4276 19.9163 10.8425C18.5649 11.7906 17.1826 12.4053 15.9301 12.6837C14.0241 13.1072 12.7156 12.7156 12 12C11.2844 11.2844 10.8928 9.97588 11.3163 8.0699C11.5947 6.81738 12.2094 5.43511 13.1575 4.08368C13.5724 3.49221 14.0512 2.90664 14.5935 2.34046C13.8182 2.13305 13.0228 2.02041 12.2256 2.00253ZM17.6569 17.6568C18.9081 16.4056 19.6582 14.8431 19.9072 13.2186C16.3611 15.2643 12.638 15.4664 10.5858 13.4142C8.53361 11.362 8.73568 7.63895 10.7814 4.09281C9.1569 4.34184 7.59434 5.09193 6.34315 6.34313C3.21895 9.46732 3.21895 14.5326 6.34315 17.6568C9.46734 20.781 14.5327 20.781 17.6569 17.6568Z"
            fill="currentColor"
          />
        </svg>
      </button>
    </div>

    <script src="./src/js/index.js"></script>
  </body>
</html>
and the site like this:
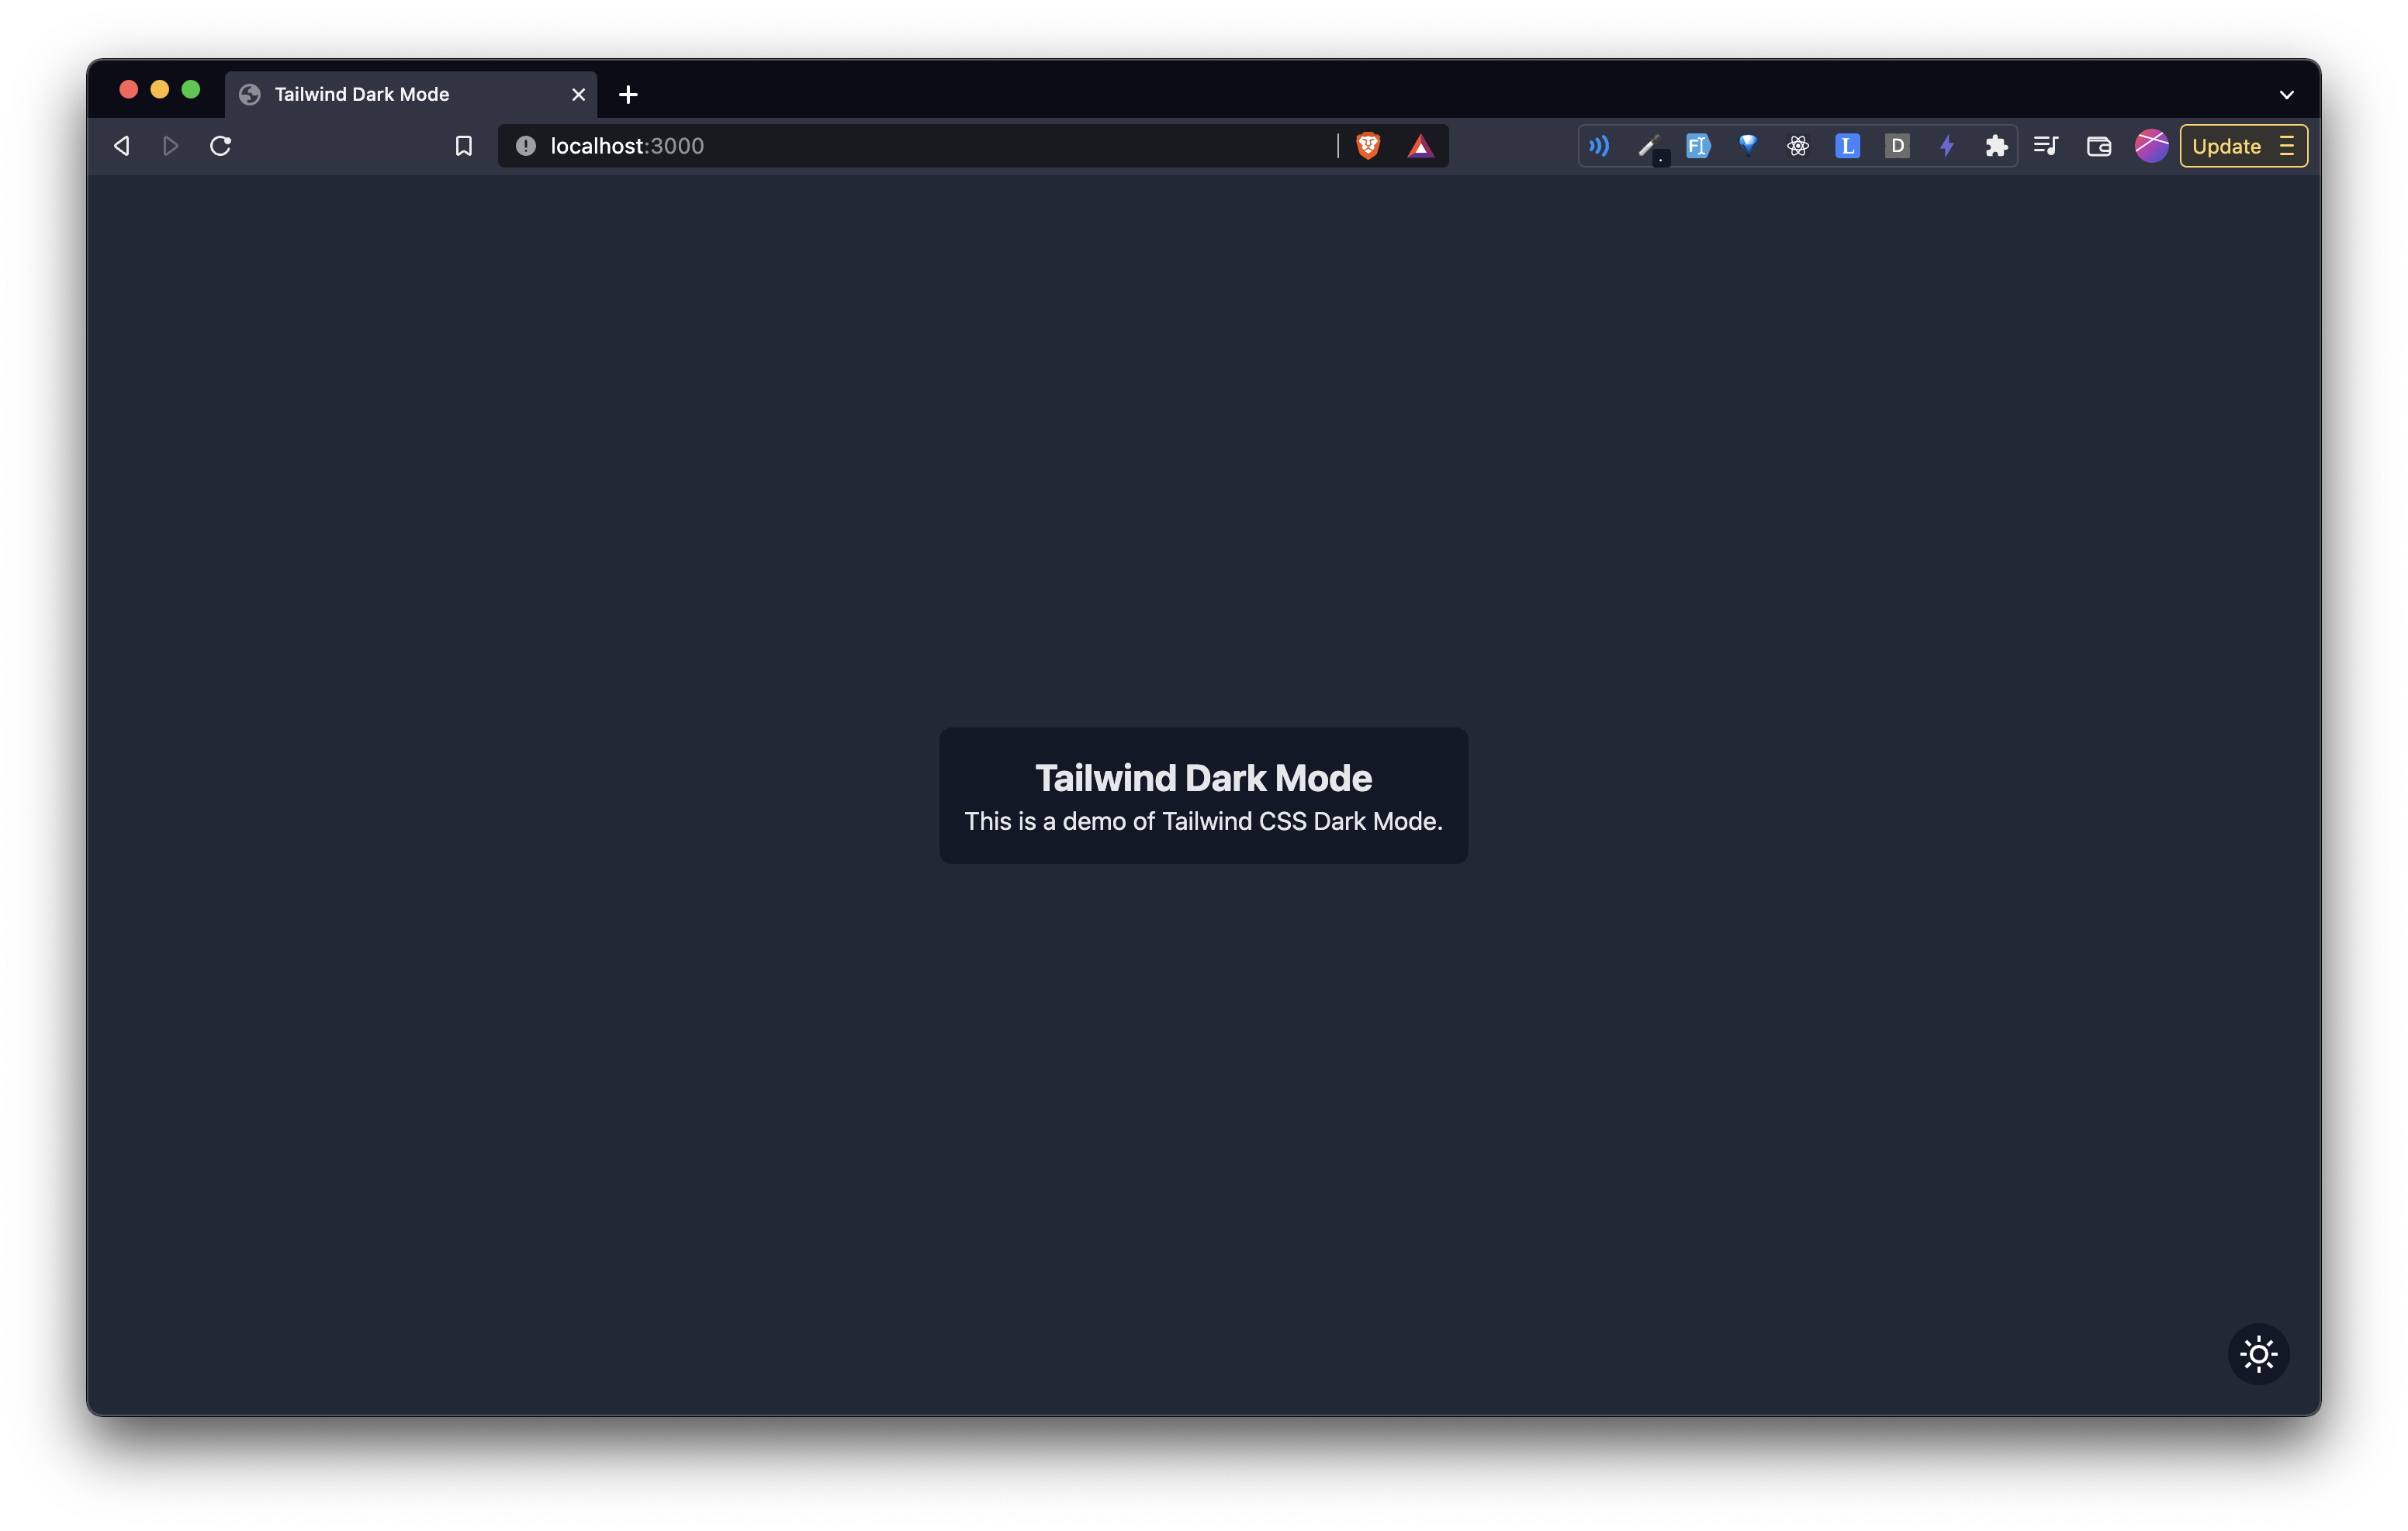 The repository below has all the code used in this article
A few days ago, I wrote an article on how to use the useState hook. Another important hook provided by React is the useEffect hook.
Now, if you've used React Class based Components, then useEffect will help you replace functions like componentDidMount, componentDidUpdate, etc.
Prerequisites
- Basic knowledge of ReactJS
How to use?
useEffect takes in two arguments. A function, and an array of dependencies like so:
useEffect(function, [dependencies])
Let's start with the function argument
Function Argument
Let's use the example I used in the useState article.
import { useState } from "react";

function App() {
  const [count, setCount] = useState(1);

  function incrementCount() {
    setCount(count + 1);
  }
  return (
    <div>
      <h1>Hello, World</h1>
      <p>{count}</p>
      <button onClick={incrementCount}>Increase counter</button>
    </div>
  );
}

export default App;
Will give you something like this:
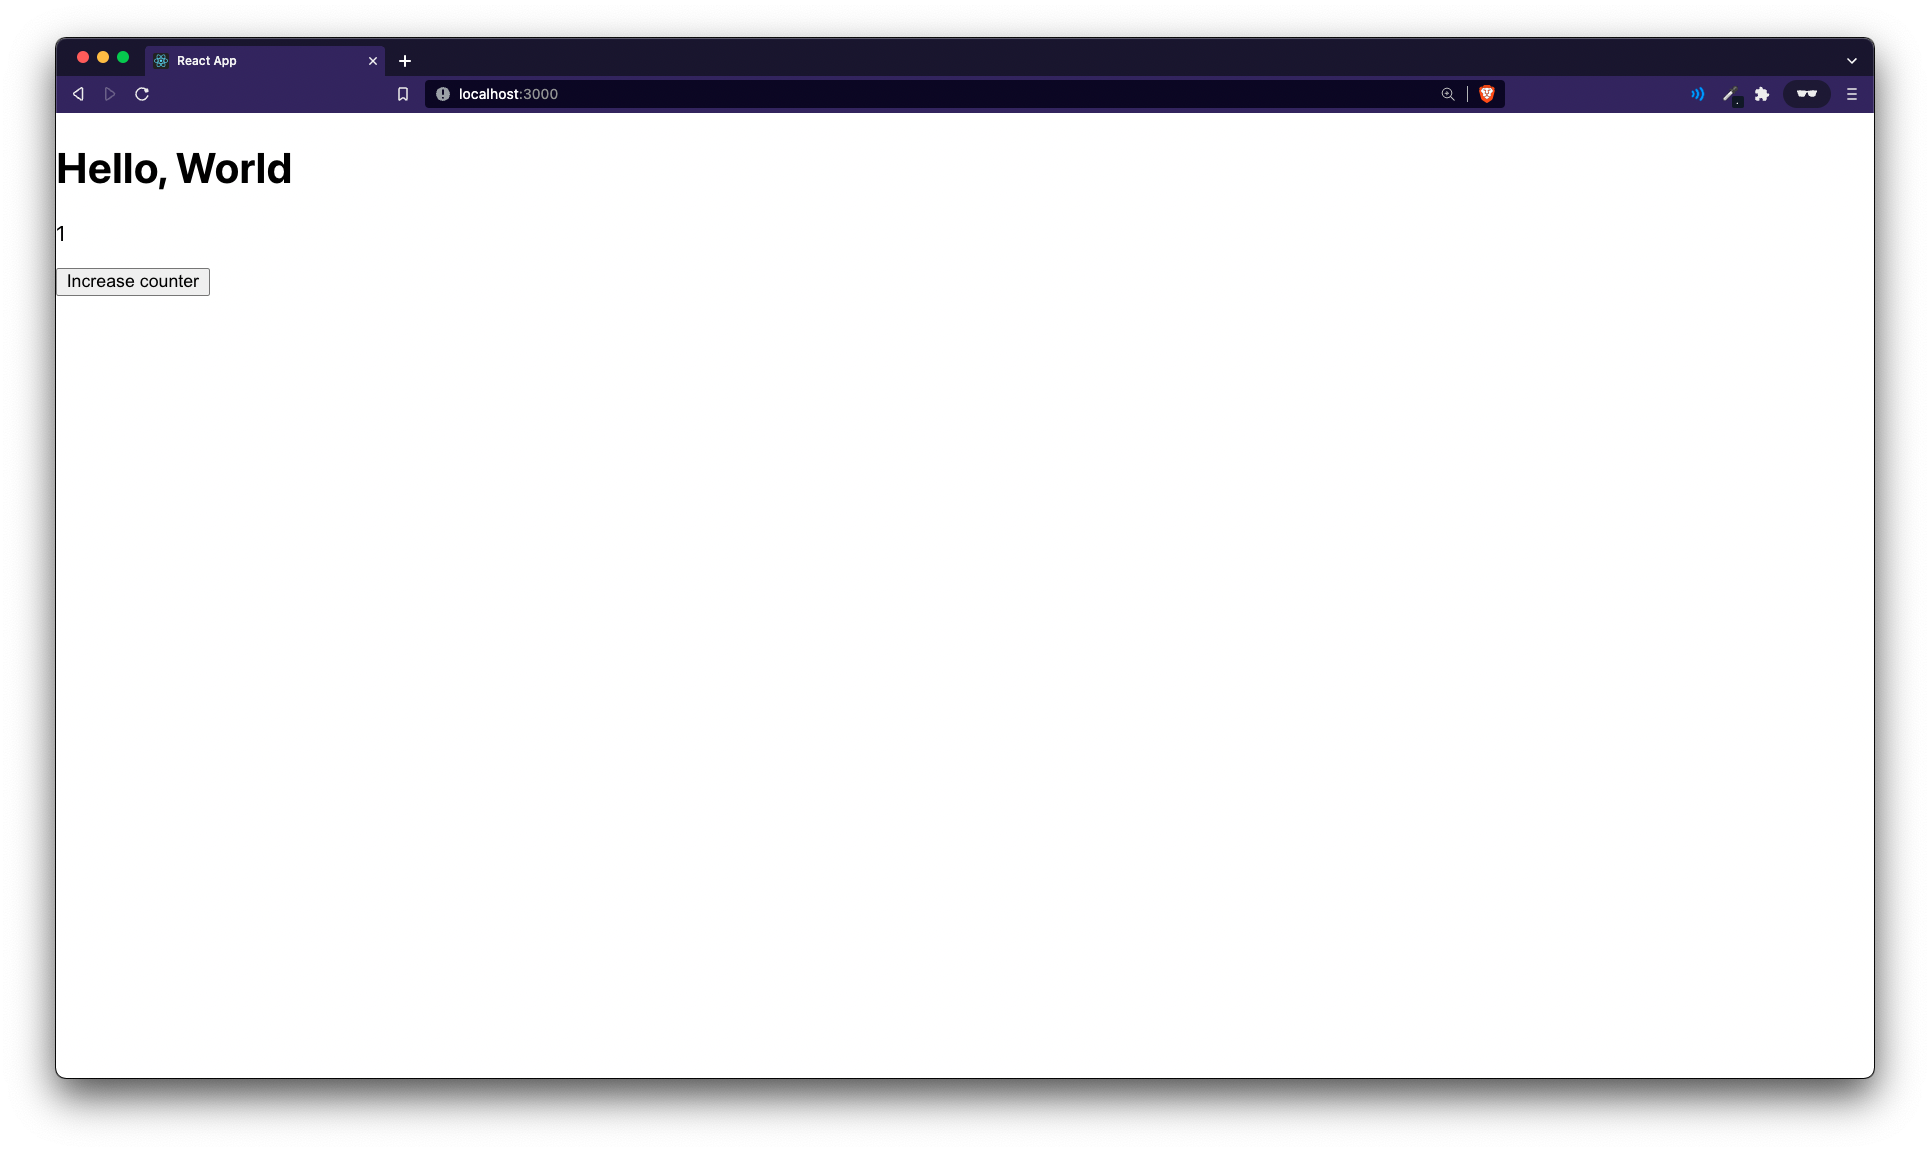
Now make these code:
- import { useState } from "react";
+ import { useState, useEffect } from "react";
...
    const [count, setCount] = useState(1);
+   useEffect(() => {
+    console.log("useEffect running");
+   });
...
Now, go to the browser, refresh the page, open up dev tools and move to console window
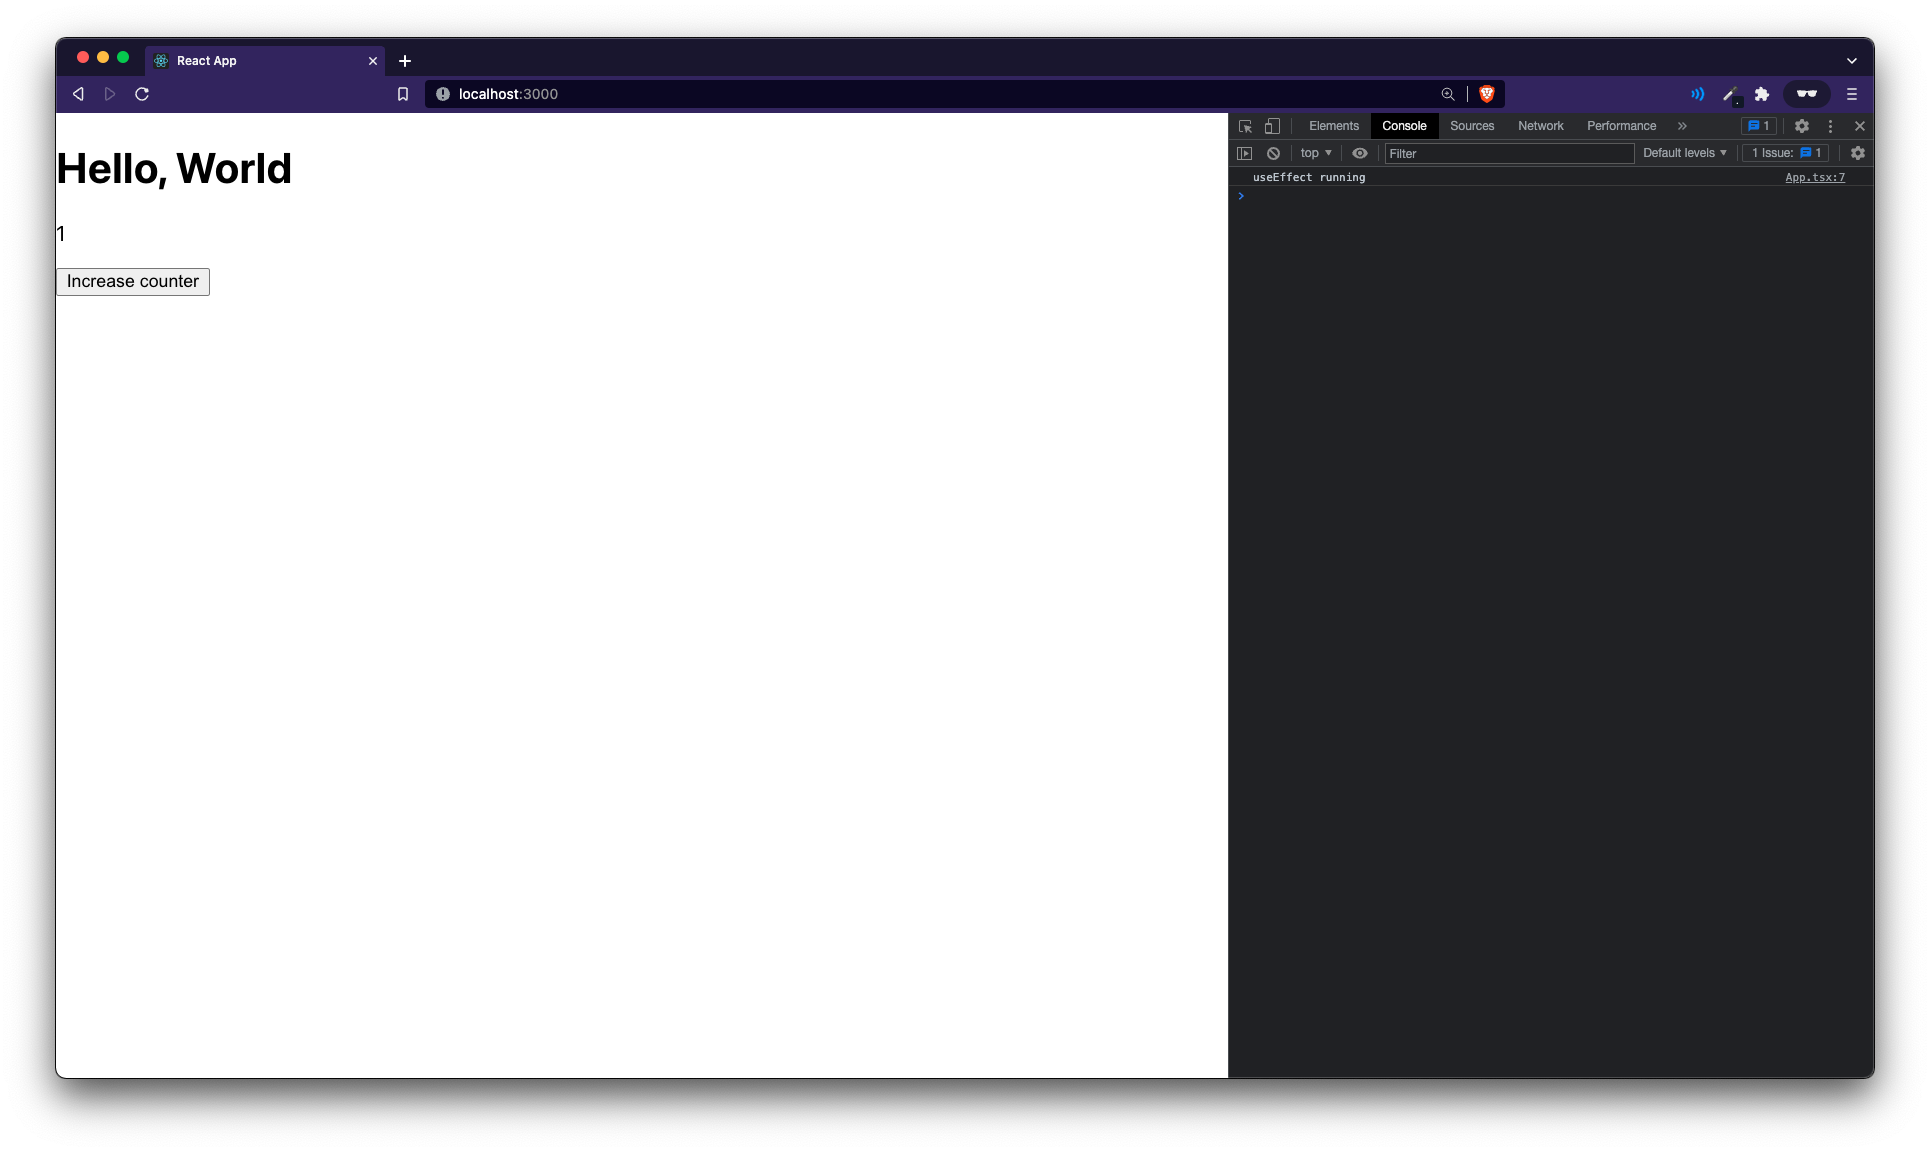
Looks like it's working! But WAIT. Try clicking on the button and notice what happens:
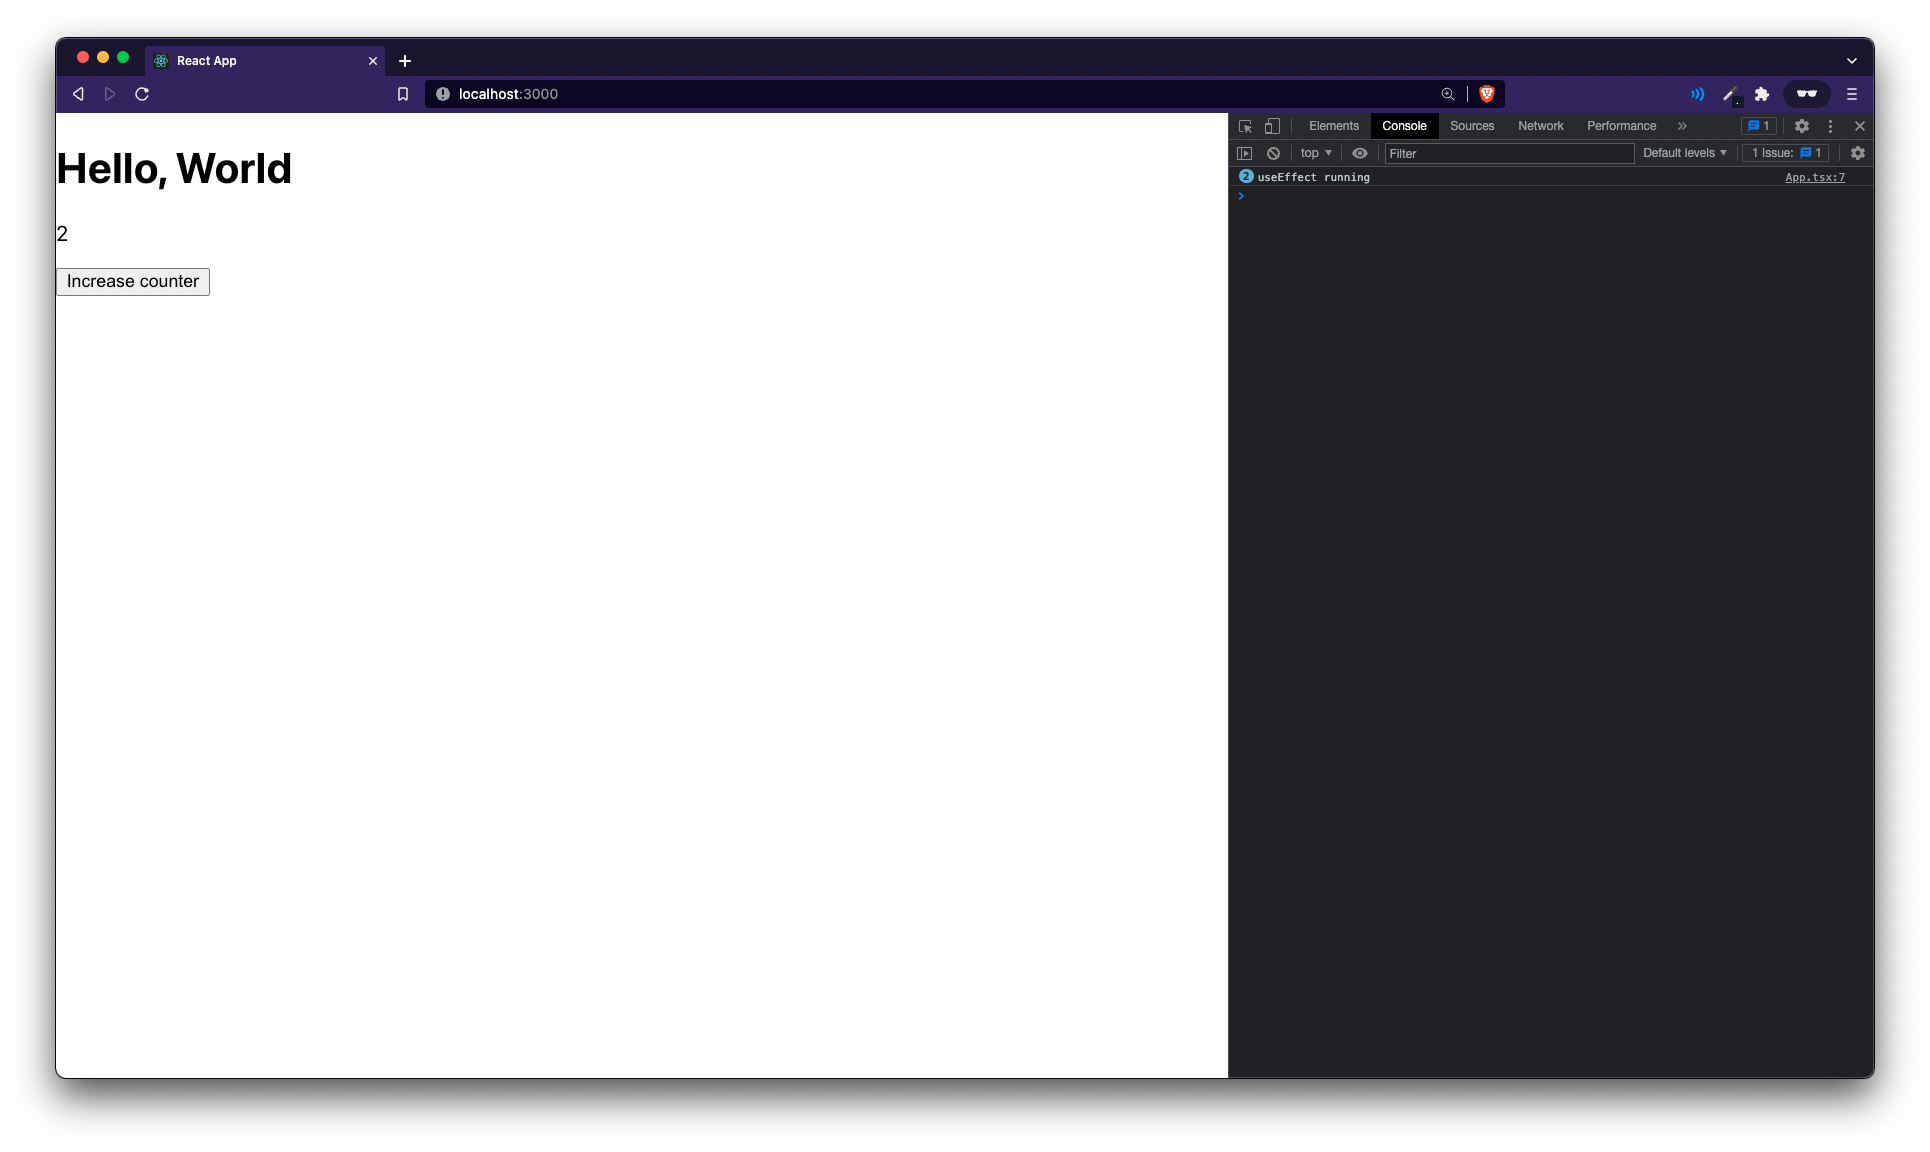
The useEffect ran again. This is because by default, useEffect runs on every single render. When you update the state, you're basically re-rendering the component, so the useEffect runs again. This might be useful in some cases.
Replacement for componentDidMount
What if you want to run it only when the component mounts for the first time (like componentDidMount did). This is where the dependency argument comes into play. Make this change
-  useEffect(() => {
-    console.log("useEffect running");
-  });
+  useEffect(() => {
+    console.log("useEffect running");
+  }, []);
You're passing in an empty array of dependencies. This basically means, run the useEffect loop only on first render.
There is however still one difference between this and
componentDidMount.useEffect(fn, [])runs after the first render to the DOM whereascomponentDidMountruns after "mounting" the component but before it is actually rendered(shown) in the DOM.
Run depending on a value
What if you want to run useEffect when a certain value changes. For eg. add this
  const [count, setCount] = useState(1);
+ const [isDark, setIsDark] = useState(false);
...
   <button onClick={incrementCount}>Increase counter</button>
+  <button onClick={() => setIsDark(!isDark)}>Toggle isDark</button>
Let's take that counter p tag to a different component for demonstration purposes
function Counter({count}) {
  return <p>{count}</p>;
}
...
<div>
   <h1>Hello, World</h1>
-  <p>{count}</p>
+  <Counter count={count} />
...
Now say, on the Counter function, you want to take the isDark prop and every time it changes we want to send out a console.log saying that the isDark prop has changed.
First let's take the prop
-  <Counter count={count} />
+  <Counter count={count} isDark={isDark} />
...
- function Counter({ count }) {
+ function Counter({ count, isDark }) {
Now, if we add a useEffect hook like this:
  function Counter({ count, isDark }) {
+ useEffect(() => {
+   console.log("isDark value changed")
+ }, [isDark])
Now, you will see a console.log everytime you click on the Toggle isDark button but notice that if you click on Increase Counter, you won't see a console.log because now the useEffect runs only when the isDark value changes and not on every render like we saw before!
So, that's it for this article. Hope you take something back from this article. There's a little more to useEffect like cleaning up functions which you can read about here.
The final code for this is as follows:
import { useState, useEffect } from "react";

function App() {
  const [count, setCount] = useState(1);
  const [isDark, setIsDark] = useState(false);

  useEffect(() => {
    console.log("useEffect running");
  }, []);

  function incrementCount() {
    setCount(count + 1);
  }
  return (
    <div>
      <h1>Hello, World</h1>
      <Counter count={count} isDark={isDark} />
      <button onClick={incrementCount}>Increase counter</button>
      <button onClick={() => setIsDark(!isDark)}>Toggle isDark</button>
    </div>
  );
}

function Counter({ count, isDark }) {
  useEffect(() => {
    console.log("isDark value changed");
  }, [isDark]);
  return <p>{count}</p>;
}

export default App;
A key component of a web application is the state. Taken directly from the beta(new) version of the ReactJS Docs:
Think of state as the minimal set of changing data that your app needs to remember. For example, if you’re building a shopping list, you can store the items as an array in state.
Now, how do we manage state inside a React Component? So, in this tutorial we'll be talking just about that!
Prerequisites
- Basic knowledge of ReactJS
What are React Hooks?
First, let's start with what is a React Hook. The beta docs of ReactJS says the following:
Functions starting with use are called Hooks. useState is a built-in Hook provided by React. You can find other built-in Hooks in the React API reference. You can also write your own Hooks by combining the existing ones. Hooks are more restrictive than regular functions. You can only call Hooks at the top level of your components (or other Hooks). If you want to useState in a condition or a loop, extract a new component and put it there.
So basically, if you know a little history about React, you would know that React used to be mainly comprised of something called Class-Based Components. But now, the community is starting to move to Function-Based Components. Now, React Hooks allow the functional components to have access to state and other React Features.
Setting up the app
Create a project using the following command
npx create-react-app react-hooks-tutorial
Then edit your src/App.js to look like this
function App() {
  return (
    <div>
      <h1>Hello, World</h1>
      <p>1</p> // this will update based on the state after this tutorial
      <button>Increase counter</button>
    </div>
  );
}

export default App;
useState hook
Now, the way the useState hook is used in React is very interesting. In a conventional, class based component you'd do something like this
state = {
    color: "red"
}
and then access it via this.state. But using the useState hook you'd do something like this
+ import { useState } from "react"
  function App() {
+   const [count, setCount] = useState(1);
    return (
Now the useState hook returns two things:
- The first variable is the actual state variable. For eg. count in this case is 1.
setCountis a function which you can use to change the value of thecountstate.
Using the count state variable to show data
First, update the hardcoded value of 1 with the count variable like so
       <h1>Hello, World</h1>
-      <p>1</p>
+      <p>{count}</p>
       <button>Increase counter</button>
Using setCount to update state
Now to make this work, let's make the click of the button increase the count variable by 1.
       <p>{count}</p>
-      <button>Increase counter</button>
+      <button onClick={() => setCount(count + 1)}>Increase counter</button>
Using previous state to update state
Now, let's try something. Change the button line to the following
-     <button onClick={() => setCount(count + 1)}>Increase counter</button>
+     <button onClick={incrementCount}>Increase counter</button>
  const [count, setCount] = useState(1);
+ function incrementCount() {
+   setCount(count + 1);
+   setCount(count + 1);
+   setCount(count + 1);
+ }
Now this will give you an issue. Straight from the docs again (little modified according to our app):
This is because calling the set function does not update the
countstate variable in the already running code. So eachsetCount(count + 1)call becomessetCount(2).
To fix this issue, you can reference the previous state and then update the current state using that. So change your code like this
-  function incrementCount() {
-    setCount(count + 1);
-    setCount(count + 1);
-    setCount(count + 1);
-  }
+  function incrementCount() {
+    setCount((prevCount) => prevCount + 1);
+    setCount((prevCount) => prevCount + 1);
+    setCount((prevCount) => prevCount + 1);
+  }
So, you get the prevCount argument and increment the current state according to that and this should work!
Note: This is obviously not a real life scenario. To increment by 3, you'd probably do something like
setCount(count+3)but it's good to know when you can use the previous state variable as a reference.
That is it for this tutorial! You final code should look like this:
import { useState } from "react";

function App() {
  const [count, setCount] = useState(1);
  function incrementCount() {
    setCount((prevCount) => prevCount + 1);
    setCount((prevCount) => prevCount + 1);
    setCount((prevCount) => prevCount + 1);
  }
  return (
    <div>
      <h1>Hello, World</h1>
      <p>{count}</p>
      <button onClick={incrementCount}>Increase counter</button>
    </div>
  );
}

export default App;
The next step after creating a website, is deploying it to make it available to the whole world. If your site is static, and doesn't use any backend then it is pretty straightforward to deploy your app. In this article, I'm gonna talk about how to deploy a static HTML and CSS site using Github Pages.
Register at Github
First of all create an account at Github. Github is a Git repository hosting service which is owned by Microsoft. It provides a great feature called Github Pages and can be used to deploy static sites.
Create a Github Repository
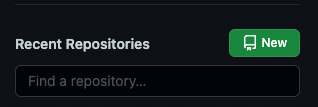
After registering, click on the button which says New on the top left of the page.
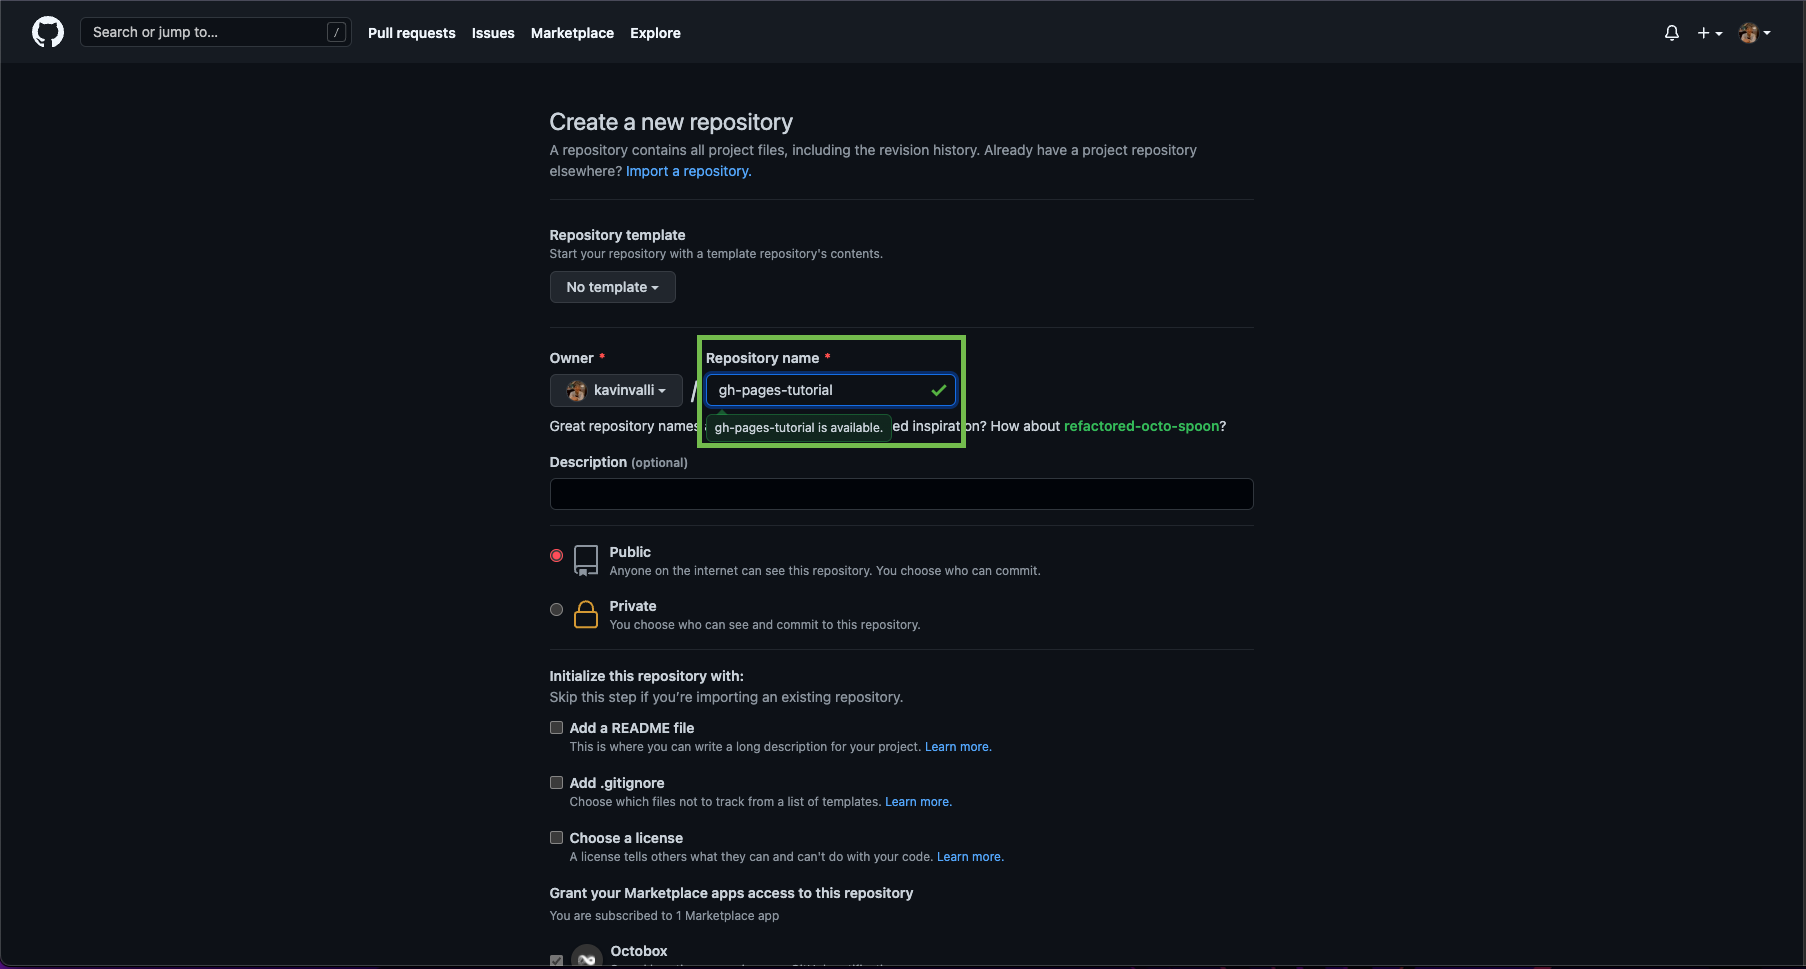
Upload files
If you know git, you're welcome to push your files to Github. Else, no worries, you can use Github's file upload feature like so:
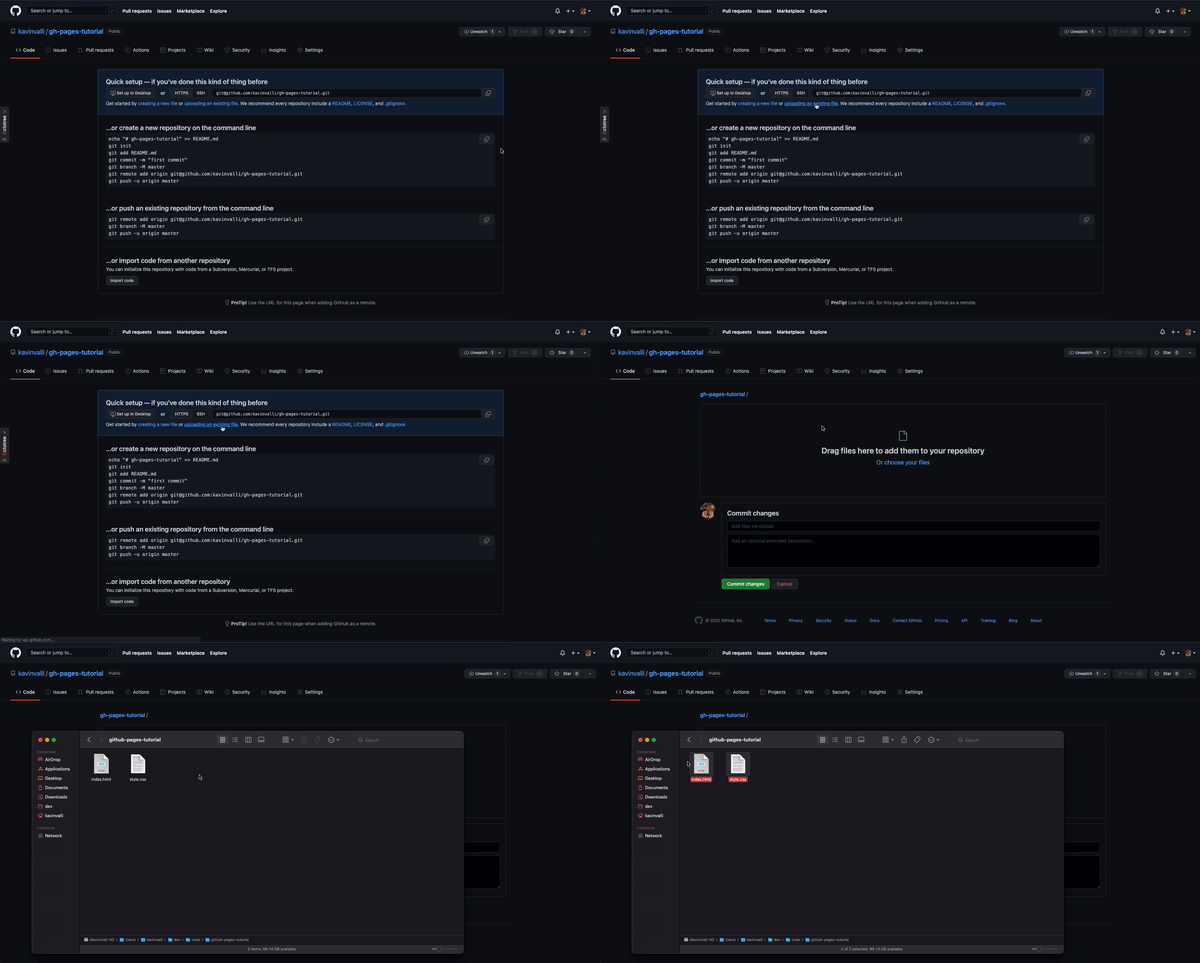
Enable Github Pages
Last step is to enable Github Pages like so:
- Click on Settings
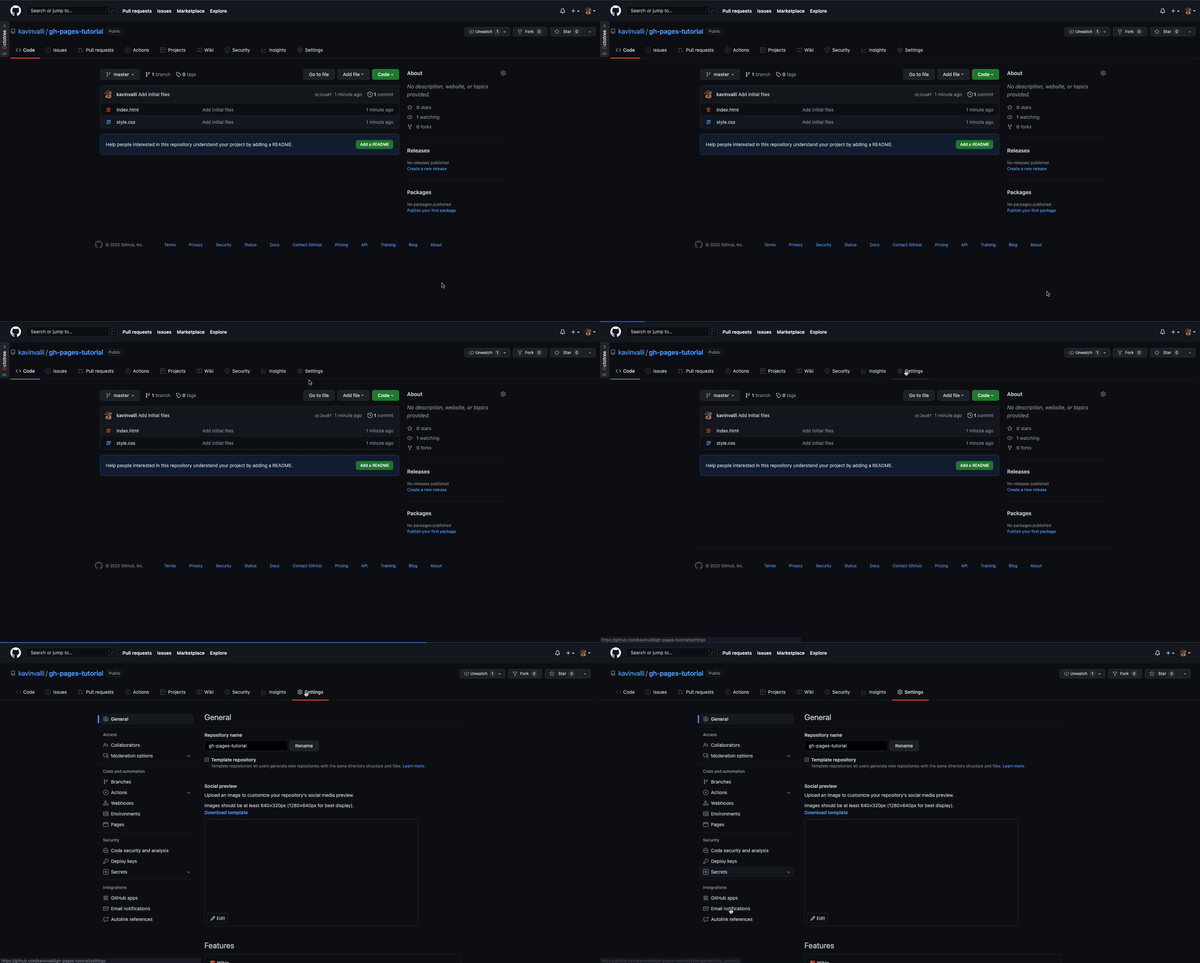
- Click on Pages
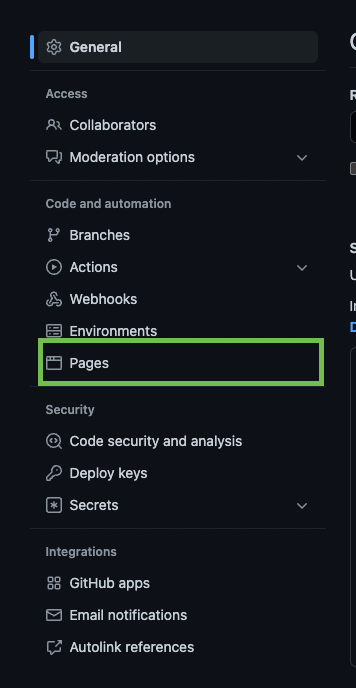
- Click on Branch and choose
masterThis might be
maindepending on the default branch you're working on - Click on the button on the right of Branch and choose
/ (root) - Click on Save
Then wait for some time and then refresh. Wait till you see a banner which says something like this:

And there it is! You've deployed your site using Github Pages. For example, you can view the sample deployment here.
Links
You can find the sample github repository in the example here:
]]>A few days ago, I decided to try out RemixJS and tried building a link shortener using it... cause if I create one more Todo List app, I'll lose my mind. Here's my experience of using Remix till now.
What is Remix?
Well, let me start with what Remix is. If you've used ReactJS before, you'd most probably have come across React Router. Around a couple years ago, the founders of React Router decided to create a React framework on top of React Router. It originally needed a license, but last year, they decided to go open source! So now, it is something anyone can access.
More about Remix?
I started following Kent C. Dodds, who is a part of the remix team, and he has a lot of livestreams where he talks about remix, and has a couple videos which really pushed me to try out remix. I highly recommend subscribing to his Youtube Channel and he has an amazing Website also built using remix. You'll learn about some very cool stuff if you go through it, and you can find a really good video on it by Kent here.
About the Link shortener
I decided to try Remix out by creating a Link shortener, because that was something simple yet I could experiment with concepts like authentication, data fetching and all that fancy stuff. You can find the code here. First, I went through the tutorials on Remix's docs which is a really good resource on starting with remix.
Authentication
Then, I started off and decided to use Github for authentication. Now, I didn't want to implement Github OAuth by myself and didn't want to go through the work of having to manage tokens in the app, so I decided to use Remix Auth. It works really really well with Remix and has support for a lot of strategies. It took me a little while to get started with it cause, it didn't really have good docs at the time but the examples were helpful. Now, the docs have improved a lot and you should be good to go pretty soon.
Core Concepts
The Jokes tutorial covered most of the concepts I needed to build the url shortener. So, it didn't take me too long to complete the app. All the concepts, including db interaction, data fetching, form validation and submission was already stuff I'd read about in the tutorial so I would recommend going through that to get started with Remix.
Conclusion
In the end, I had a great time getting started with Remix and I think it's definitely something I'll use more in the future.
Make sure to star the repo below and would love to know your experience with Remix after you give it a go in the comments! You're welcome to use the shortener for your use!
]]>Code Diffs was something I wanted to use for a while in Hashnode but I didn't know that it was already there to be used in markdown. The way you can implement this is like follows:
```diff
+ const port = process.env.PORT || 3000;
- app.listen(3000, () => {
-   console.log(`🚀 Server started on port 3000`)
- }
+ app.listen(port, () => {
+   console.log(`🚀 Server started on port ${port}`);
+ });
```
This example is from on of my articles.
So, the way this works is, hashnode uses a plugin called highlight.js to convert the codeblocks. Highlight.js already has this feature implemented. Now this looks like this:
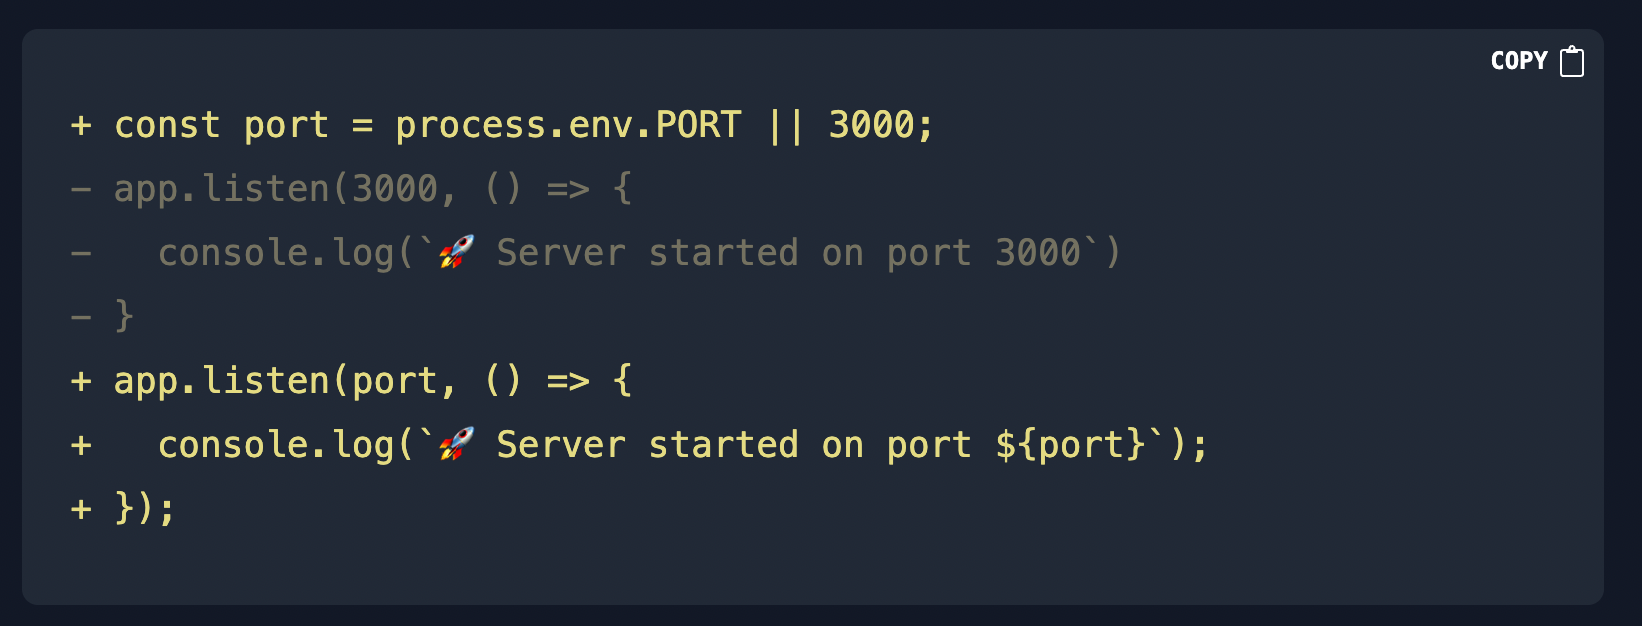
You can definitely go forward with this, but the colors and design wasn't something I was satisfied with. So, I decided to tweak my custom css to make it look better.
You can get access to Hashnode's Custom CSS feature by becoming a Hashnode Ambassador
I added the following to my custom css:
.hljs-addition {
    color: green !important;
    box-shadow: inset 10.5px 0 green !important;
    padding: 4.4px 0 !important;
    background: rgb(0, 255, 0, 0.1);
}

.hljs-deletion {
    color: red !important;
    box-shadow: inset 10.5px 0 red !important;
    padding: 4.4px 0 !important;
    background: rgb(255, 0, 0, 0.2);
}
Now, this definitely can be refactored a little bit, but this is what I got:
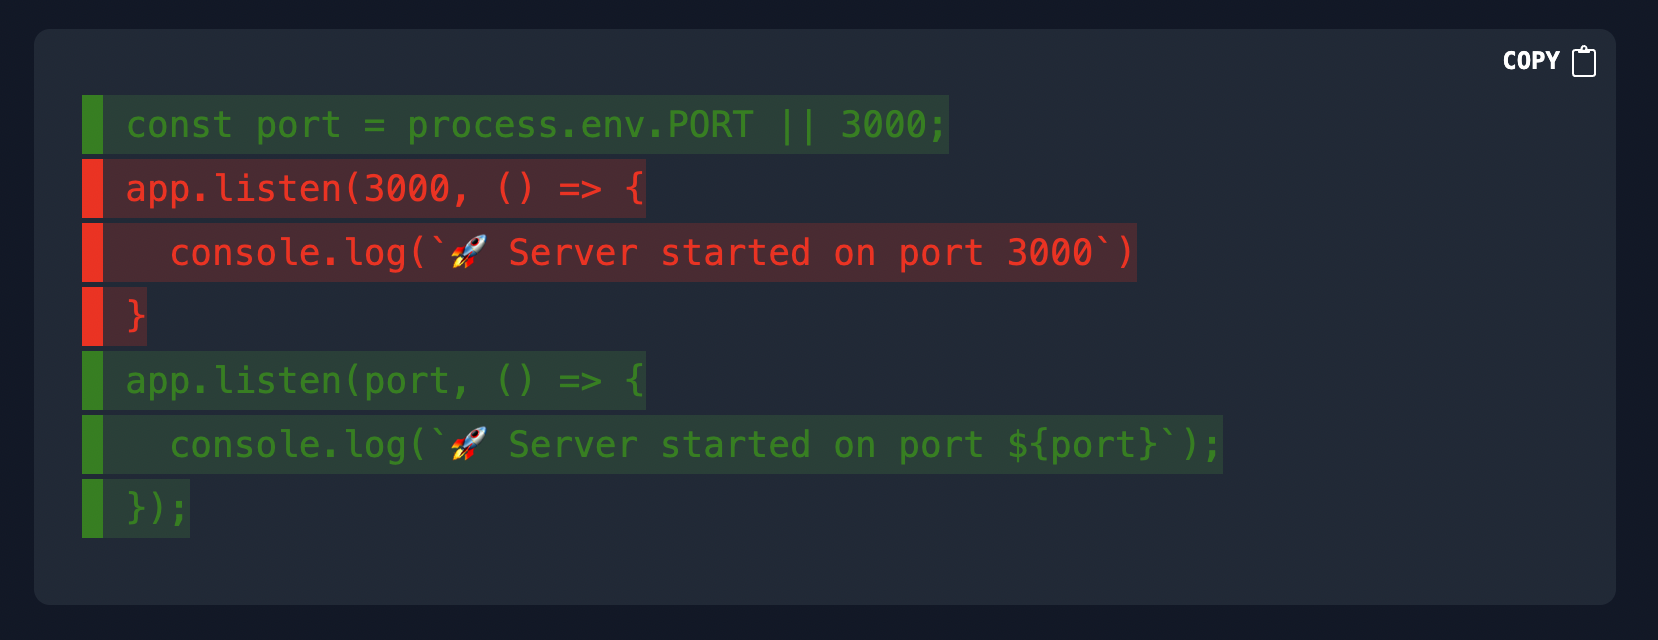
Now, I'm pretty satisfied with this! You can go ahead and use this feature and you're welcome to use my custom css and if you want tweak it a little bit and I would love to see your implementation in the comments!
]]>NOTE: This has one drawback that I couldn't find a way where you could have both the diff highlighting and the syntax highlighting for a certain language together in a code block. That is something we might have to wait for @Hashnode to implement, if they do.
Node.JS and Express are two of the most used technologies in the web development world right now. It powers some big sites like Paypal, Wall Street Journal, Shutterstock and a lot more.
Getting started with Node.JS and Express is very easy.
Requirements
- You should have Node.JS installed for this tutorial. If not, visit https://nodejs.org/en/ and download the LTS Version. This will also install npm which is a widely used package manager for Node.JS.
- You're also expected to have a basic knowledge of Javascript and Node.JS.
Creating a project
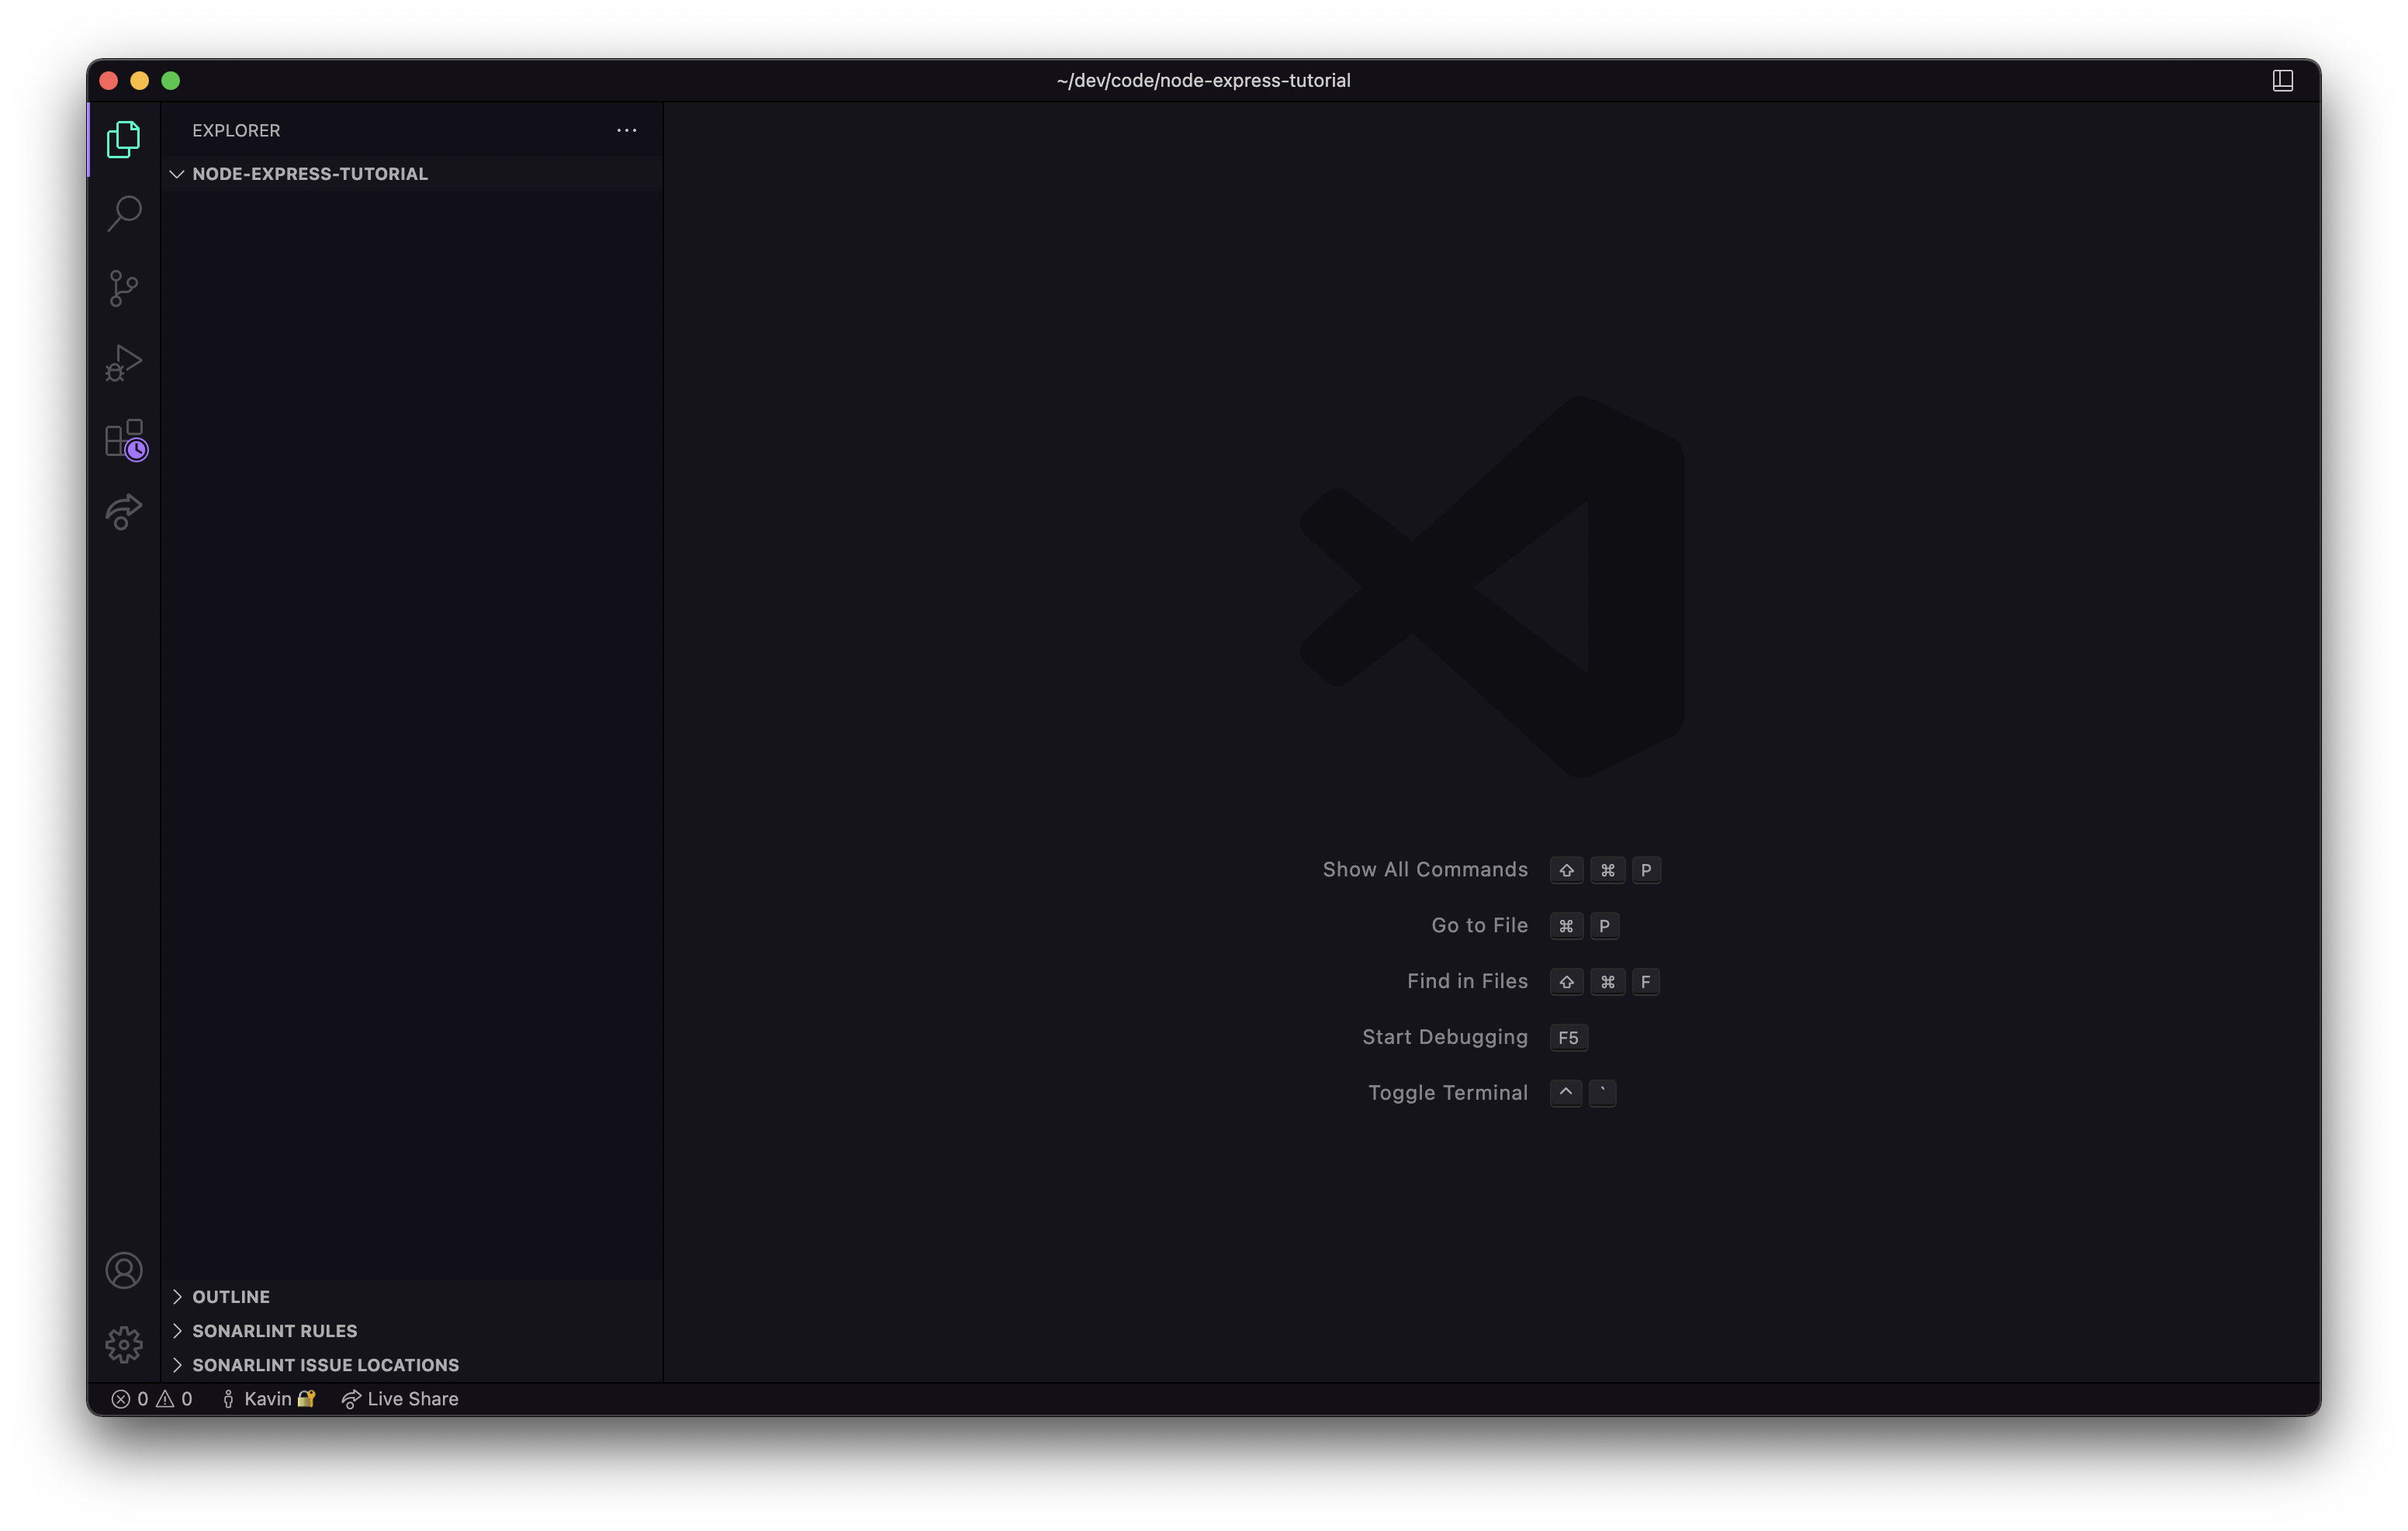
First, let's start off with creating a Node.JS project/directory. You can run the following two commands on the the terminal. Alternatively, you can create a folder from your file manager and open it in VS Code or any other code editor of your choice.
mkdir node-express-tutorial
cd node-express-tutorial
code . # for Visual Studio Code users
Configuring the folder to use npm
Run the following in the terminal.
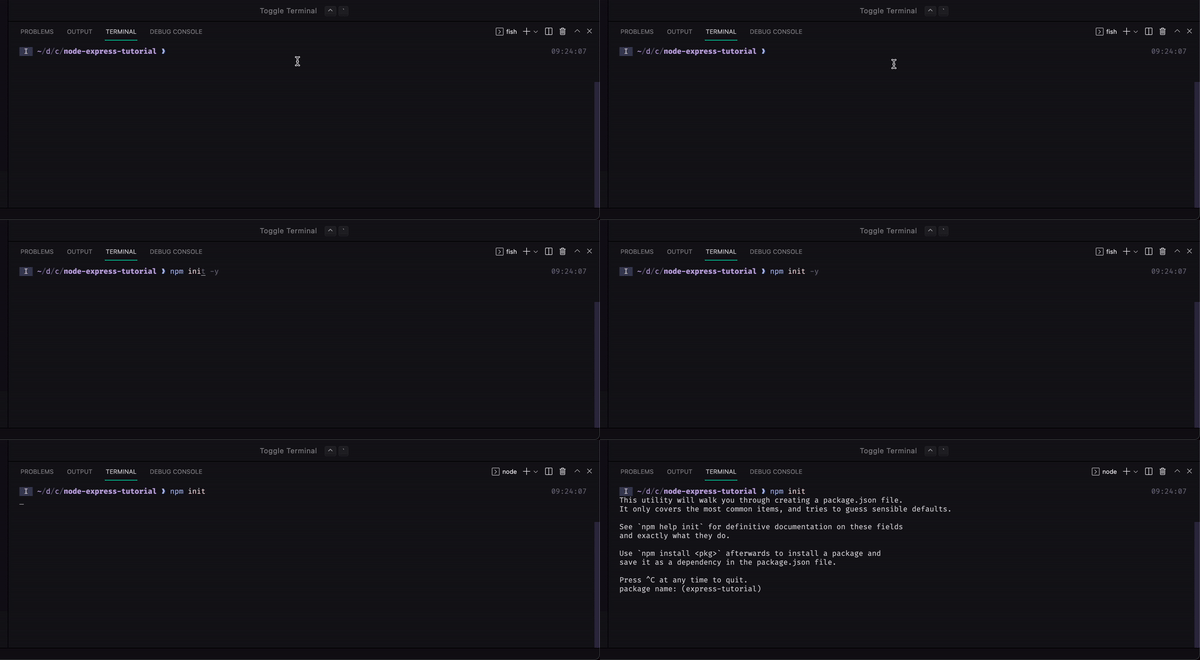
npm init
You will be prompted with a few questions. You can press enter through most of them.
Alternatively, you can run
npm init -yif you want to skip through all the questions with the default value.
Starting with the coding part
So, start with creating a file named index.js. You can name it anything, just make sure you end it with .js.
Conventionally, the file is named
index.js,server.jsorapp.js.
Installing express
Like most NodeJS packages, you can install express using npm. Run:
npm install express
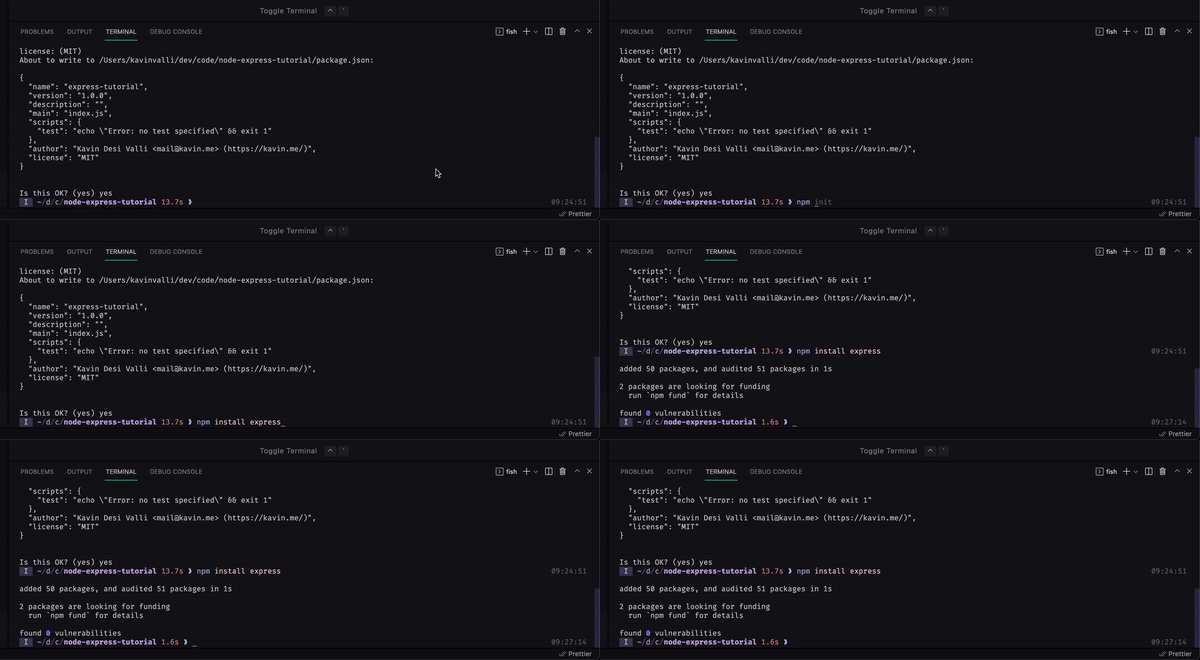
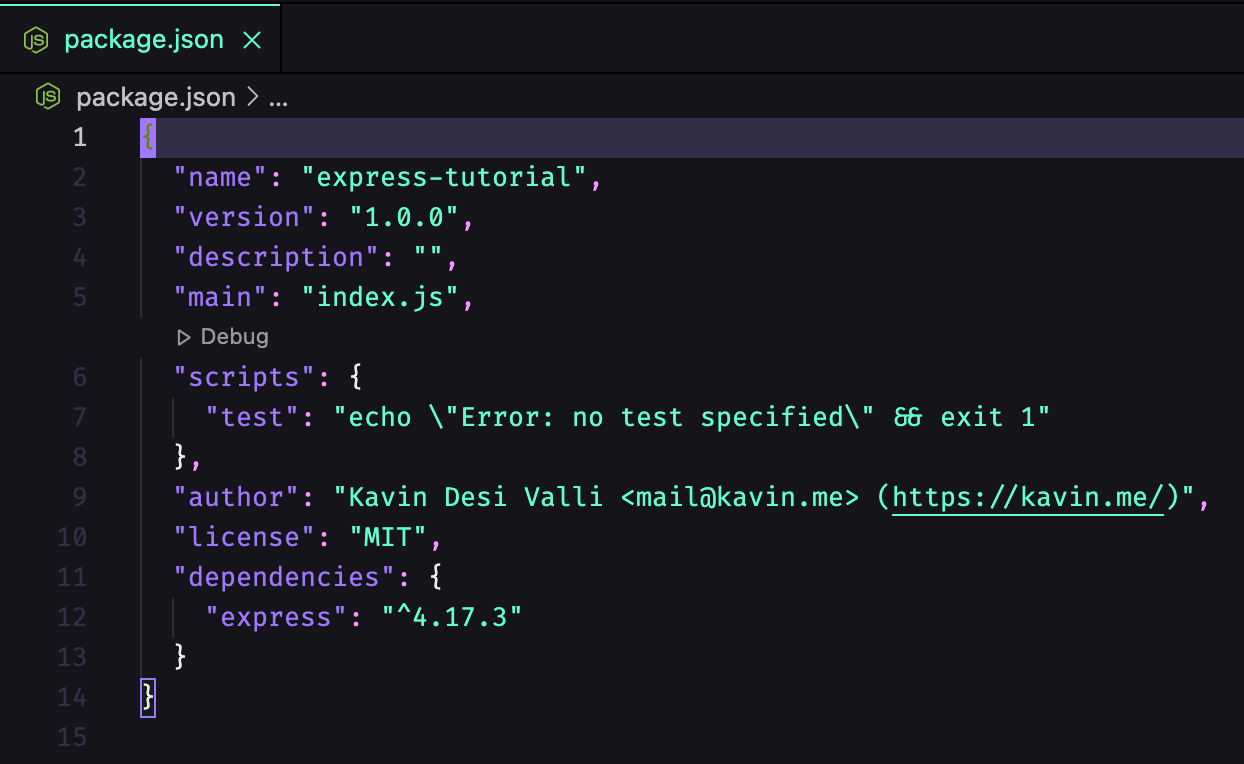
This will add express as a dependency in your package.json and also install it in your node_modules folder.
Using express
In your index.js file, write the following:
const express = require("express")
If you've used Node.JS before, this should look familiar. This line basically imports the express package. Now, to use express, you need to instantiate the imported function. So:
const express = require("express")
+ const app = express()
Now, you can use the app variable to start the server like so:
app.listen(3000, () => {
    console.log(`🚀 Server started on port 3000`)
}
You've basically already created a web server. You can run the app by running
node index.js
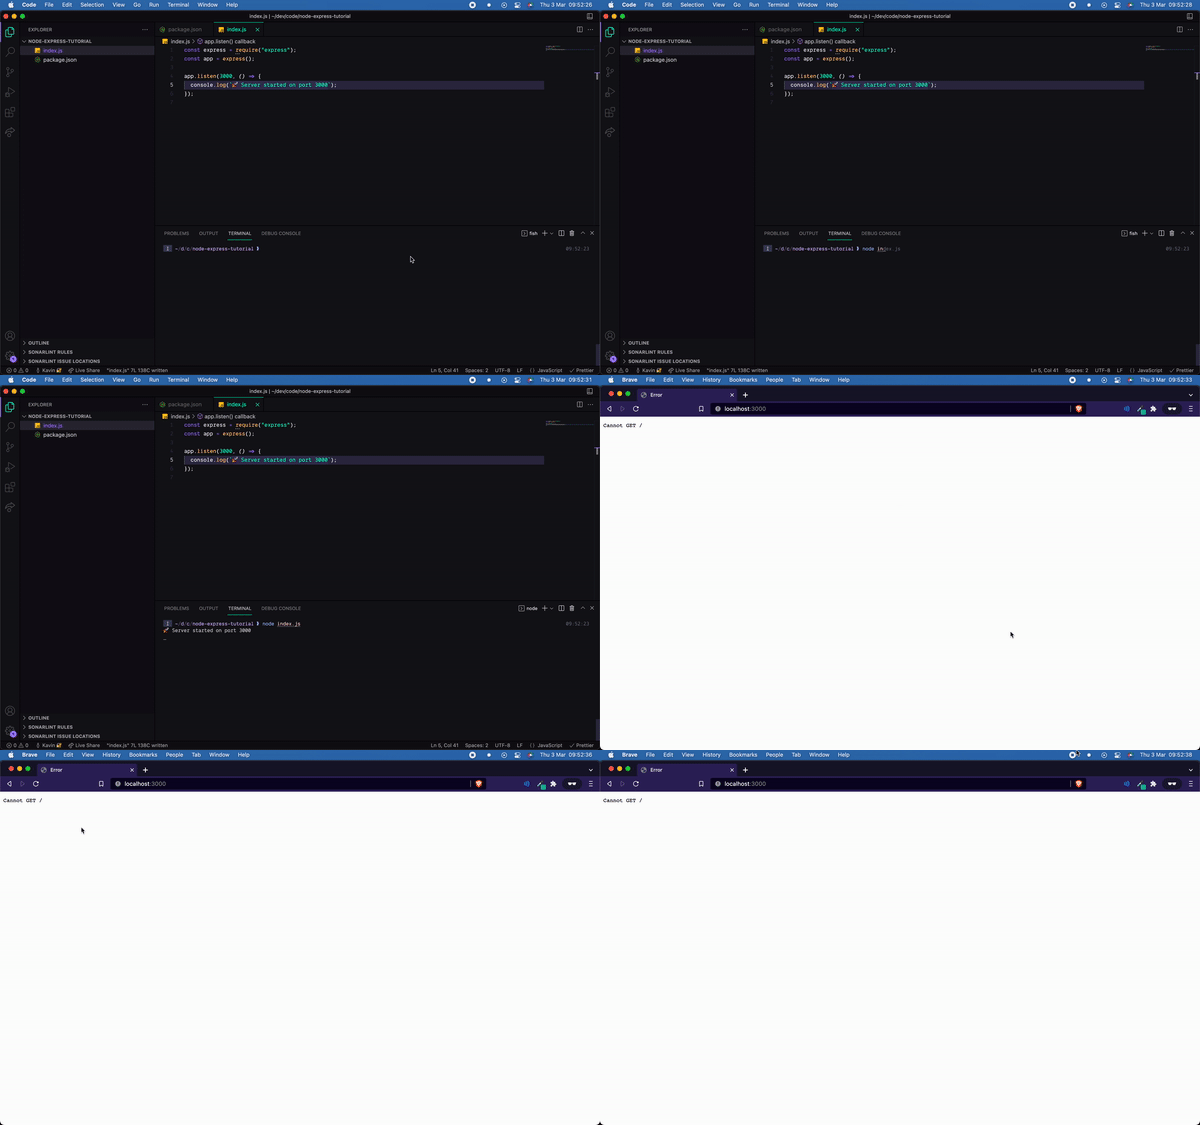
If you get something like in the above gif, you're good to go to the next step!
Routes
So now, we've started an express server but it doesn't know what it has to do when we're visiting the / route. Hence we get the error:
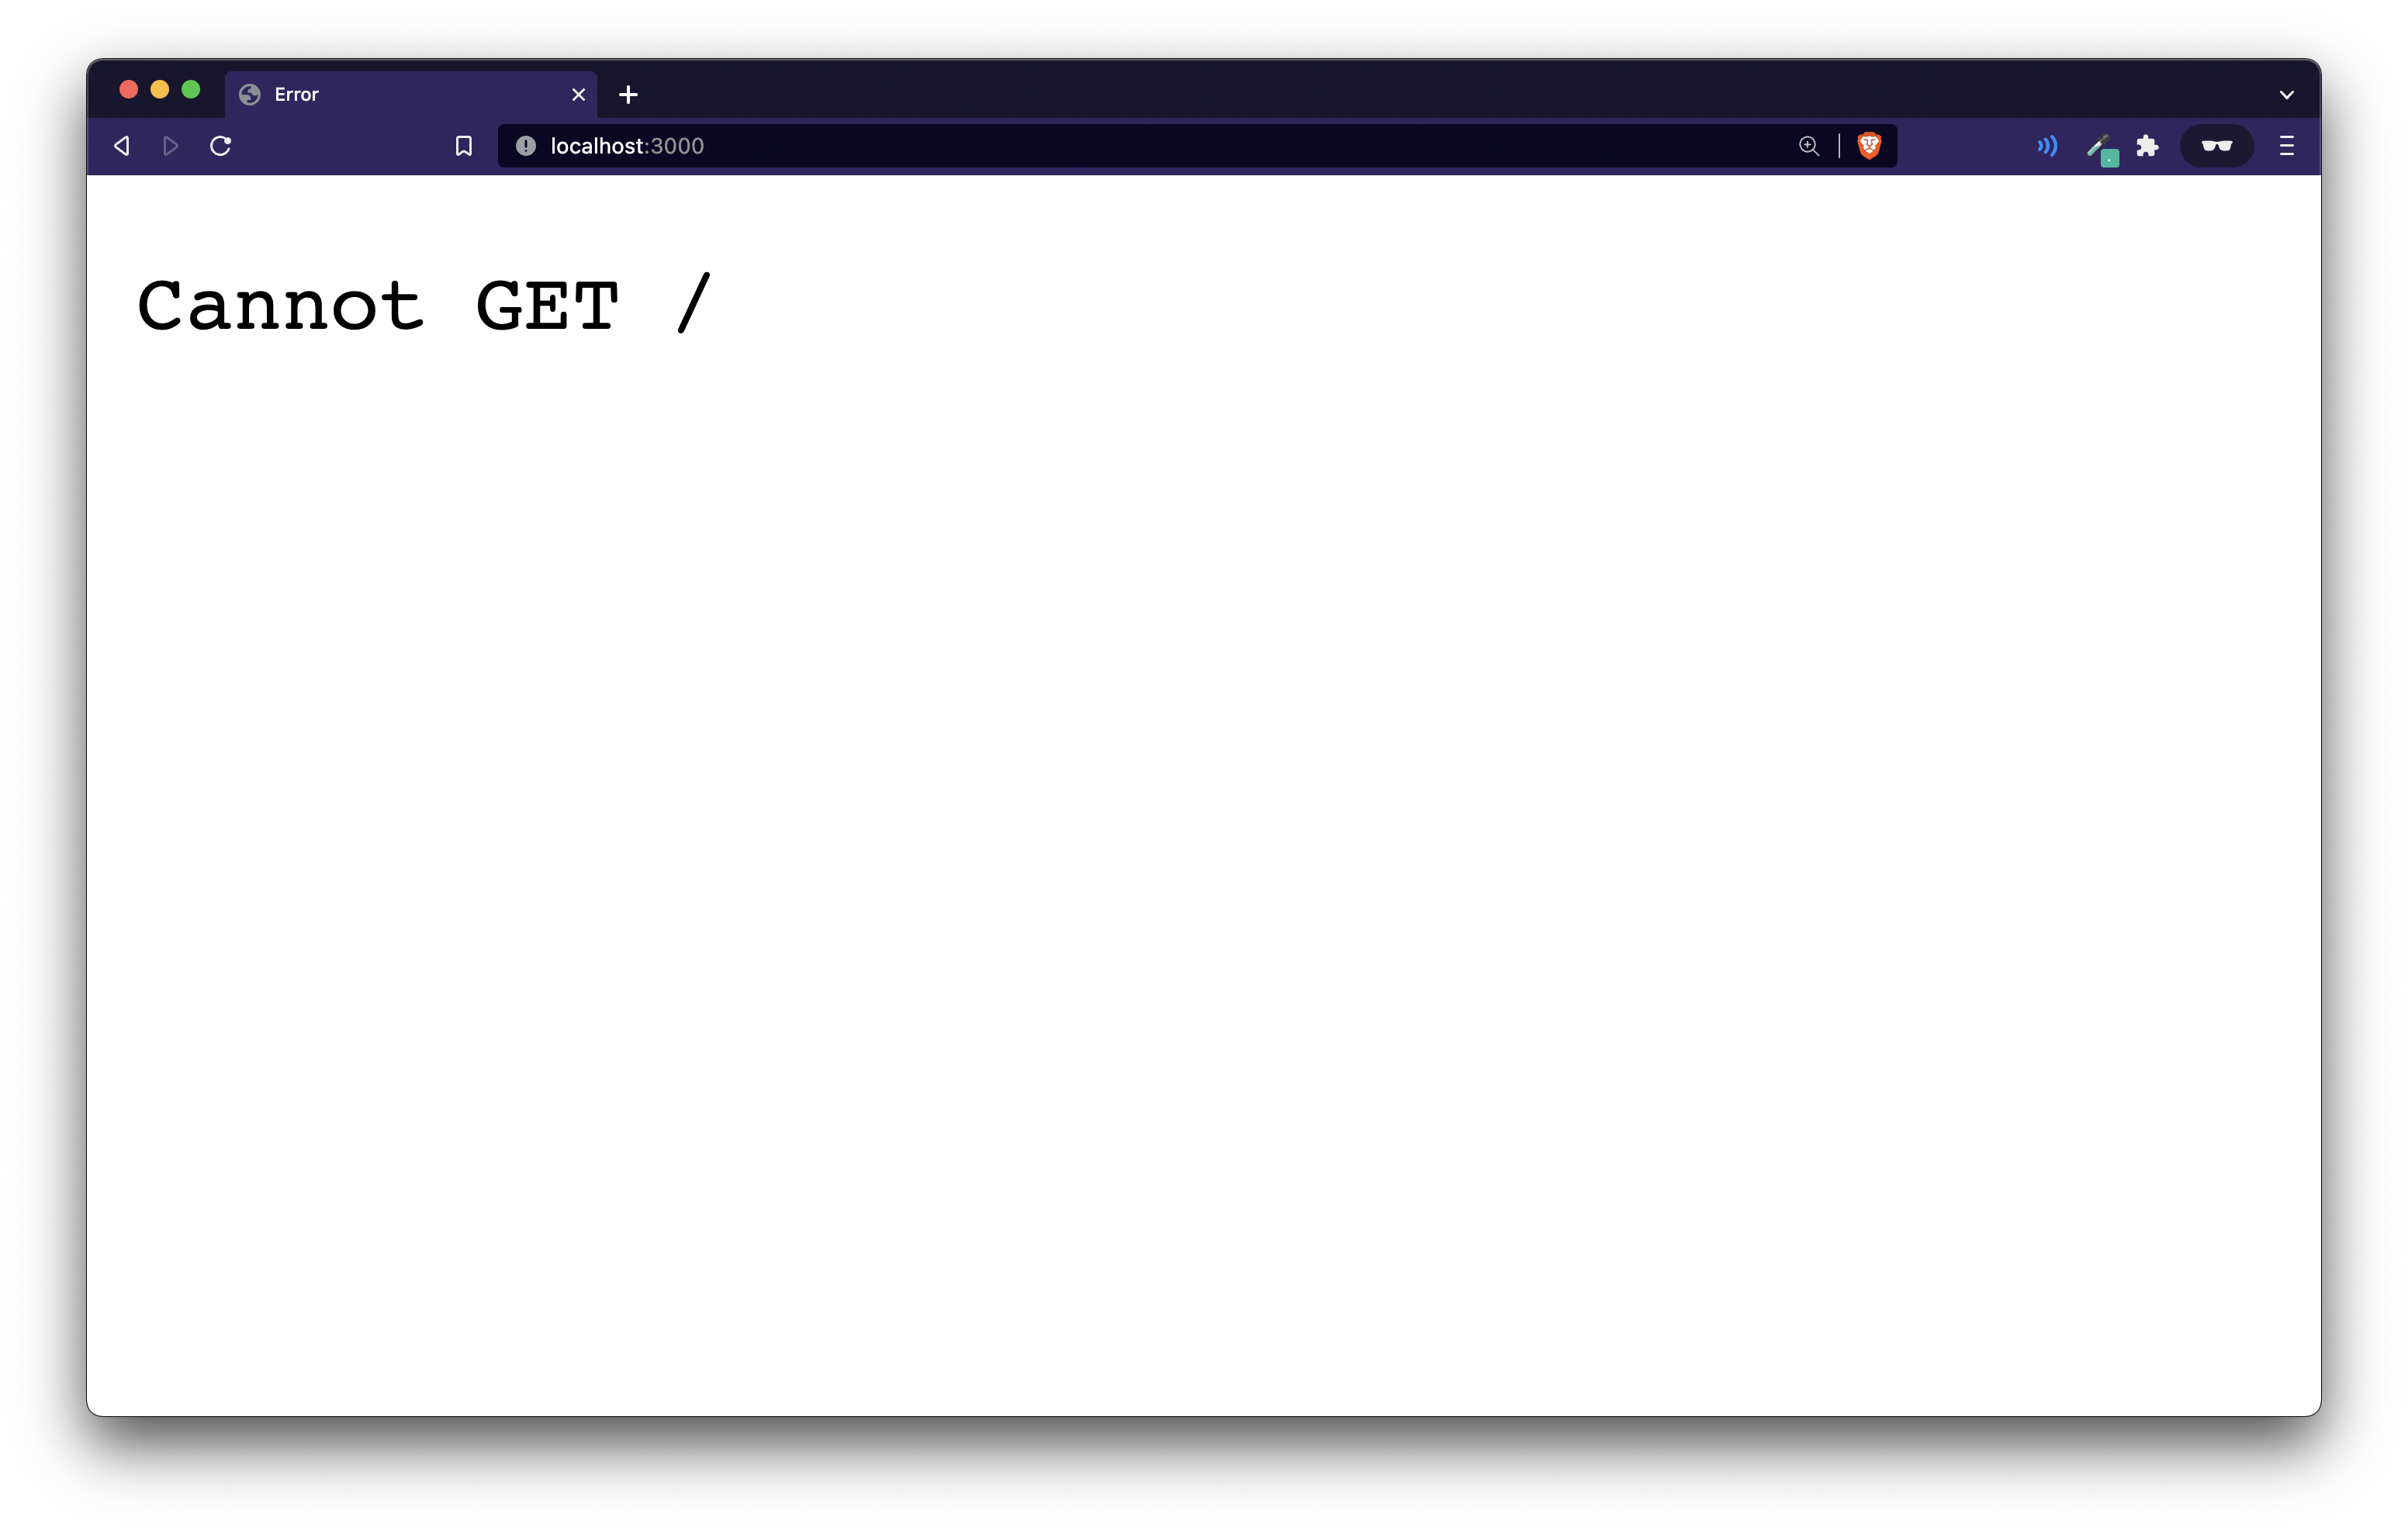
For this, add the following line of code before calling the app.listen function:
app.get('/', (req, res) => {
    return res.send("Hello, World")
})
Let's go through this code:
- We call the
app.getfunction. This takes in two parameters:- A route: The route on which you want to run this function. In this case we're using the
/route. - A callback function: The second parameter is a callback function with the
requestandresponseparameters which express provides us with. Theres(response) gives us a send function with which we can send back a text response to the browser.
- A route: The route on which you want to run this function. In this case we're using the
Now, we need to restart the NodeJS server running. Go to the terminal where you had run node index.js and then hit Control-C. And then restart by typing node index.js again like so:
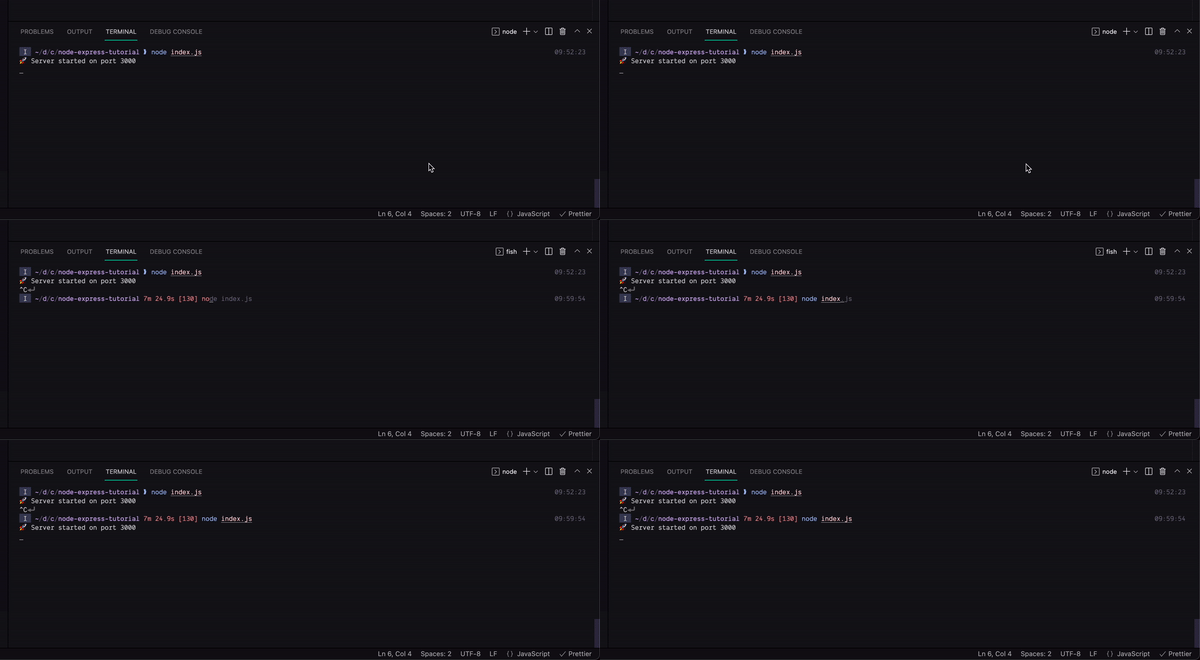
BONUS: Restarting the node server repeatedly becomes very annoying. To deal with this, there's a package called
nodemonwhich you can install and setup. For detailed instructions visit: https://livecode247.com/how-to-add-auto-reload-to-your-node-js-app
Now, refresh the page on the browser and you should see this:
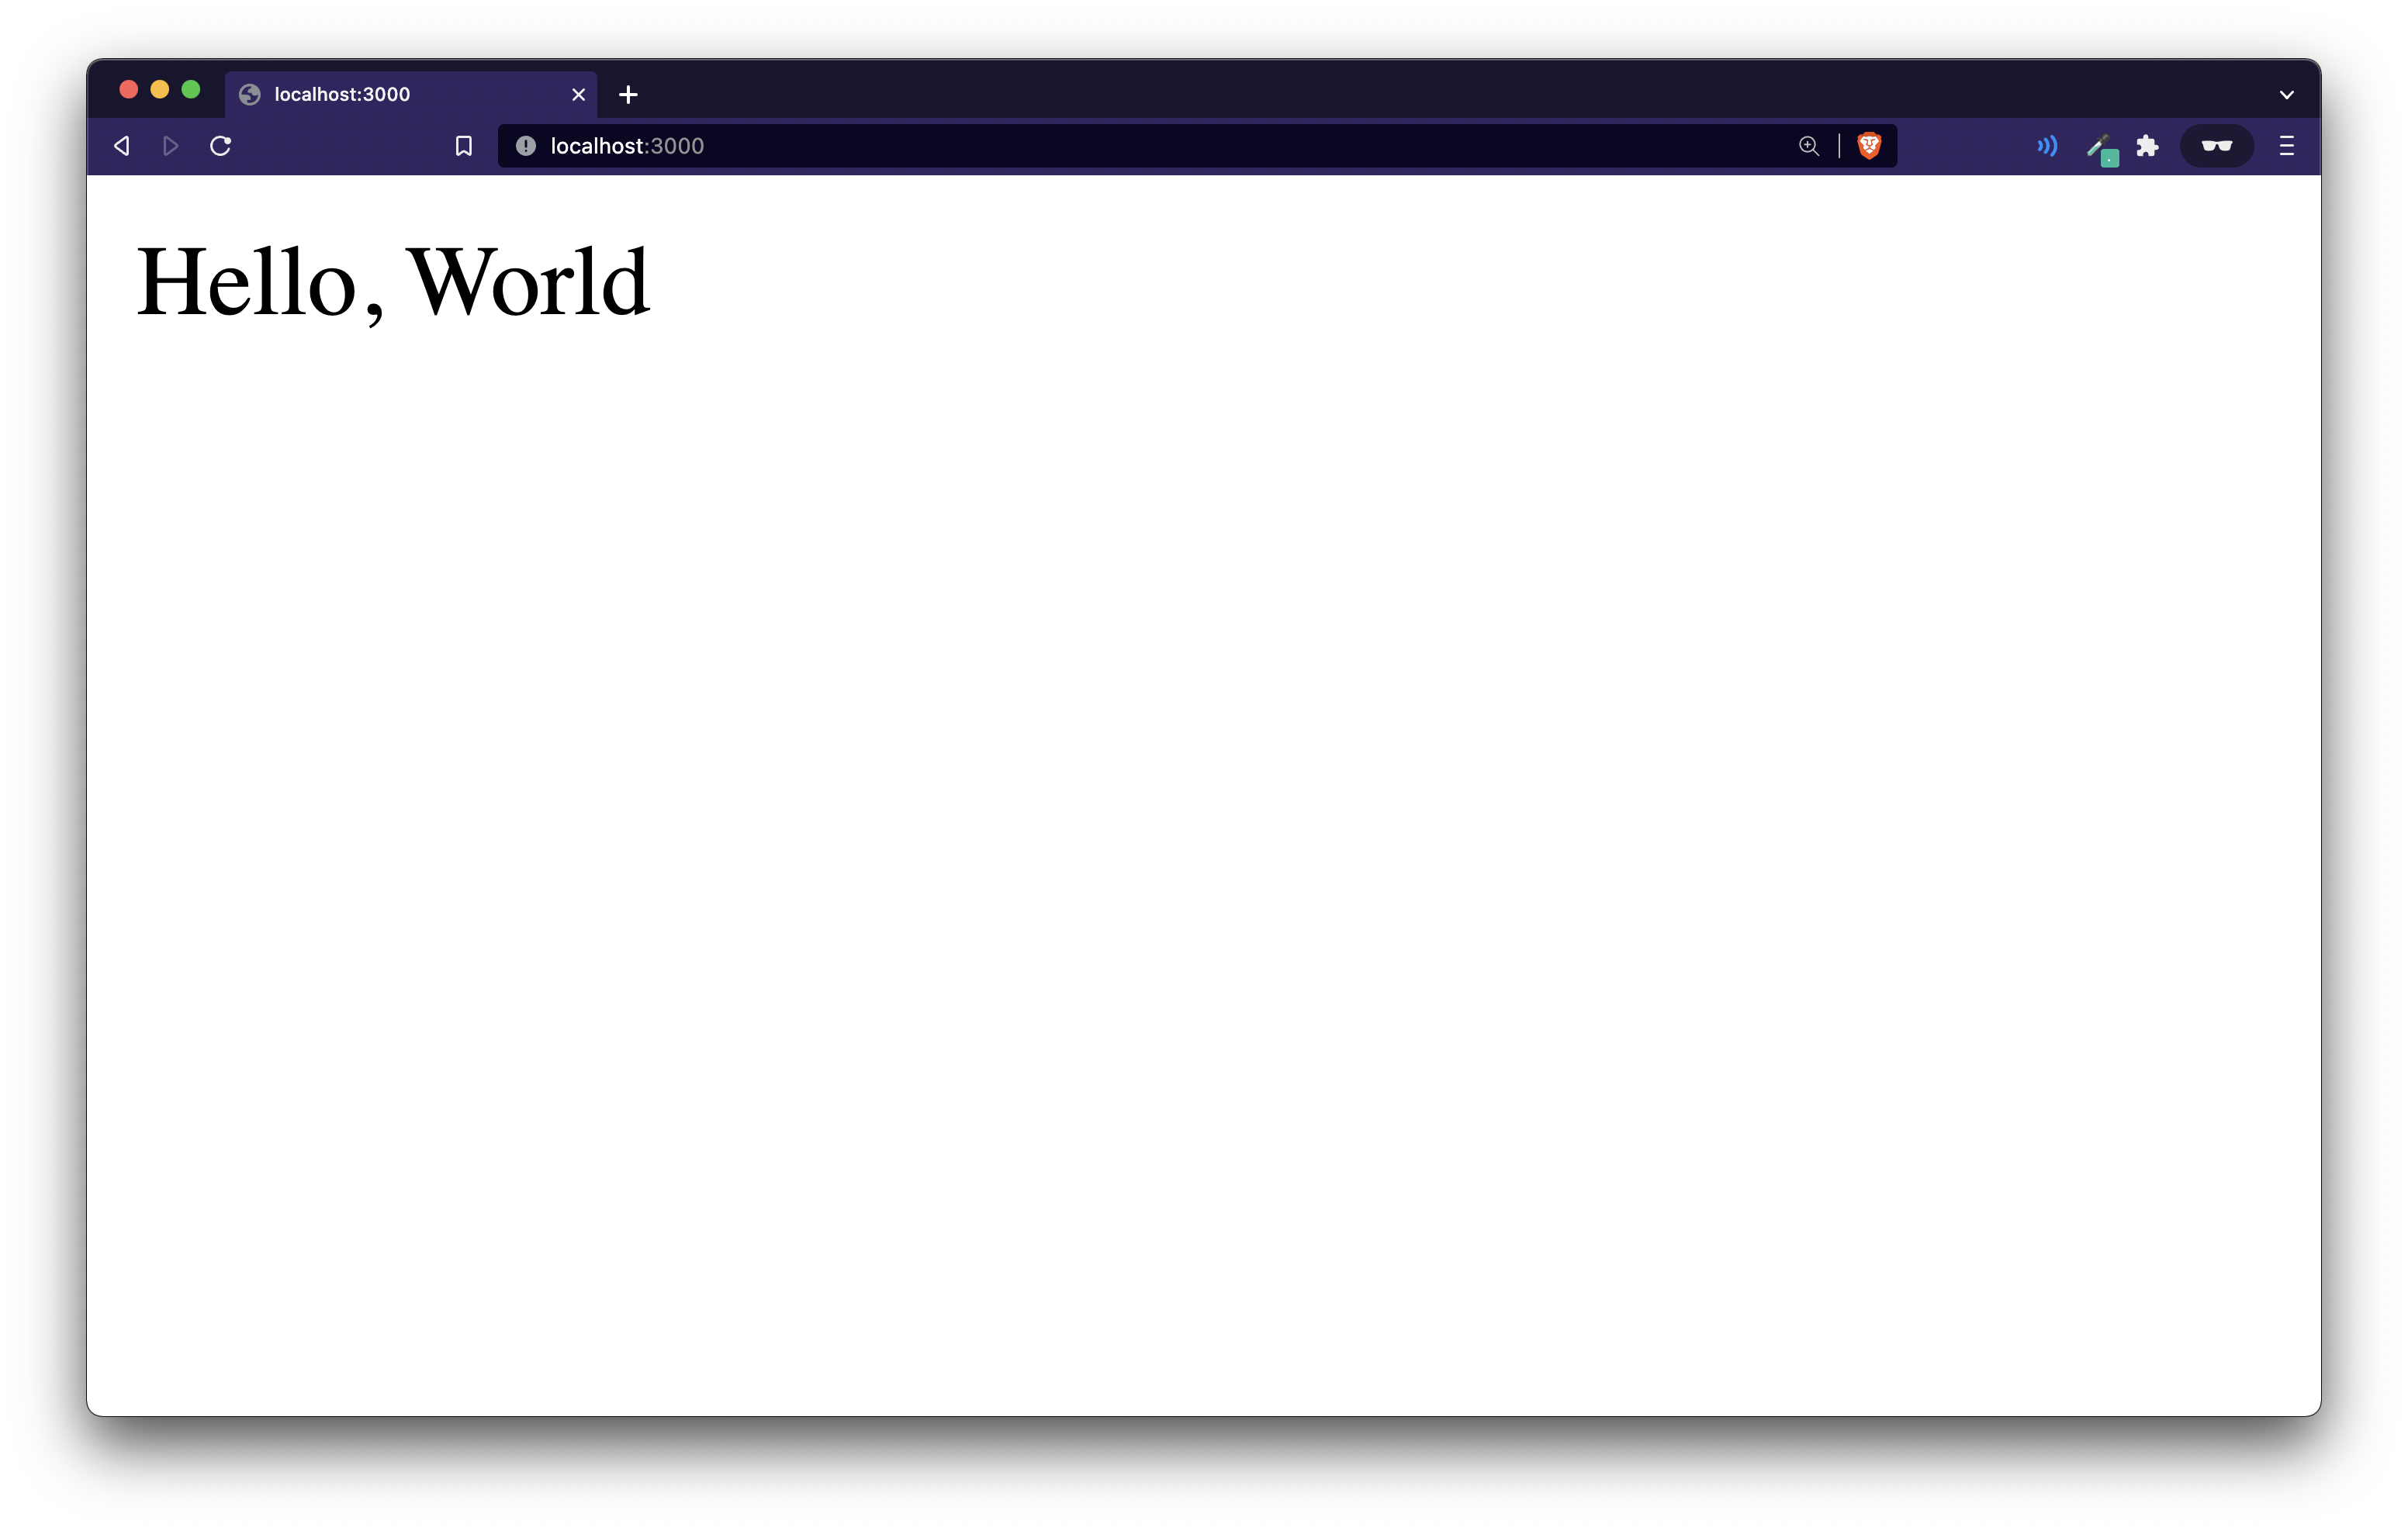
For the final step, you can refactor the port number like this
+ const port = process.env.PORT || 3000;
- app.listen(3000, () => {
-   console.log(`🚀 Server started on port 3000`)
- }
+ app.listen(port, () => {
+   console.log(`🚀 Server started on port ${port}`);
+ });
process.env.PORT returns the PORT environment variable which is set in many hosting providers so it is a good practice to use that instead of hardcoding a port. We're saying that if it doesn't exist, use port 3000.
Final Code
Your final code in index.js should look like this:
const express = require("express");
const app = express();

app.get("/", (req, res) => {
  return res.send("Hello, World");
});

const port = process.env.PORT || 3000;
app.listen(port, () => {
  console.log(`🚀 Server started on port ${port}`);
});
That's it for this tutorial! Now express has a lot more stuff to offer you. Just yesterday, MDN released it's new website and I found a very good in-depth tutorial on express. Do check it out here.
]]>I'm very excited for this article because I'm going to show you guys my developer setup! So, my developer setup is something which has evolved in the past few years. I've switched through editors, IDEs, browsers, etc. and this is what I use now. This might change in a few days/months/years too... who knows!
Hardware
M1 Macbook Air 2020 with 256GB storage and 8GB RAM with an external 27-inch monitor.
Editor
The editor I generally use is Neovim. So, most of you would have heard of Vim. Neovim started as a fork of Vim and has some really good features over vim. Recently, Neovim also released support for Native Language Servers. The reason I use Neovim over editors like, VS Code and Sublime Text is primarily cause of the speed. This includes, speed of Neovim as an editor, comprising of startup time, less lagging, etc, and that also includes my speed as a developer. Vim might seem pretty daunting when you start with it, but when you get the hang of it, you'd want to use it everywhere. And I'm a big keyboard-only fan. So, the fact that I don't have to touch my mouse while writing code is a big plus point.
However, I do use Visual Studio Code when collaborating with others in real time using the Live Share extension. And guess what! I use vim keybindings inside VSCode as well using the Vim extension.
Though, Neovim does have a few minus points to it
- You'll have to learn vim
- You'll have to spend some time customising neovim to suit your needs, and setup plugins for autocomplete, LSPs etc.
If you're a beginner, I highly recommend starting with VSCode and maybe use the vim extension if you want to start learning vim.
Terminal Setup
I am a person, who's always on my terminal, especially cause of the fact that I use neovim as my primary code editor. I use iTerm2 but I've heard of Kitty and Alacritty as pretty good alternatives.
I also use tmux heavily in my workflow. I use multiple tmux sessions for every project and recommend a lot of people to use it.
I use the fish shell. It has some great features which you can find on the website which lead me to use it over zsh and bash.
I use GNU Stow to manage my configurations.
You can find my dotfiles in the repo linked below.
So that's it for this post. I might post an article specific to my Neovim Configuration and how I manage my dotfiles in the recent future.
]]>People who've tried Laravel would know how easy it makes lives of developers. Then, came in AdonisJS which is essentially just Laravel for Typescript developers. I've used both for a while now and love not having to go through long processes of setting up codebases from scratch.
One of my seniors, told me about Inertia and we used it for a couple of projects with Laravel and it was amazing to be able to use Laravel with React. Essentially, Inertia is just a connector / glue between server-side and client-side frameworks.
With Inertia you build apps just like you've always done with your server-side web framework of choice. You use your framework's existing functionality for routing, controllers, middleware, authentication, authorization, data fetching, and more.
The only thing that's different is your view layer. Instead of using server-side rendering (eg. Blade or ERB templates), the views are JavaScript page components. This allows you to build your entire front-end using React, Vue or Svelte.
By using Inertia, I was able to pass data from my server side framework (Laravel) to my client side framework (ReactJS) as props which made it super easy to work with data since I had to no longer do the work of fetching data from REST or GraphQL APIs.
My senior created LIRET which uses Laravel and React with Inertia as an adapter with more features out of the box.
I finally came across inertia-adonisjs which is a Inertia.js AdonisJS Provider.
I recreated the LIRET stack but with AdonisJS and then came up RITA
RITA is a batteries-included starter for Adonis apps. The full form of Rita is React Inertia Typescript Adonis.
Features
Backend
- AdonisJS
- Database (MySQL but you can change it very easily)
- Authentication
- Email-Password
- Github
- Gmail
- You can also add other providers very easily
- Admin Authorisation with Middleware support
Frontend
- Frontend with React and Typescript
- TailwindCSS setup
- Some built in components/hooks like
useTitleandTextInputfor simplicity - Built in components for Authorisation validation like
<Admin>,<User>,<Authenticated>and<Guest>
Using Inertia as a connector.
There are a few more features and you can find detailed instructions at the Readme.
Give the repo a star if you like it!
]]>I went ahead and created a Github CLI extension which fuzzy finds repos and you can choose an action you want to run on it.
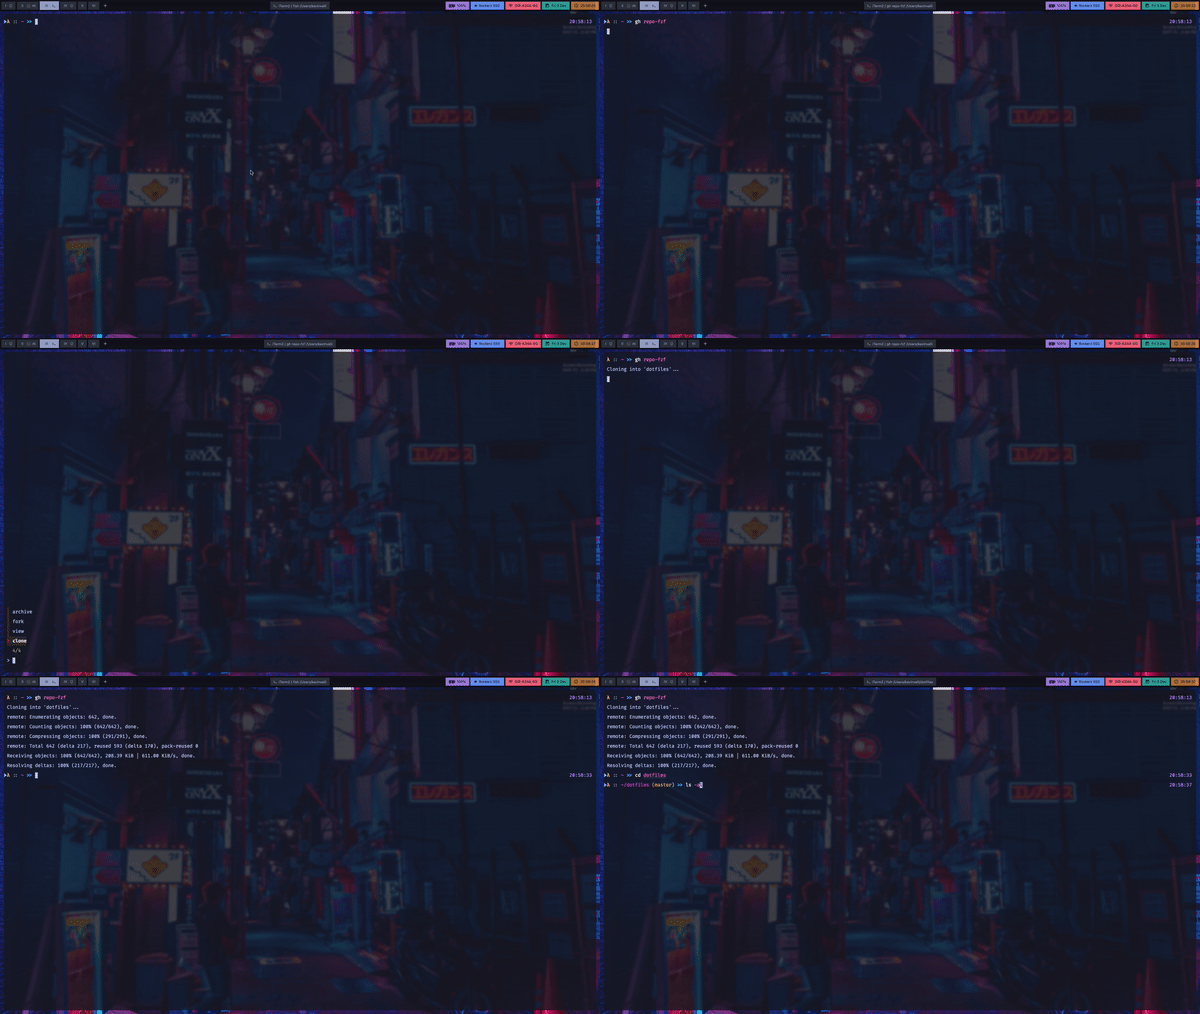
Requirements
gh cli- minimum version (2.0.0)fzf
Installation
Via the Github CLI
gh extension install kavinvalli/gh-repo-fzf
Manually
You can also install it manually by following these steps:
Clone repo
# git
git clone https://github.com/kavinvalli/gh-repo-fzf
# github cli
gh repo clone kavinvalli/gh-fzf
cd into it
cd gh-repo-fzfInstall it locally
gh extension install .
Usage
- To list all directories you have access to, run:
gh repo-fzf
- To list directories of a particular user / organisation:
gh repo-fzf <username/organisation-name>
After choosing a directory, you will be prompted to choose one of the following:
Clone- clones a repository to your local machineView- opens the Github URL of the repositoryFork- forks the repositoryArchive- archives the repository
Feel free to put up any issue you face on the Github Repository. Contributions are also welcome.
Don't forget to star the repo 😉
]]>I created my portfolio website a few months ago and tried to make it as unique as possible and came up with the idea of a terminal based website. You can find it here
It takes in a command (you can list all commands you can use by typing help and then typing the command) and displays an output much like a proper terminal.
I used HTML, CSS, and Vanilla Javascript which I regret sometimes because of how hard it is to maintain now. I might add Parcel later to make it easier to bundle the code. But for now it's how it is and you can find the code in the Github Embed below!
Update (26/10/2021): The website is now made using NextJS
Oh, there is also a normal mode on the website if you don't want to use the terminal mode. I'll love some feedback on the website and drop your portfolio links below too!
I also later created a normal design website which can be found here and the code for that is in this repo:
]]>The DotEnv is an NPM package which allows you to load local NodeJS Environment Variables in your project. It is based on The Twelve-Factor App Methodology - Storing configuration in environment separate from code.
Installation
The installation is as easy as any other NPM Package
npm install dotenv
# YARN
yarn add dotenv
Setup
Create a .env file in your root directory. Add any env vars you want in that file.
For eg.
DB_HOST=localhost
DB_PORT=3306
DB_USER=root
DB_PASSWORD=password
Load the variables
Now in your starting JS file (which you run using node <filename>.js) add the following line of code
require('dotenv').config()
What this does is, it imports the dotenv module using the CommonJS syntax and then calls the config function on it. This loads up the dotenv variables in the .env file created earlier. You can also pass an object as an argument into it which you can find here
Use the variables
You can use the variables inside that file now like any other env variable using the Global Object process and the object env inside it in the following way:
console.log(process.env.DB_HOST)
Note that you can use the env variables inside the .env file only after calling the config function in the dotenv module. So the above line of code needs to come after the require('dotenv').config() function.